

Overview
When building a scenario in Scenario Studio, you don’t have to describe everything from scratch. The Source menu lets you bring in existing material — product guides, call transcripts, certification docs, company briefs — so the AI Agent can reference them while building your roleplay. There are four ways to add a source, all in one place:Adding a Source
1
Open the Scenario Studio
From your dashboard, click + Create to open Scenario Studio.
2
Click Source
Below the main text input, click Source. A menu opens with all three options.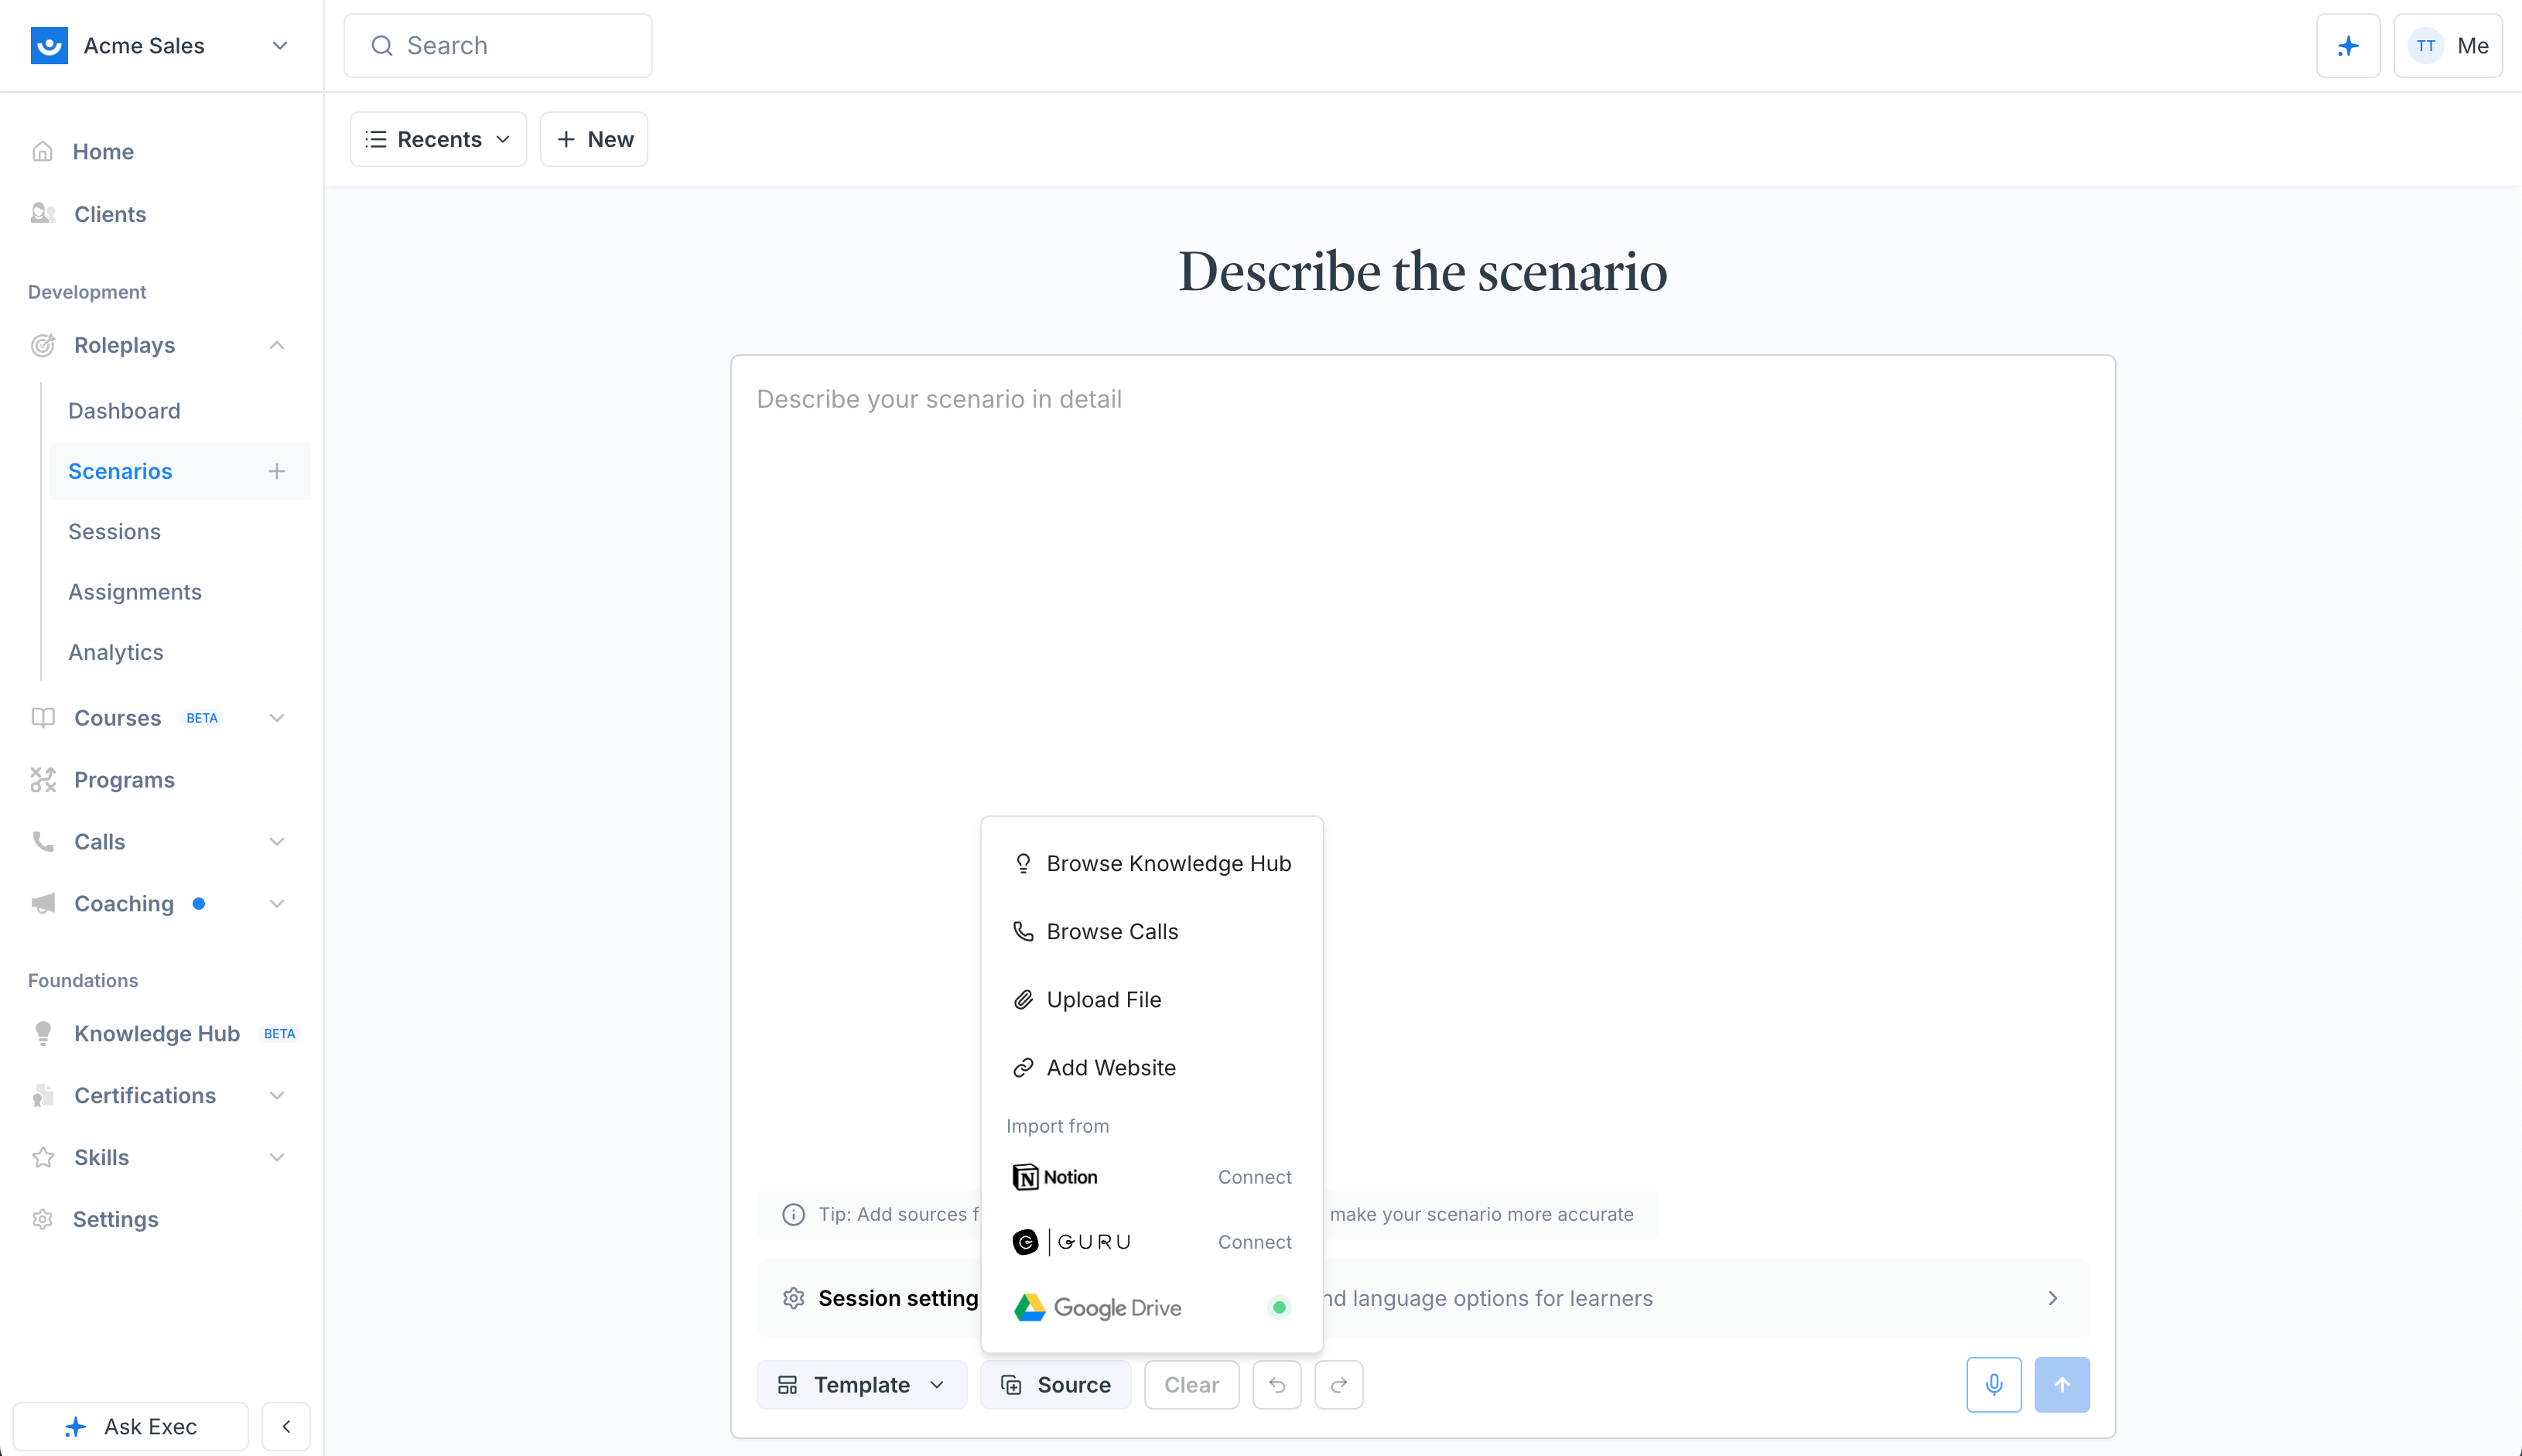
3
Pick where the source comes from
- Browse Knowledge Hub — opens a picker of saved Knowledge Hub pages
- Browse Calls — opens the call picker so you can attach a recorded call (see Building from a call)
- Upload File — file picker for PDFs, Word docs, etc.
- Import from Notion, Guru, or Google Drive — connect the integration if you haven’t already, then pick a page or doc
4
Describe what you want
In the text field, tell the AI Agent how to use the source. For example:
Using the attached call transcript, please create a discovery call roleplay for a sales rep.
5
Submit
Click Submit. The AI Agent reads the source and builds a scenario based on its contents. It may ask a few clarifying questions before generating the draft.
Building from a call
If you have a connected call recorder (Gong, Fireflies, Zoom, Fathom, Clari, Sybill, Microsoft Teams, or Recall.ai), you can attach a recorded call directly and turn it into a roleplay. The AI Agent reads the call’s summary and transcript and uses them to shape the scenario, persona, and objections.1
Open the call picker
Click Source → Browse Calls. The picker lists every call you have access to in your workspace.
2
Find the right call
Filter by people, date, category, score, or source, or type a name, email, or title into the search bar. Click a row to preview the call before attaching it.
3
Attach and describe
Select the call and click Attach. In the prompt, tell the agent what you want — for example:
Turn this discovery call into a roleplay where the rep practices handling the pricing pushback that came up around minute 12.
The Browse Calls option only appears when your workspace has a call recorder integration connected. If you don’t see it, ask an admin to set one up under Call Scoring. Access respects call permissions — you can only pick calls you’re allowed to view.