You must be the owner of a scenario or have been granted editor access to make changes. Owners can designate others as editors.
Opening a Scenario in the Studio
There are two ways to open a scenario for editing. Both lead to the same place.From the three-dot menu
On any scenario you own, click the three-dot menu (⋯) in the top-right corner and select Edit Scenario.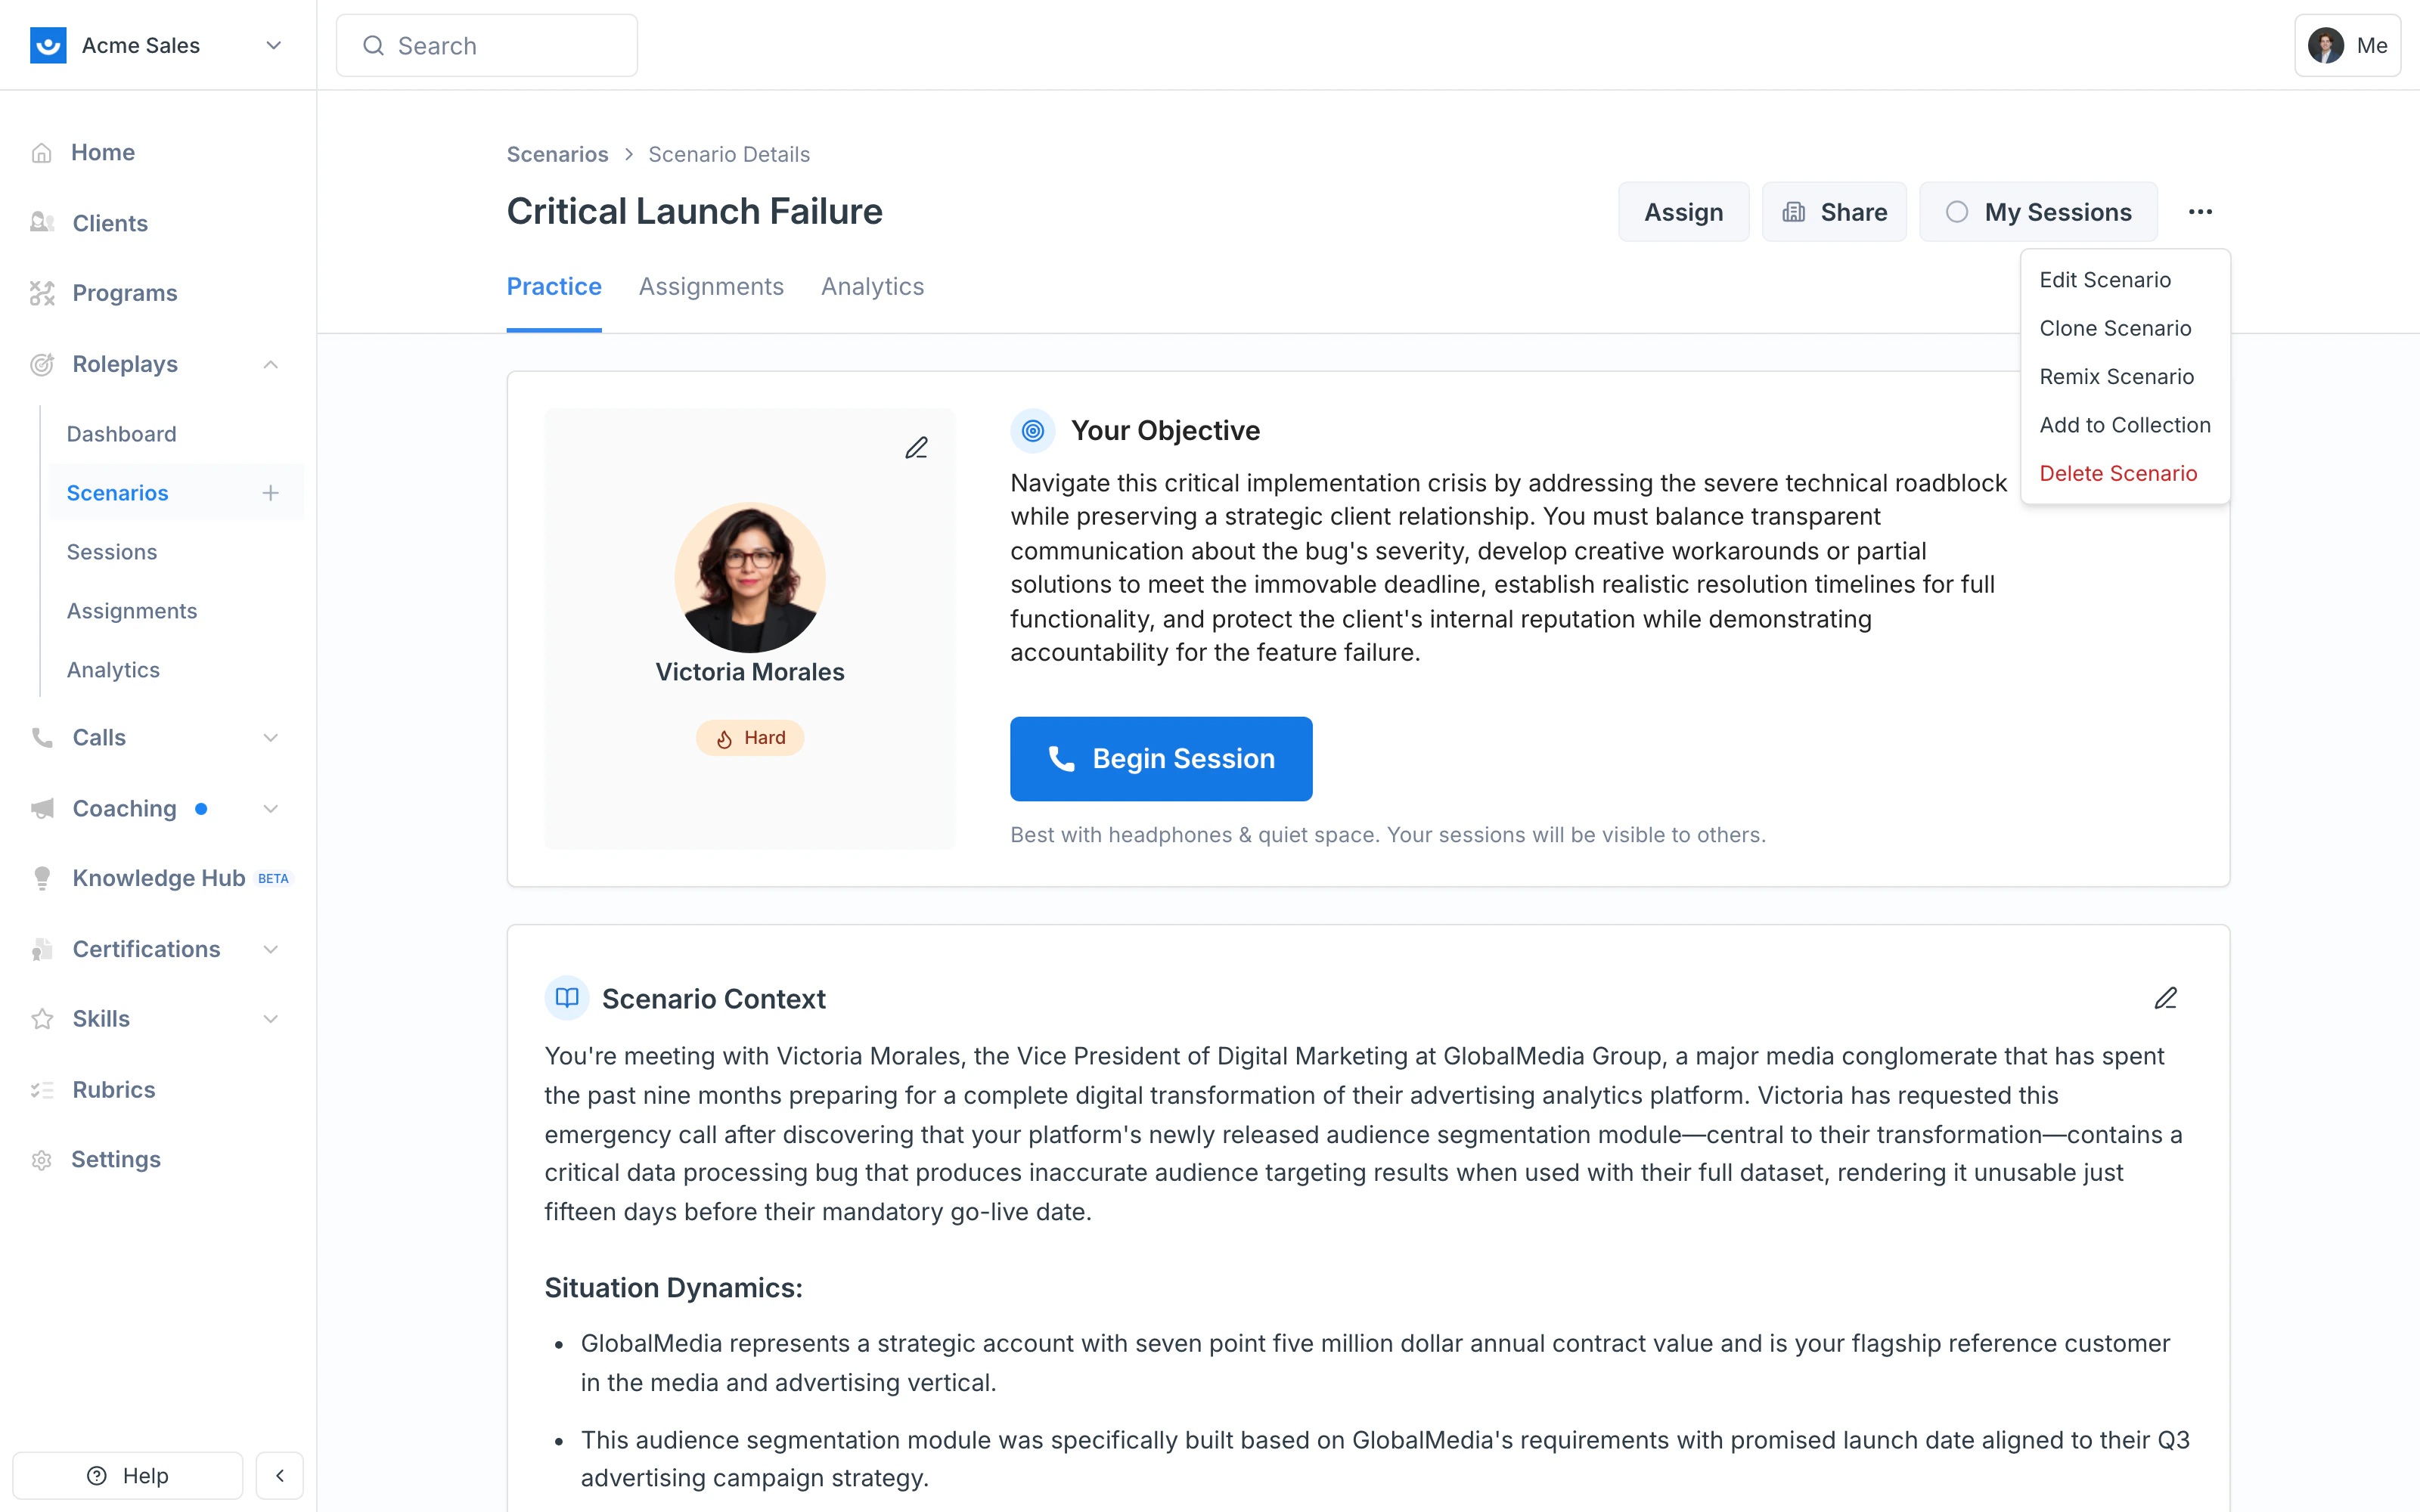
The Scenario Studio
When you open a scenario for editing, the Studio loads with:- The AI Agent chat on the left — describe a change in plain language and the agent applies it across the relevant fields
- A live preview on the right — every change you make appears here in real time before you save
- Five tabs at the top of the preview — Basic Details, Scenario Details, Character Details, Session Settings, and Advanced
- Try Now and Apply Changes buttons in the top-right — test before saving, then publish your edits
What You Can Edit
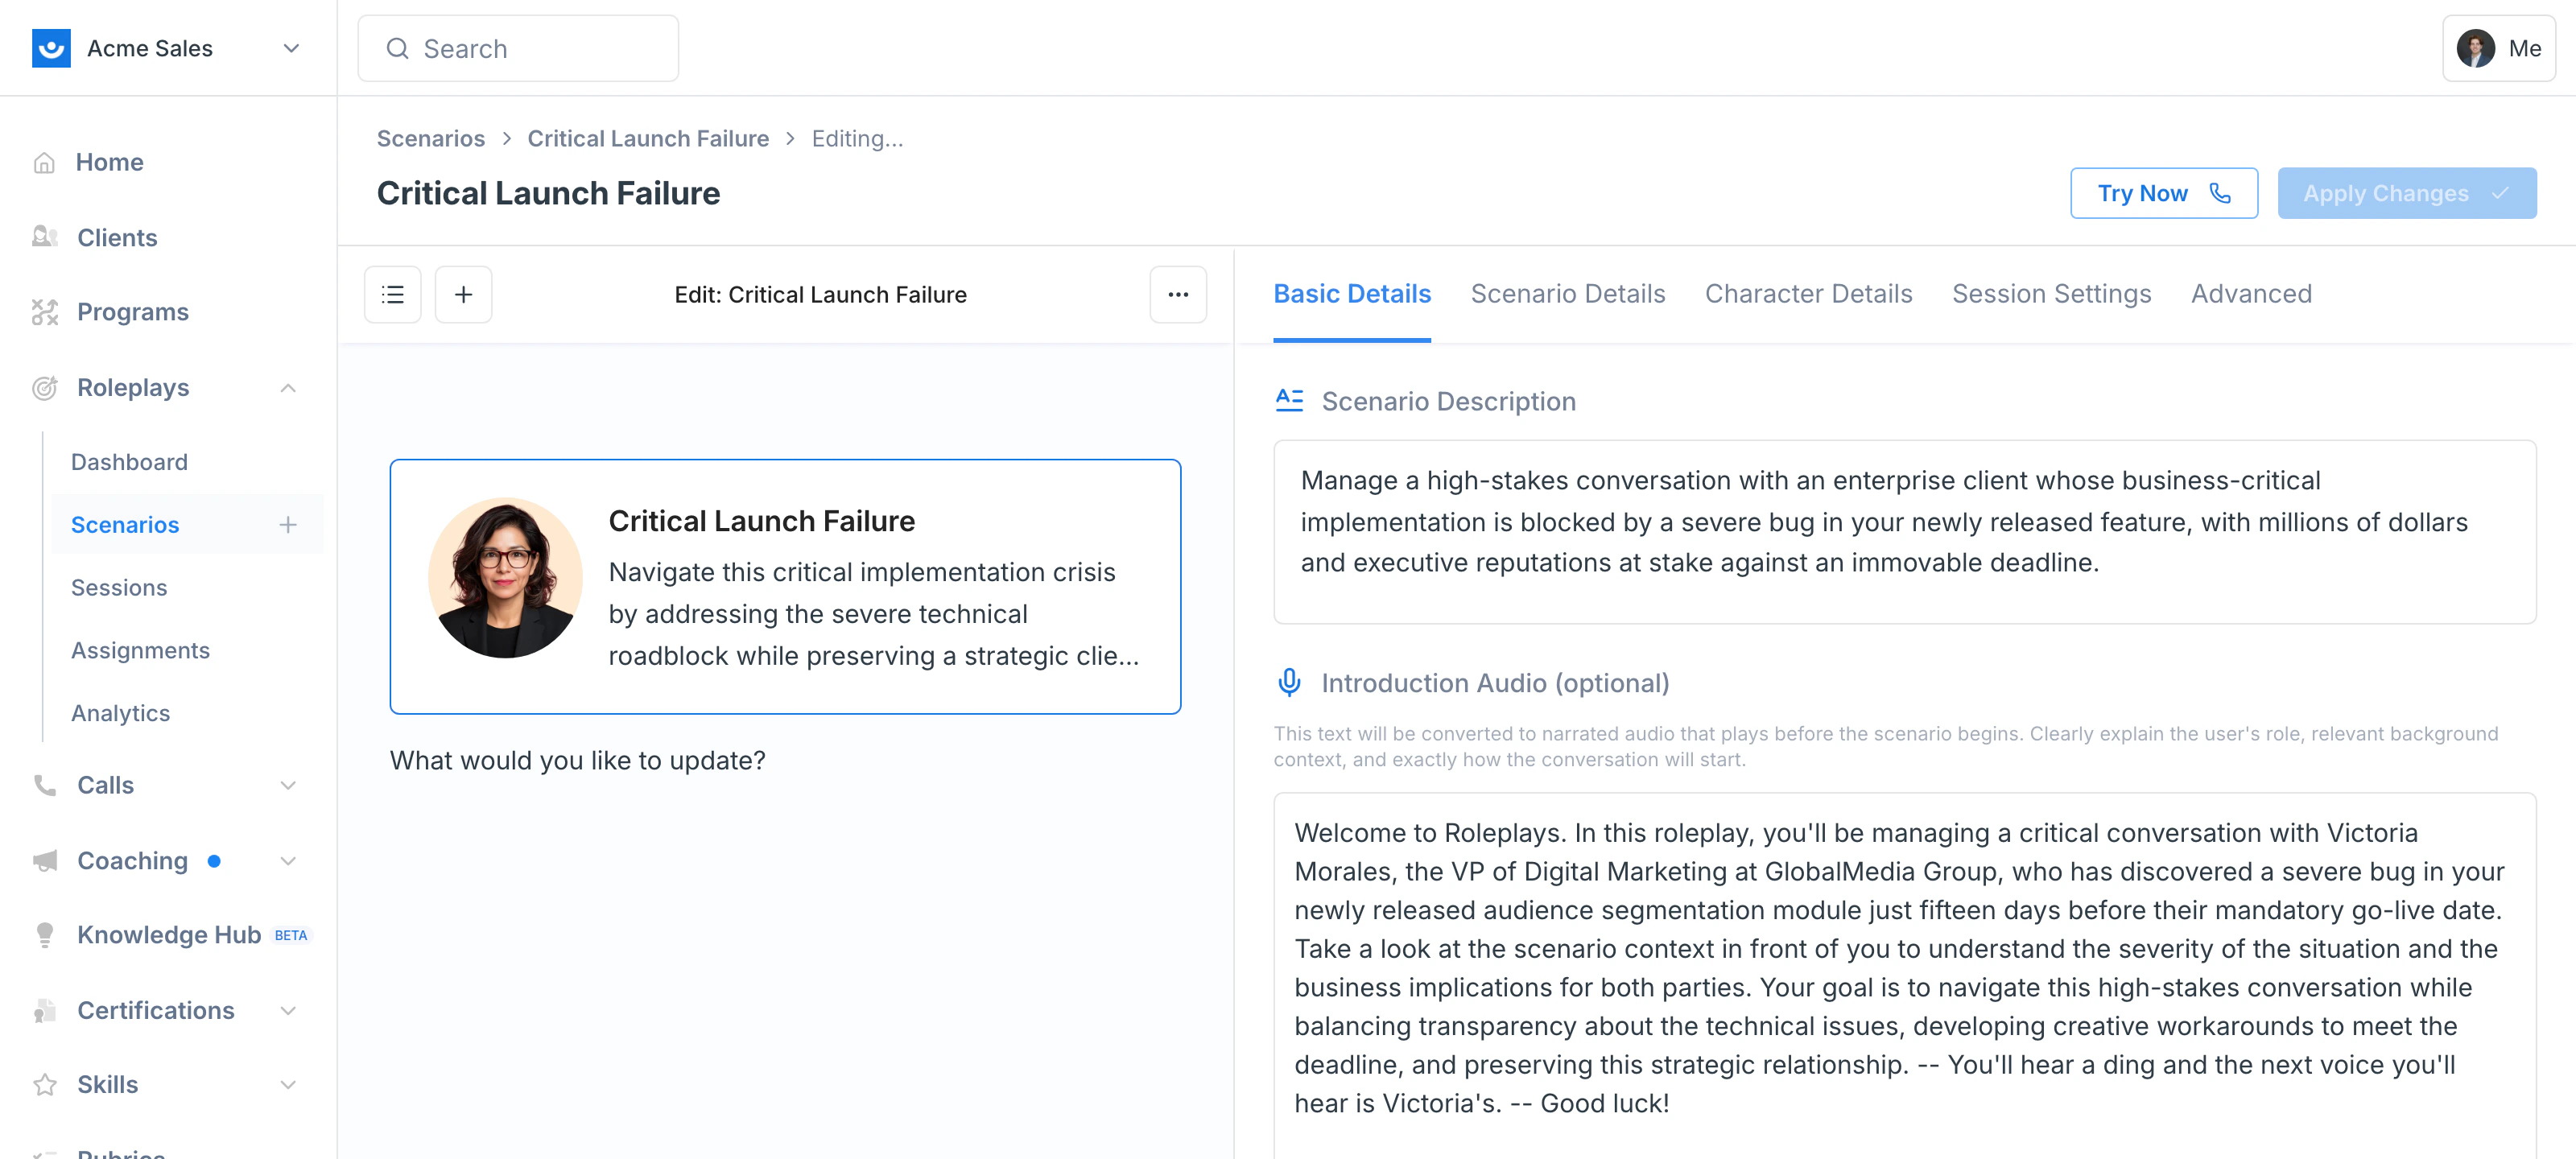
Basic Details
Basic Details
- Scenario Description — The summary participants see in the library
- Introduction Audio — The script that gets converted to narrated audio and plays before the session starts. Preview it to check tone before saving.
- Difficulty — The difficulty label (Easy, Medium, Hard, etc.). This sets participant expectations only; changing the label does not change AI behavior.
- Tags — Organize scenarios into themes for easier search and filtering
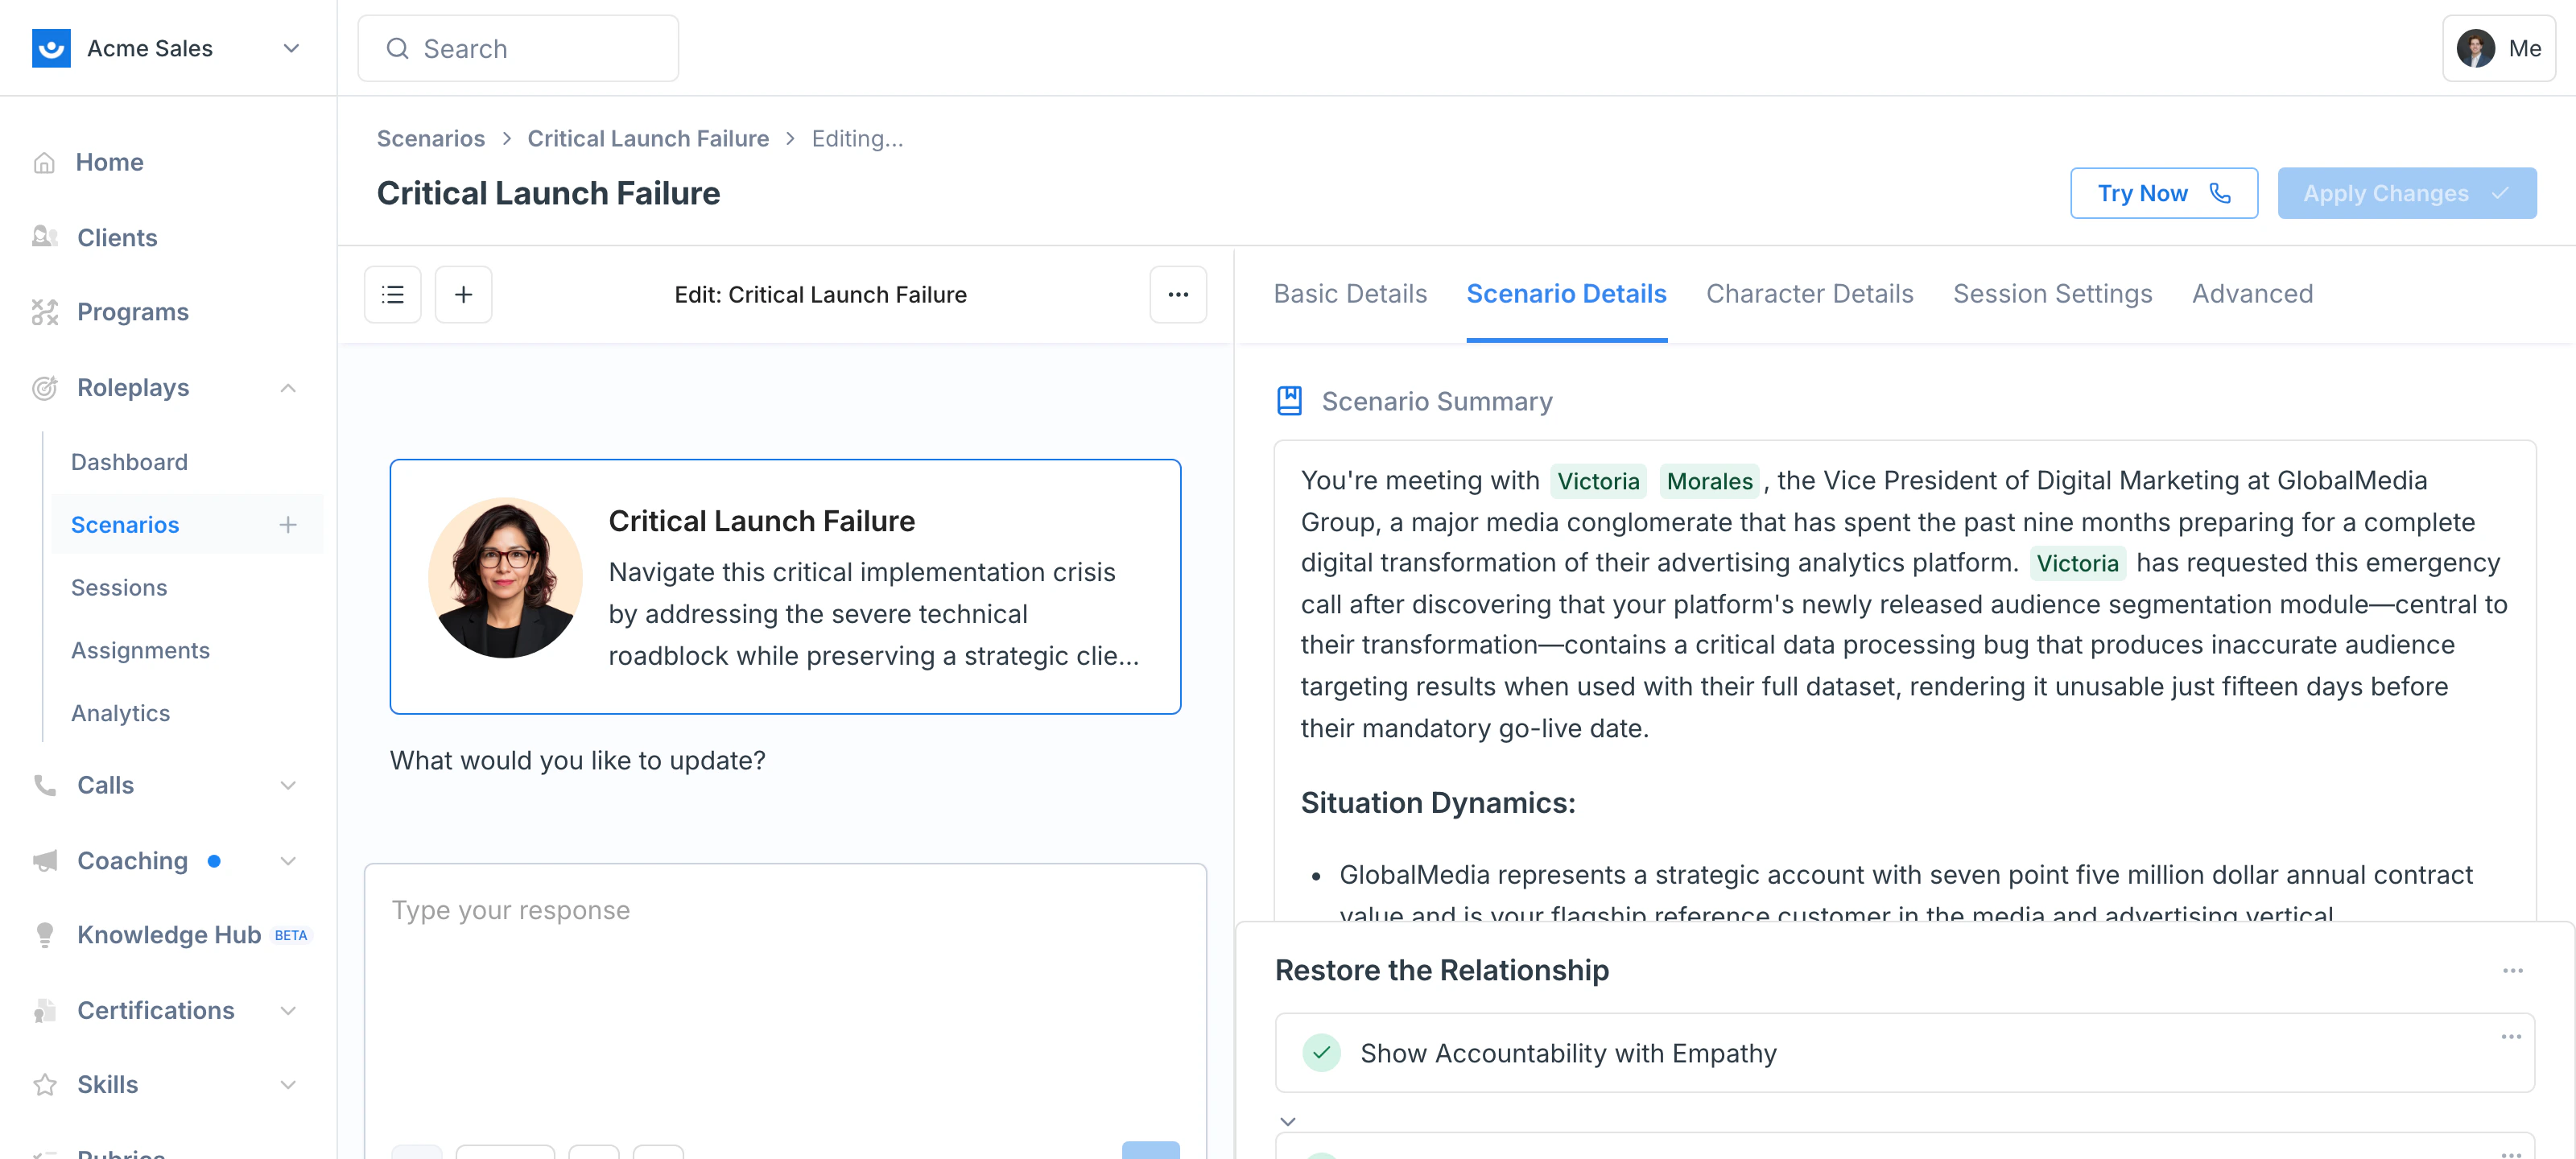
Scenario Details
Scenario Details
The full body of the scenario — situation dynamics, your objective, outcomes to avoid, evaluation criteria, and any background context the participant should see.Edit any section inline or describe the change to the agent (“add a section about Q3 revenue pressure”). Evaluation criteria can be added, removed, reordered, or rewritten directly.
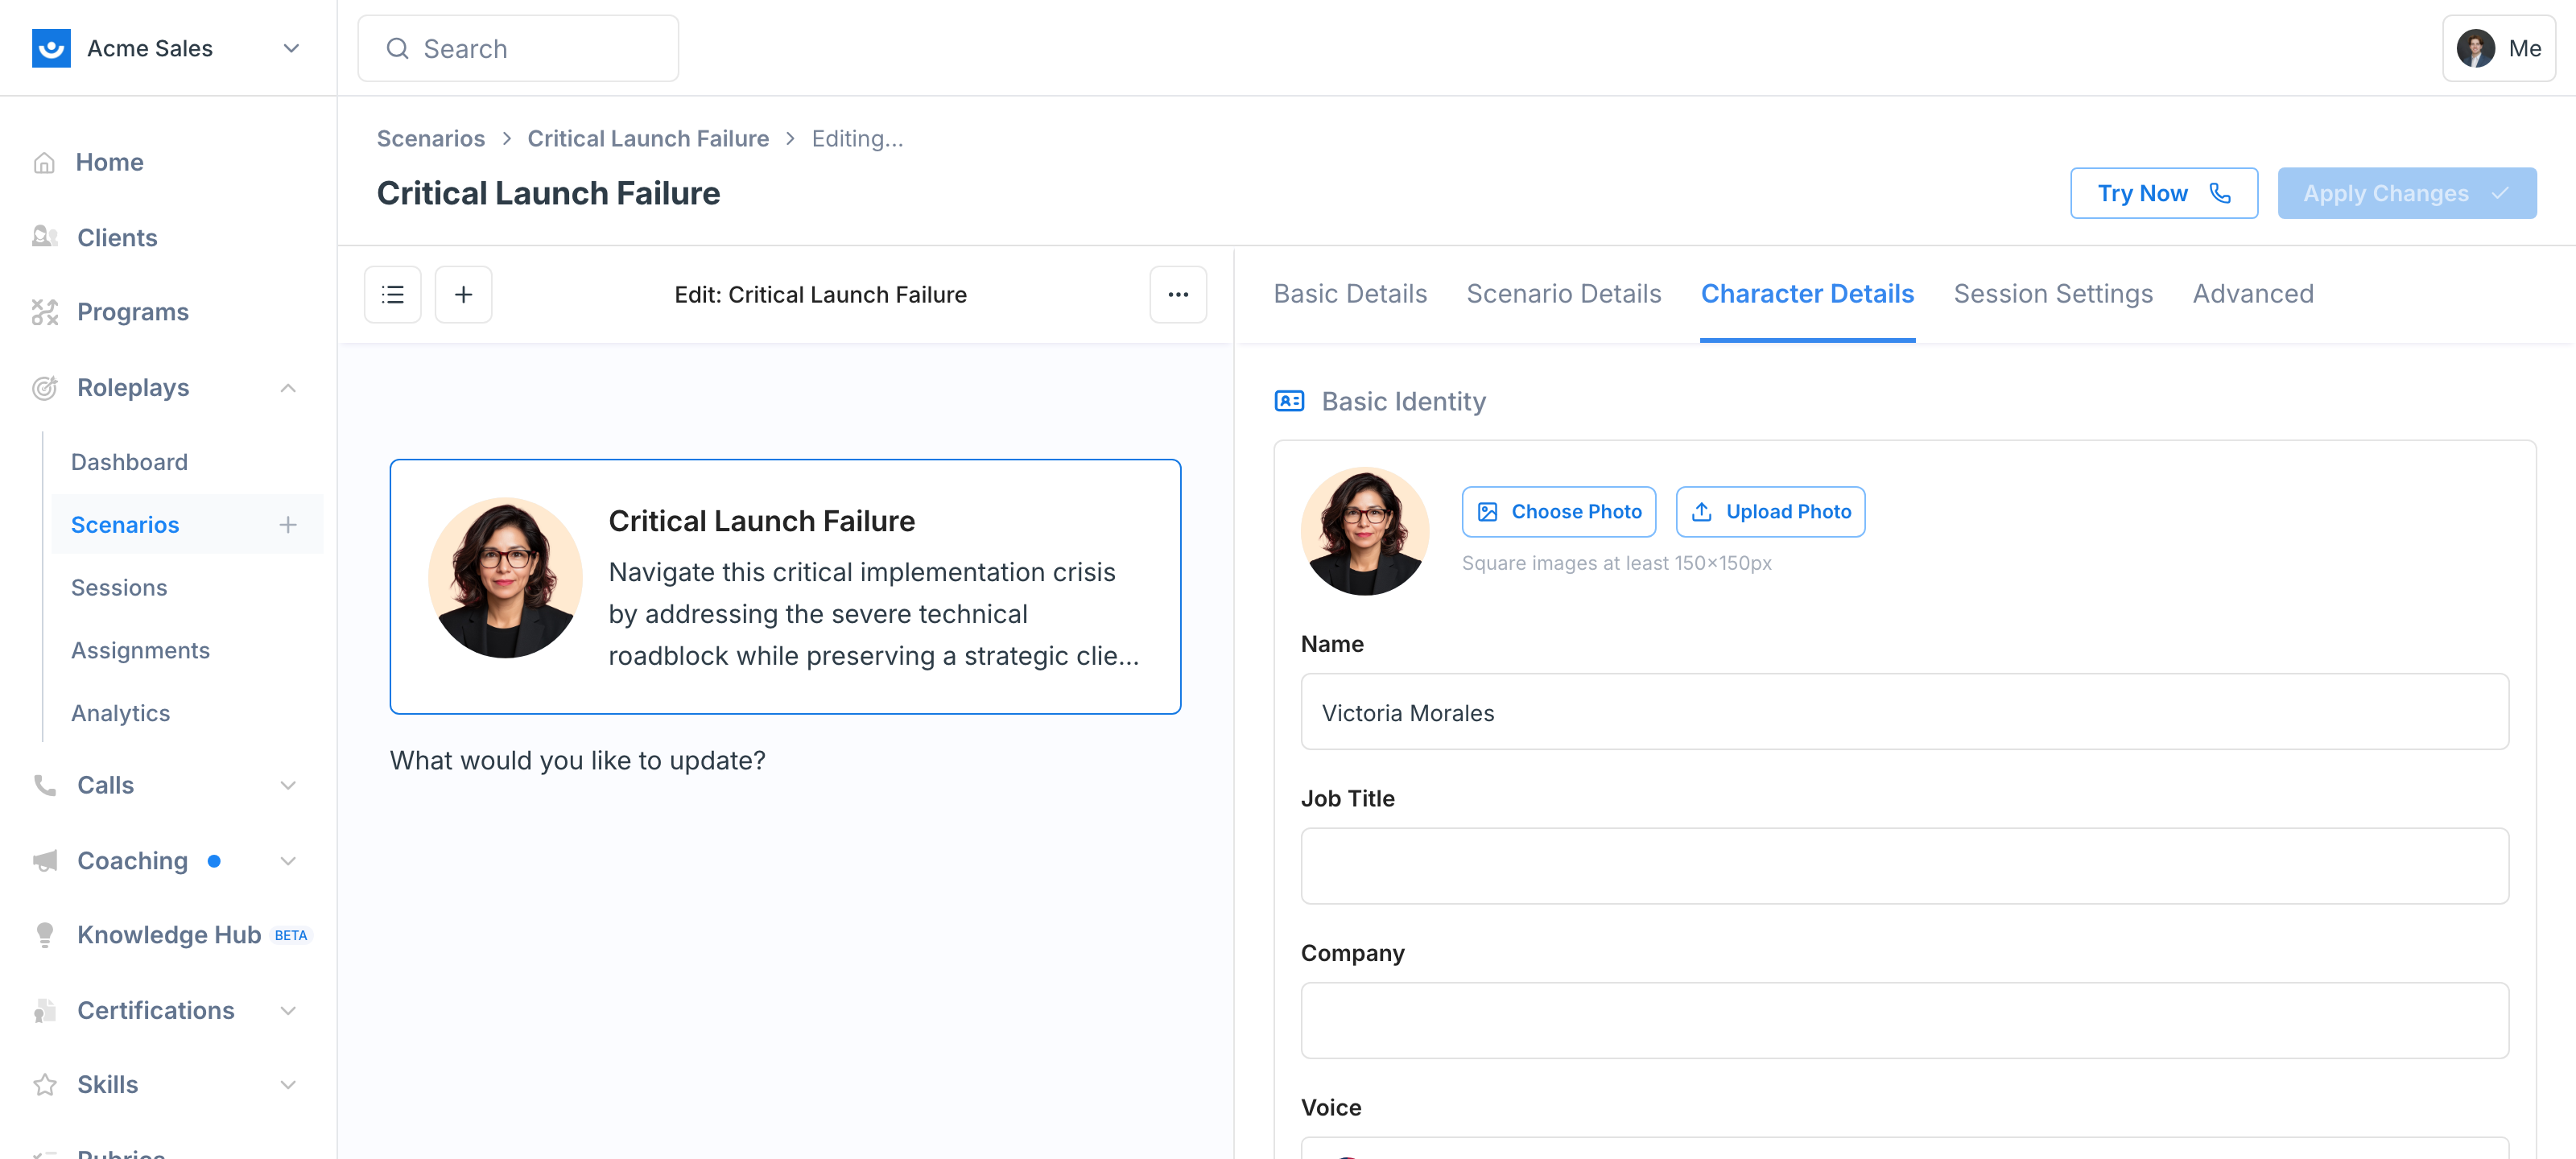
Character Details
Character Details
- Photo — Choose from the gallery, upload your own, or search natural language (“Female government worker”)
- Identity — Name, job title, and company
- Voice — Region, accent, age, and gender of the AI character’s voice
- Opening Line — The first thing the AI says. A pointed opener like “We’re already using a competitor — why should we switch?” raises stakes immediately; a casual opener leads to a slower warm-up.
- Backstory — Hidden context only the AI character knows
- Situational Understanding — What the character knows about the current situation (also hidden from participants)
- Personality — Adjust sliders for Assertiveness, Emotional Intelligence, Interaction Style, Stress Response, and Reasoning Style, or switch to a custom description
- Conversation Guidelines — Structured triggers, responses, and free-form character notes that control how the character behaves at specific moments. See Conversation Guidelines for the full editor.
Session Settings
Session Settings
Controls how the session is set up for the learner: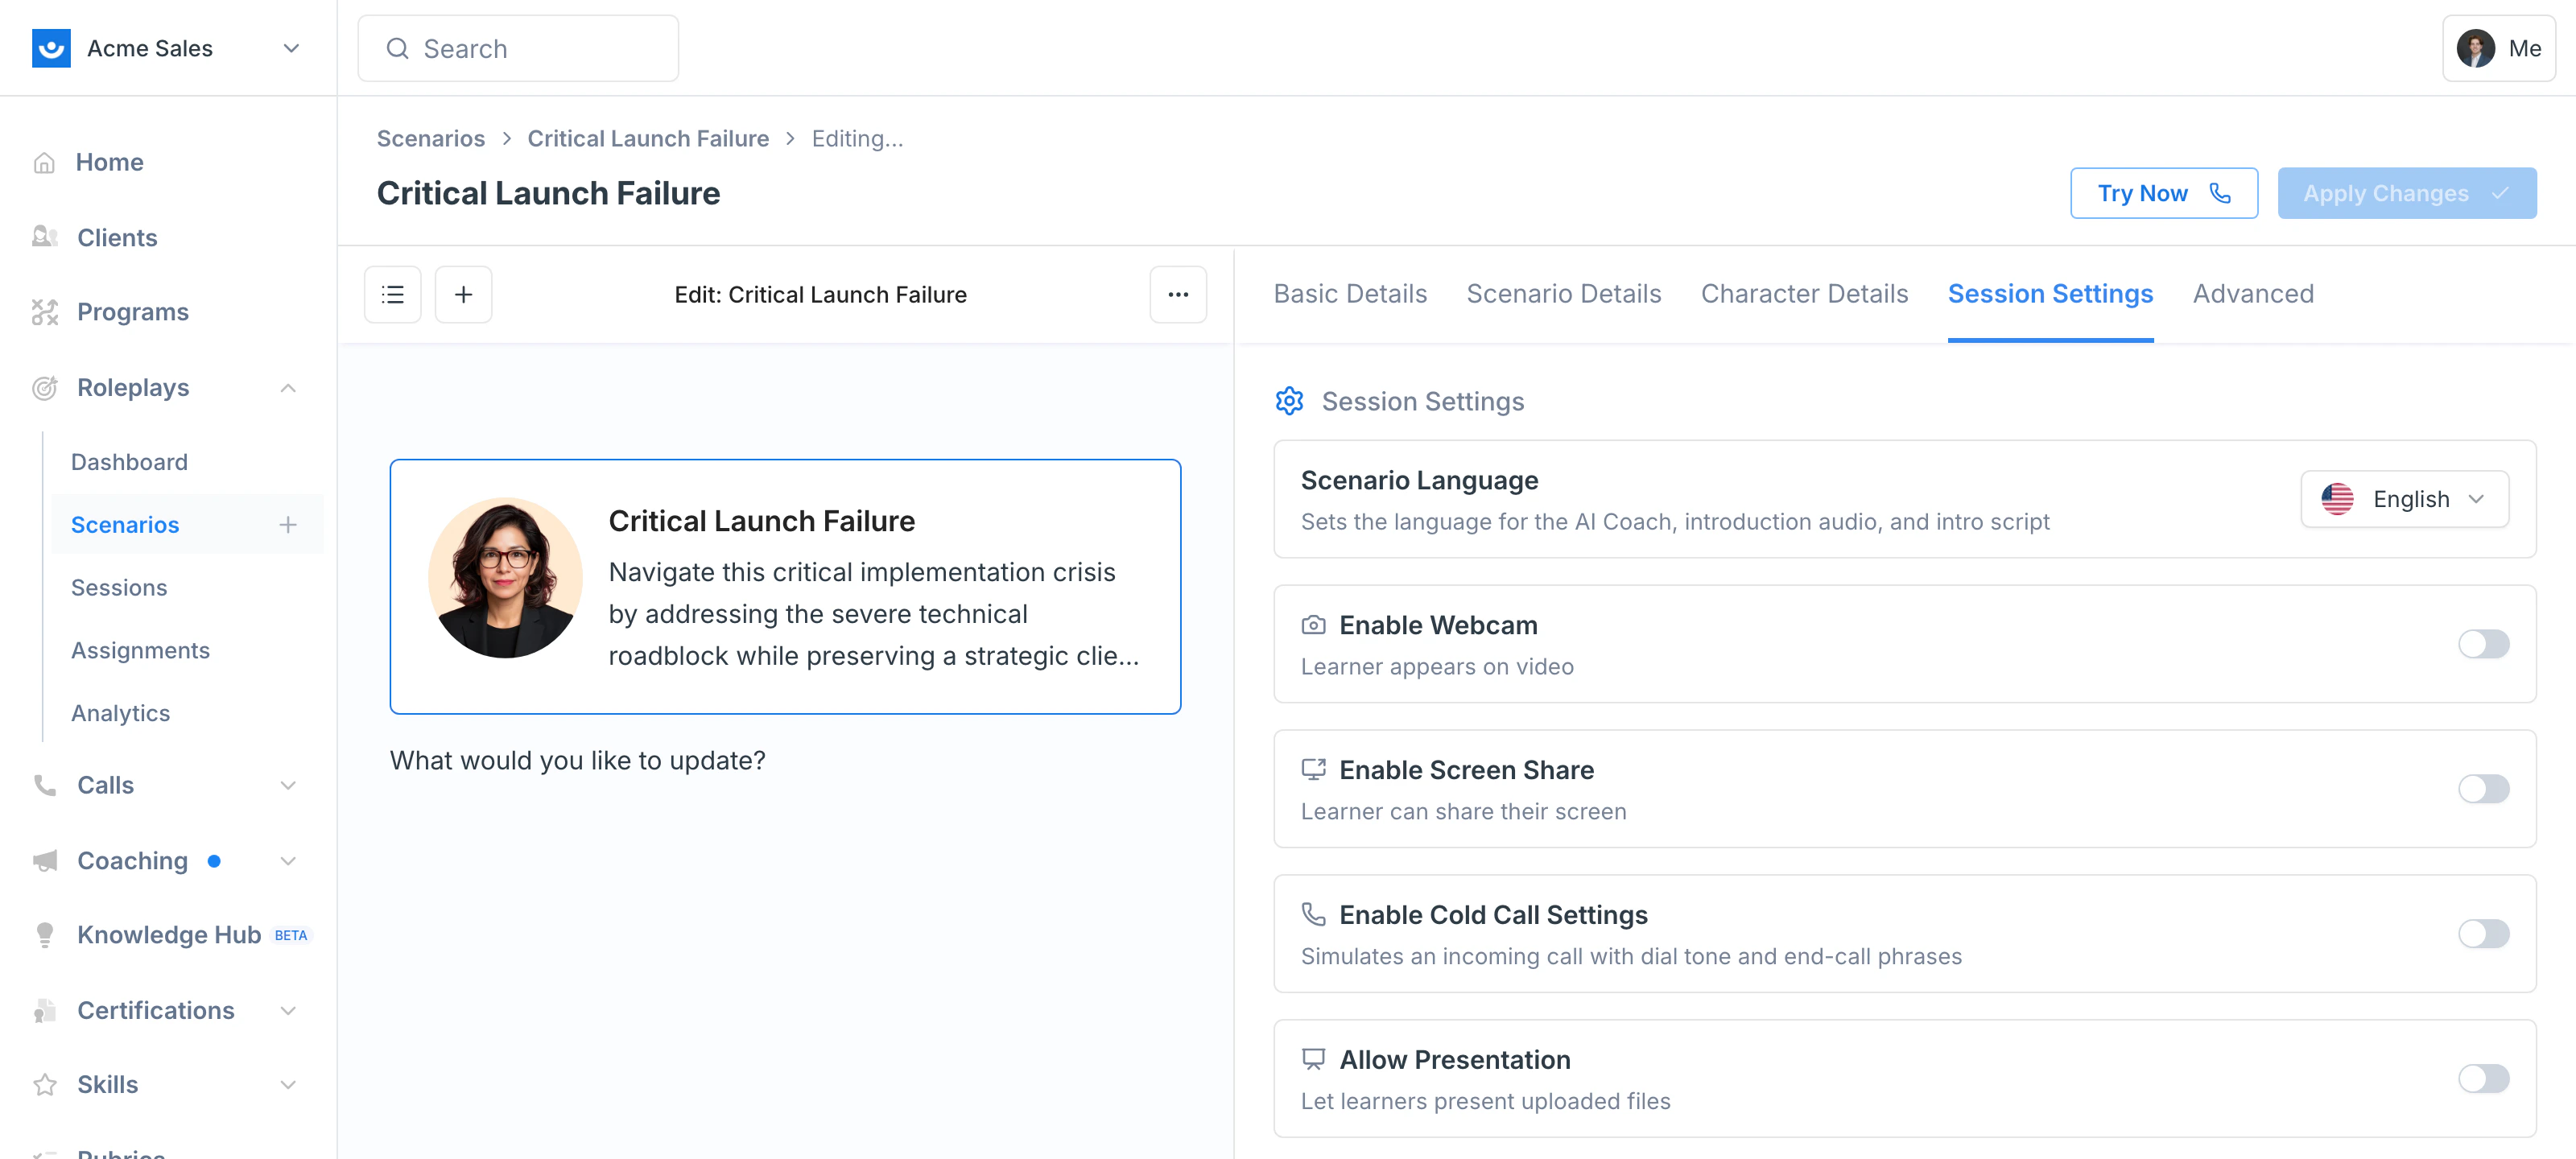
- Scenario Language — Sets the language for the AI Coach, introduction audio, and intro script
- Enable Webcam — Learner appears on video during the session
- Enable Screen Share — Learner can share their screen with the AI character
- Enable Cold Call Settings — Simulates an incoming call with dial tone and end-call phrases
- Allow Presentation — Let learners present uploaded files inside the session
Advanced
Advanced
Conditional Context — Add extra background the AI character receives based on a participant’s profile. See Conditional Context for the full setup.
Testing and Saving
- Click Try Now to start a quick test session against the version you’re editing. Adjust through the agent chat if something feels off.
- Click Apply Changes to save back to the published scenario. Anyone who runs it next will get the new version.
Edit vs. Remix vs. Clone
| Action | When to use it |
|---|---|
| Edit | You want to update the current scenario. Everyone who runs it next sees the new version. |
| Remix | You want a variation (different audience, tone, or stakes) and want to keep the original intact. Creates a new scenario. |
| Clone | You want a fresh copy to make a one-off, independent version. Creates a new scenario. |