

Feature Access is included on the Enterprise plan. On Free, Starter, and Professional workspaces, opening the page shows an upgrade prompt instead. See Plans for what each plan includes, or email [email protected] to talk through Enterprise.
Workspace and group admins always see every feature. Grants only ever add access for non-admin members, they never remove access from an admin. See Admin Capabilities.
Open Feature Access
In the left-hand navigation, open Settings, then click Feature Access. This page is visible only to workspace admins. Feature Access has two tabs:- Visibility controls which product sections appear in the navigation for each member.
- Permissions controls who can perform actions inside those sections, for example who can create roleplays or who can see other members’ calls.
Visibility tab
The Visibility tab lists every product area in your plan, with a badge showing who can see it today.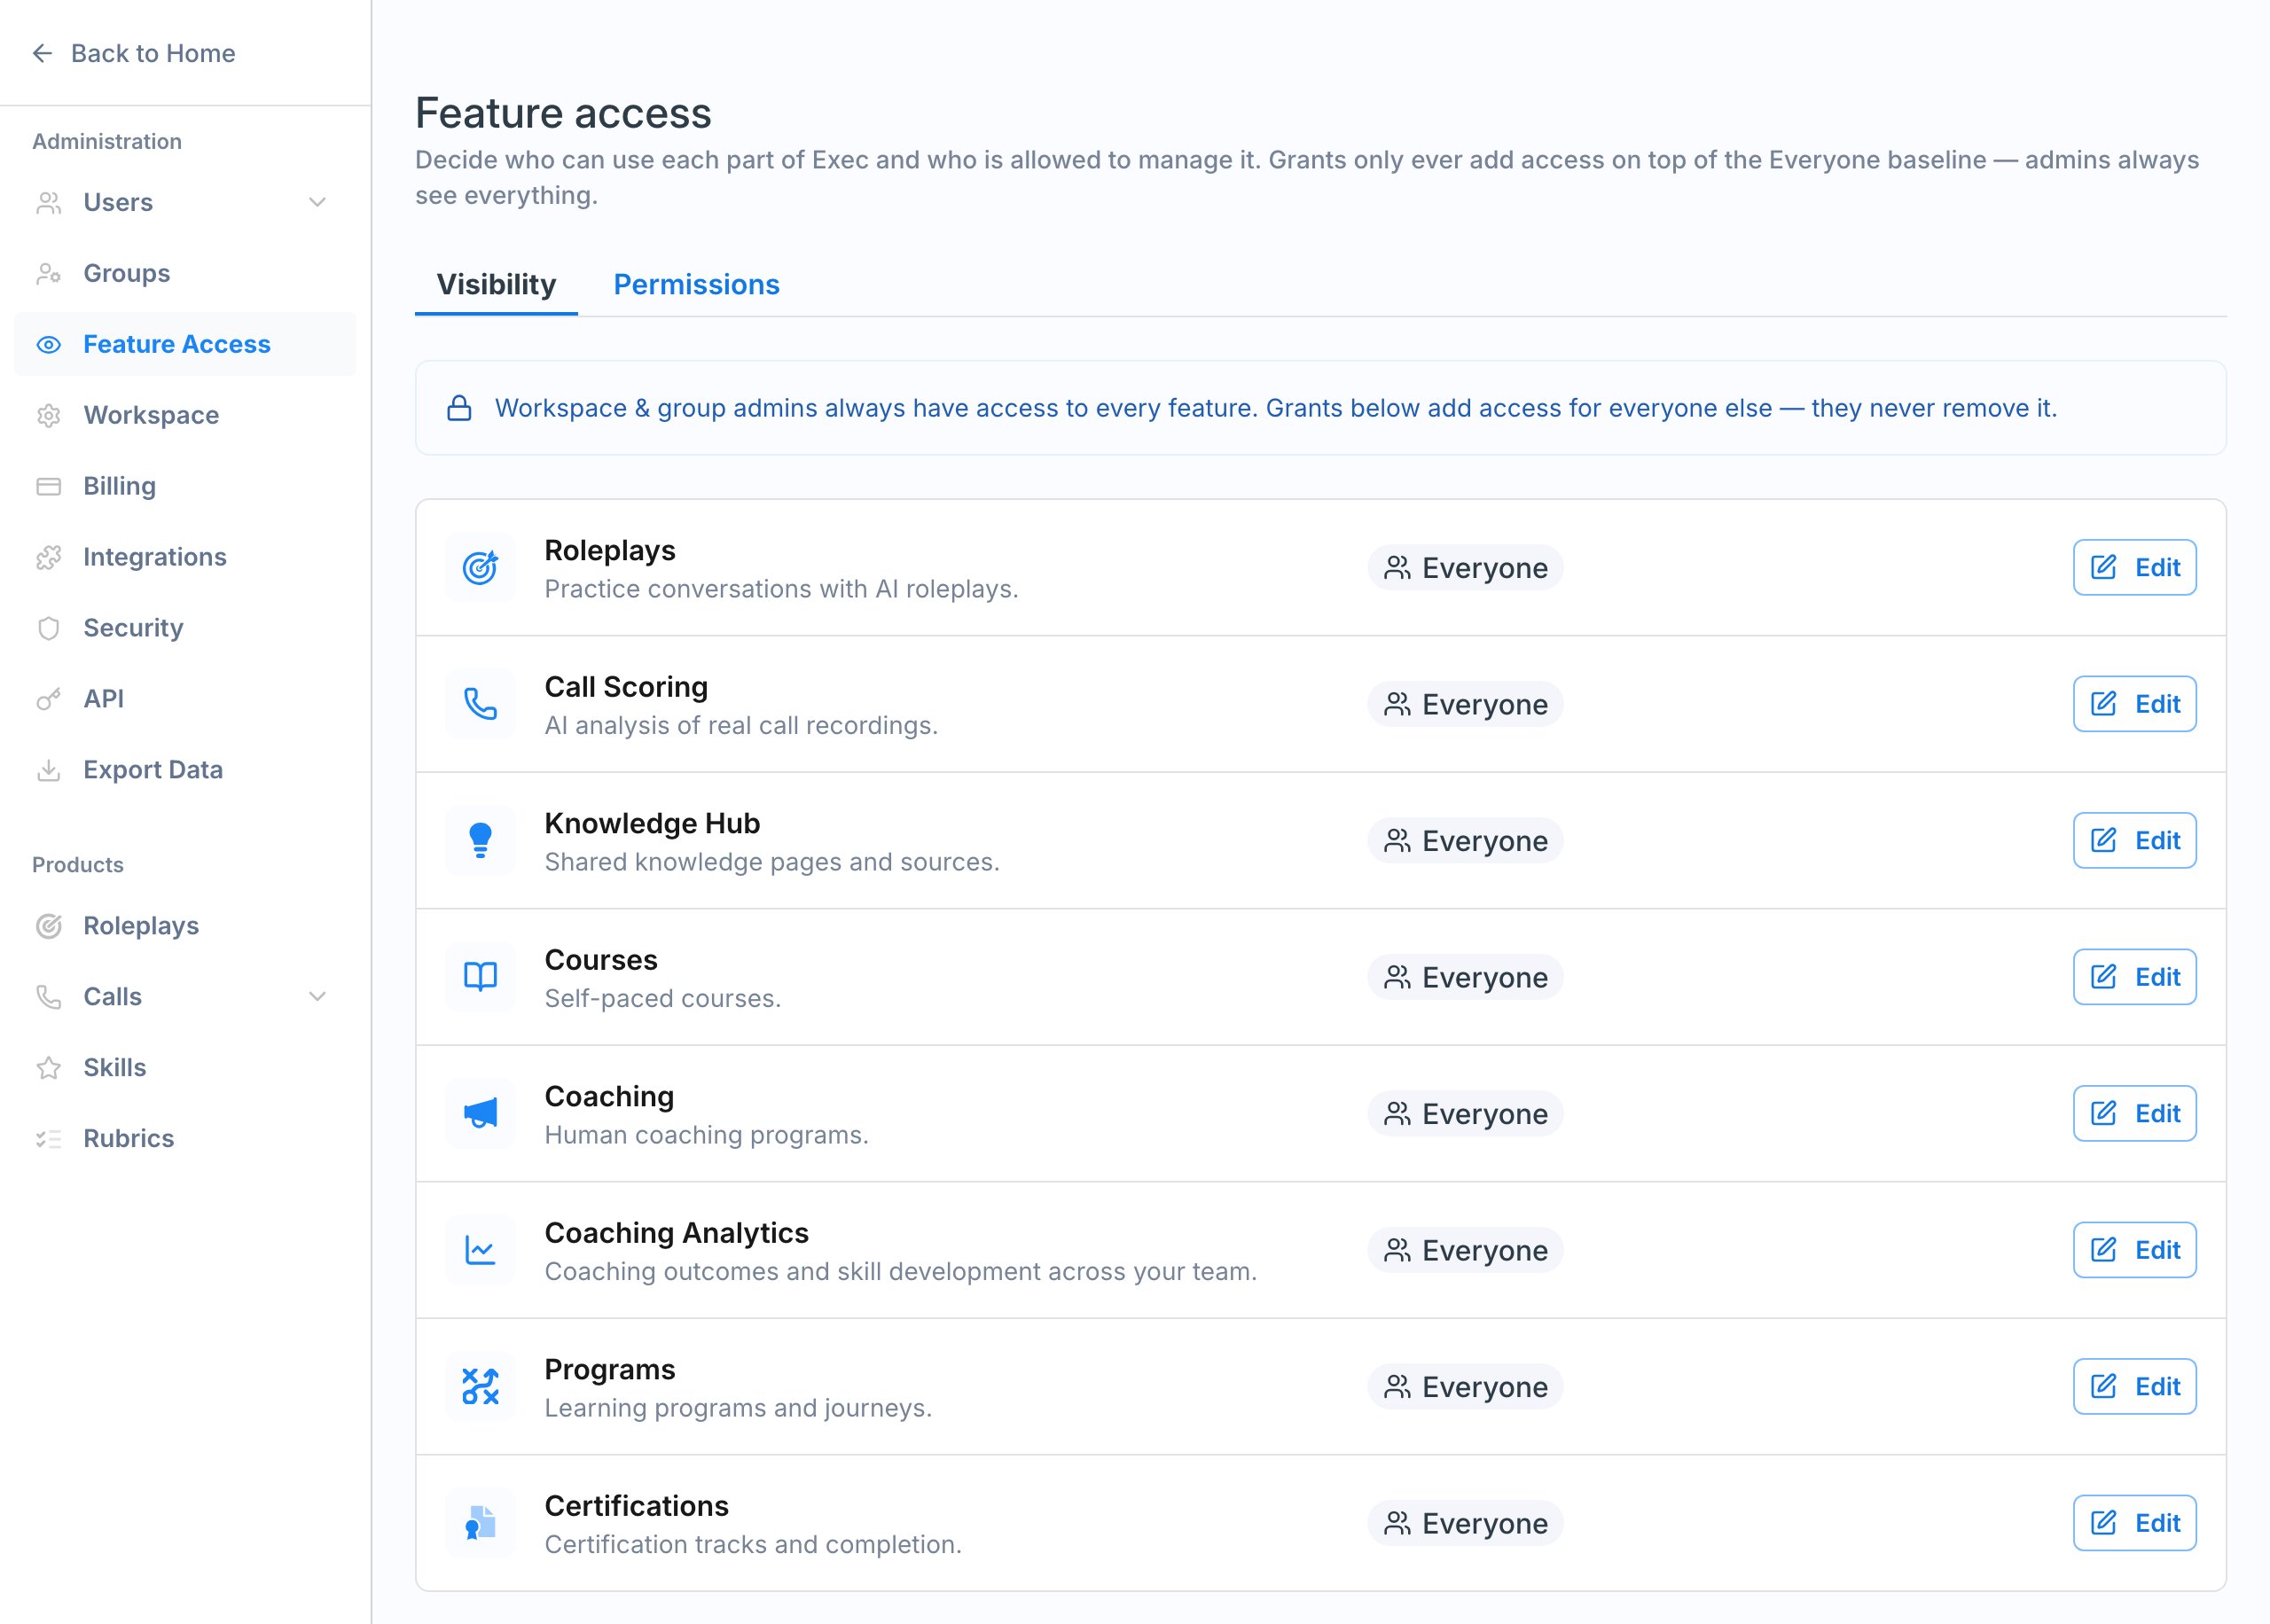
Grant access to a feature
Click Edit on any row to open that feature’s panel.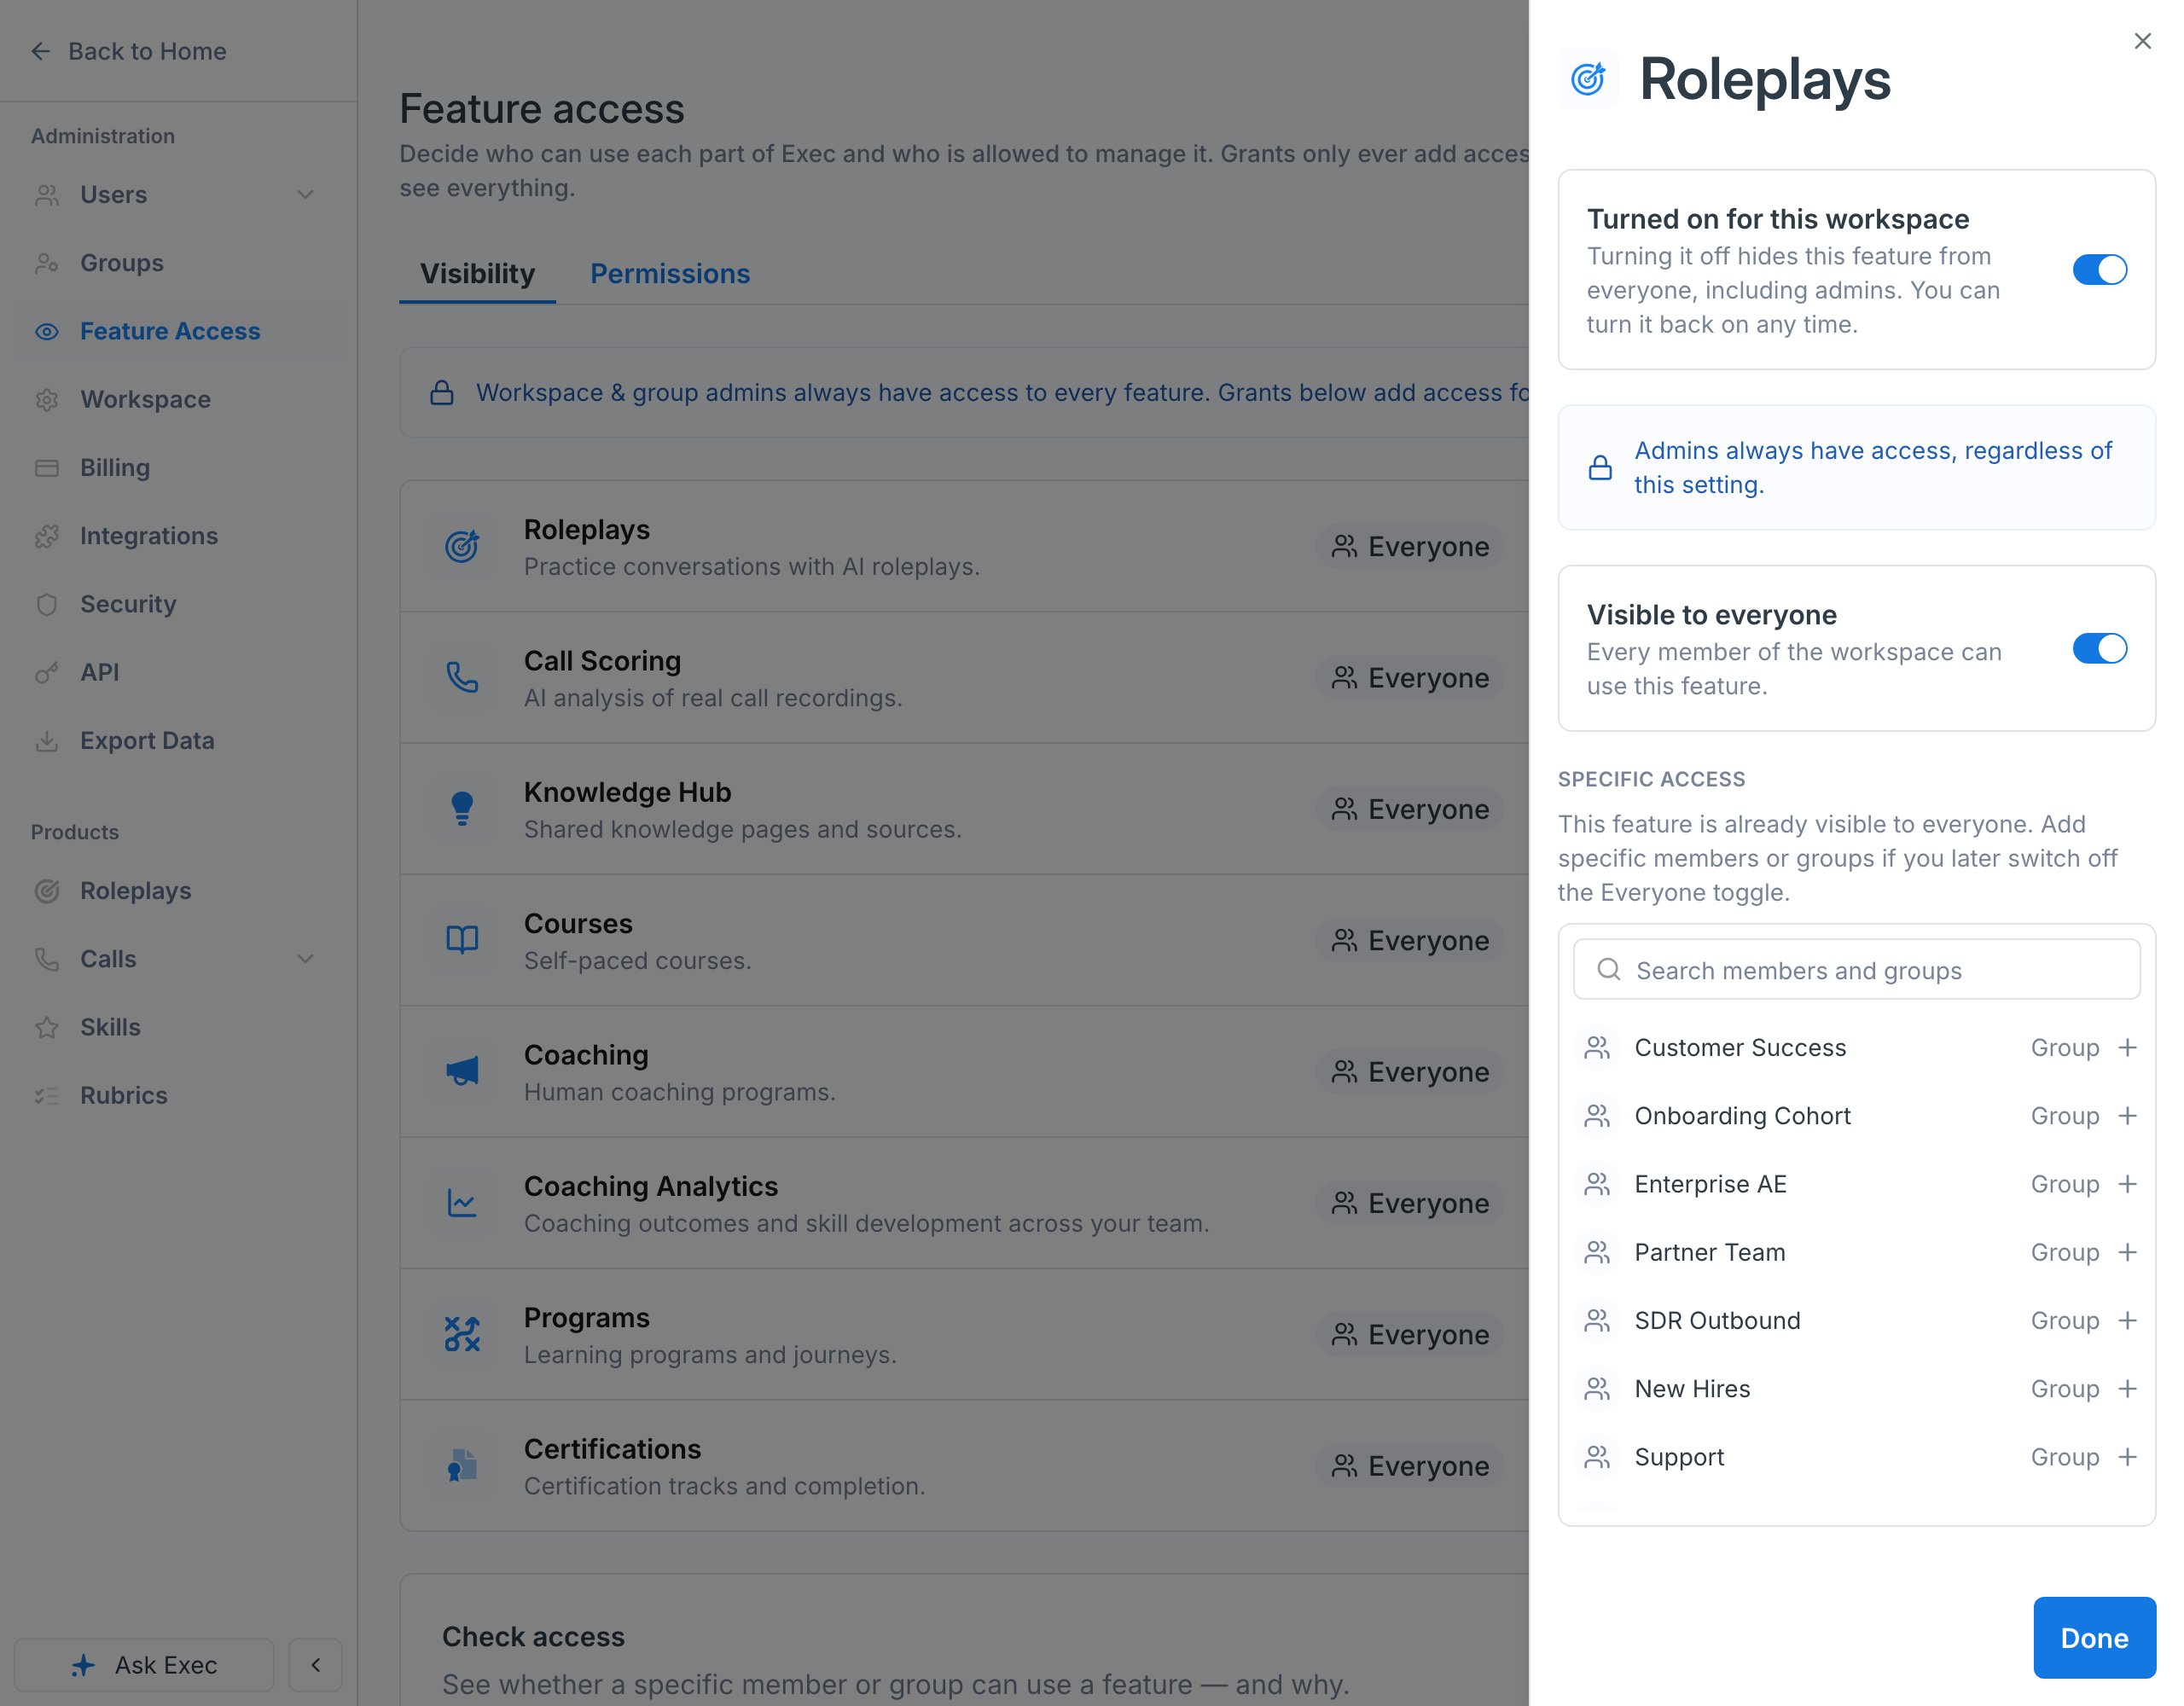
1
Turned on for this workspace
Leave this on for any feature you want to use. Turning it off hides the feature from everyone, admins included, and you can turn it back on at any time.
2
Visible to everyone
Leave this on to let every member use the feature. Switch it off to restrict the feature to the groups and members you pick next.
3
Specific access
Search for a group or a member and click it to grant access. A checkmark marks everyone already granted. You can mix and match, so a feature can go to one full group plus a handful of individuals. Turn on Selected only to review just the entries you have granted.
A member who cannot see a section can still take part in content assigned directly to them. If someone isn’t granted Programs access but an admin assigns them to a program, they can still complete their assignments. Visibility hides the section from the navigation, it does not block direct assignments.
Permissions tab
The Permissions tab controls who can take specific actions inside a feature, independently of who can see it.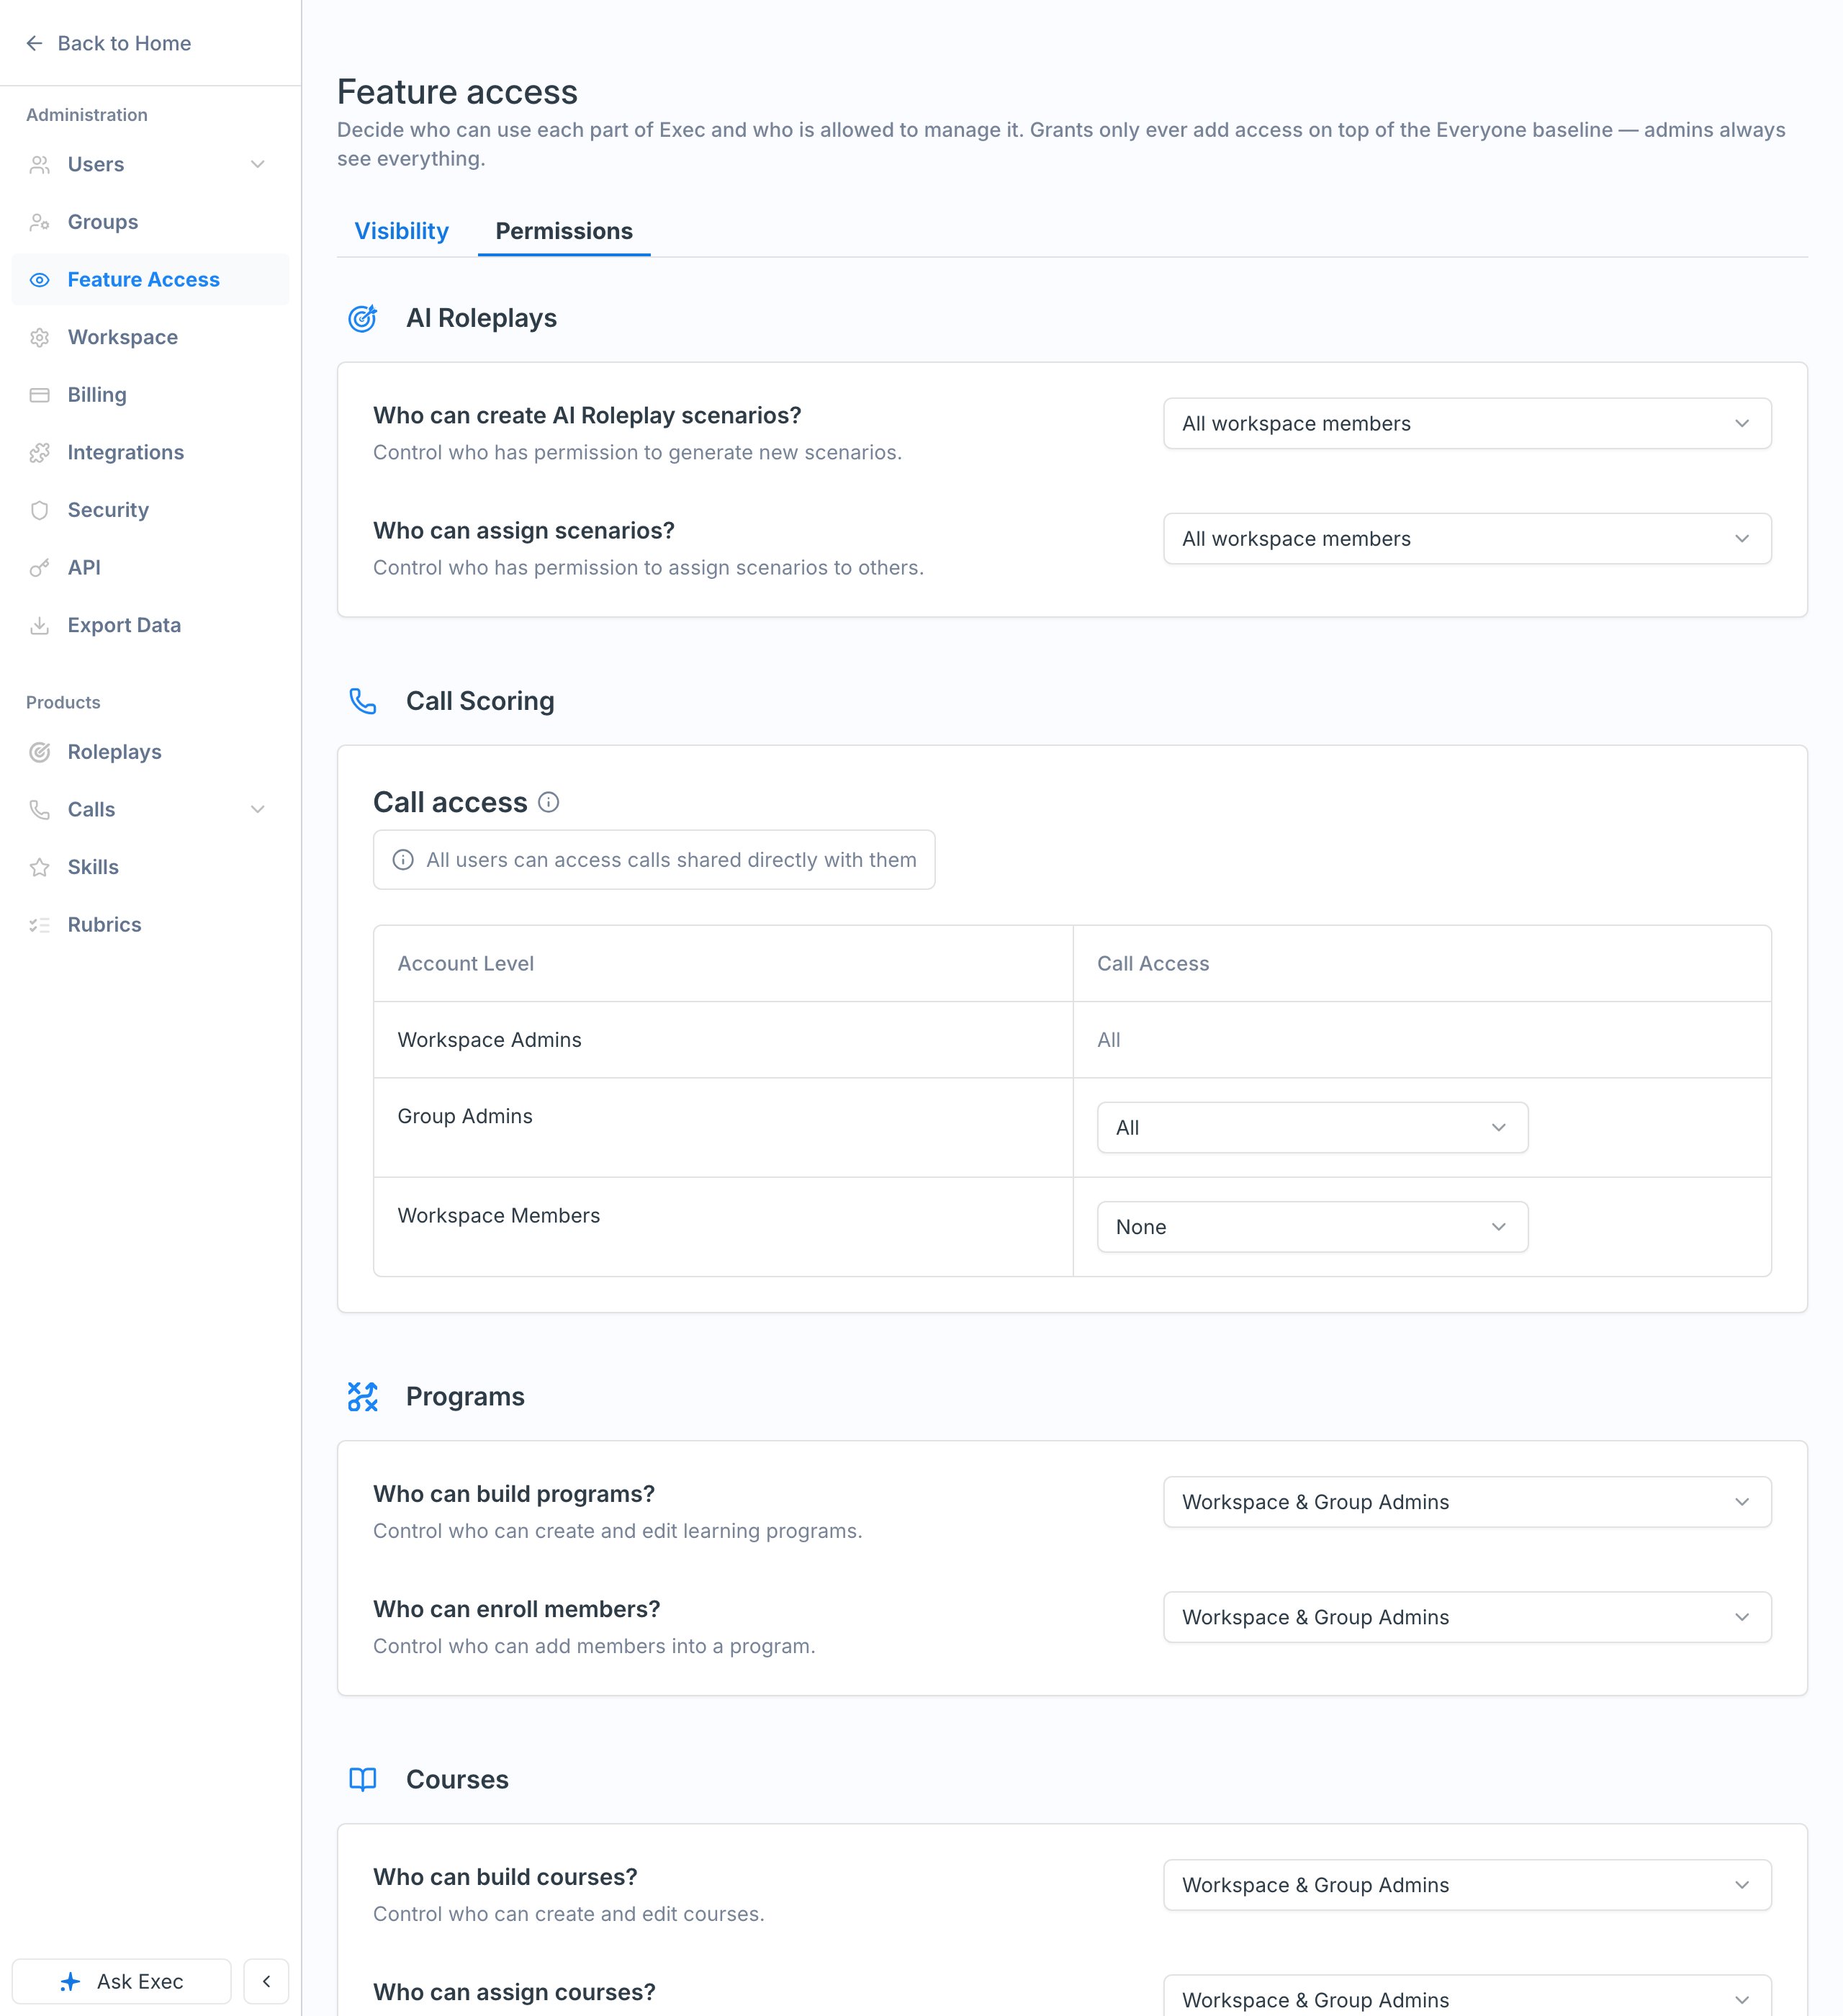
- AI Roleplays: who can create scenarios, and who can assign them.
- Call Scoring: which calls each account level can reach, set separately for workspace admins, group admins, and workspace members.
- Programs: who can build programs, and who can enroll members.
- Courses: who can build courses, and who can assign them.
Check access
Both tabs end with a checker that answers “can this person use this feature, and why?” without waiting for the member to sign in and look. It reads Check access on the Visibility tab and Check permissions on the Permissions tab.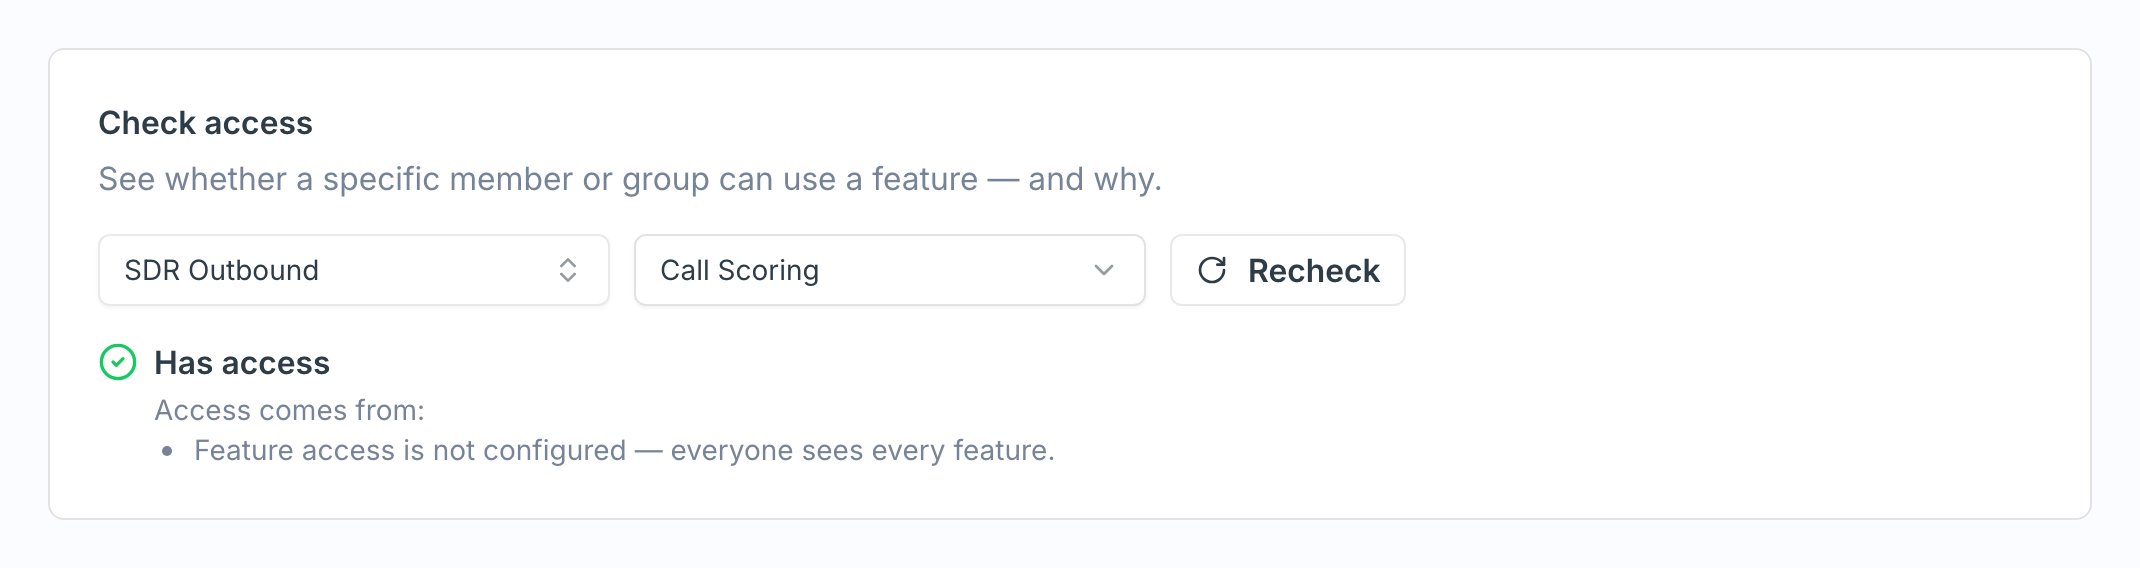
1
Choose a member or group
Search by name or email.
2
Choose a feature
Pick any feature from the dropdown.
3
Read the verdict
Exec shows whether access is granted and lists the reasons behind it, for example granted to everyone, granted through a group, or granted directly to that member. Click Recheck after changing a grant to confirm the new result.
Common setups
- Piloting a new product: switch off Visible to everyone for the feature and grant it to the pilot group. Every other member sees the workspace exactly as it was before.
- Specialist tools: restrict Call Scoring to your sales team while keeping Roleplays open to the whole company.
- Buttoned-up workspace: switch off Visible to everyone across the board and grant each product only to the teams that use it.