

Publish Changes
When your draft is ready, click Publish changes in the editor header. Publishing assigns the next integer version, so your first publish is version 1, the next is version 2, and so on.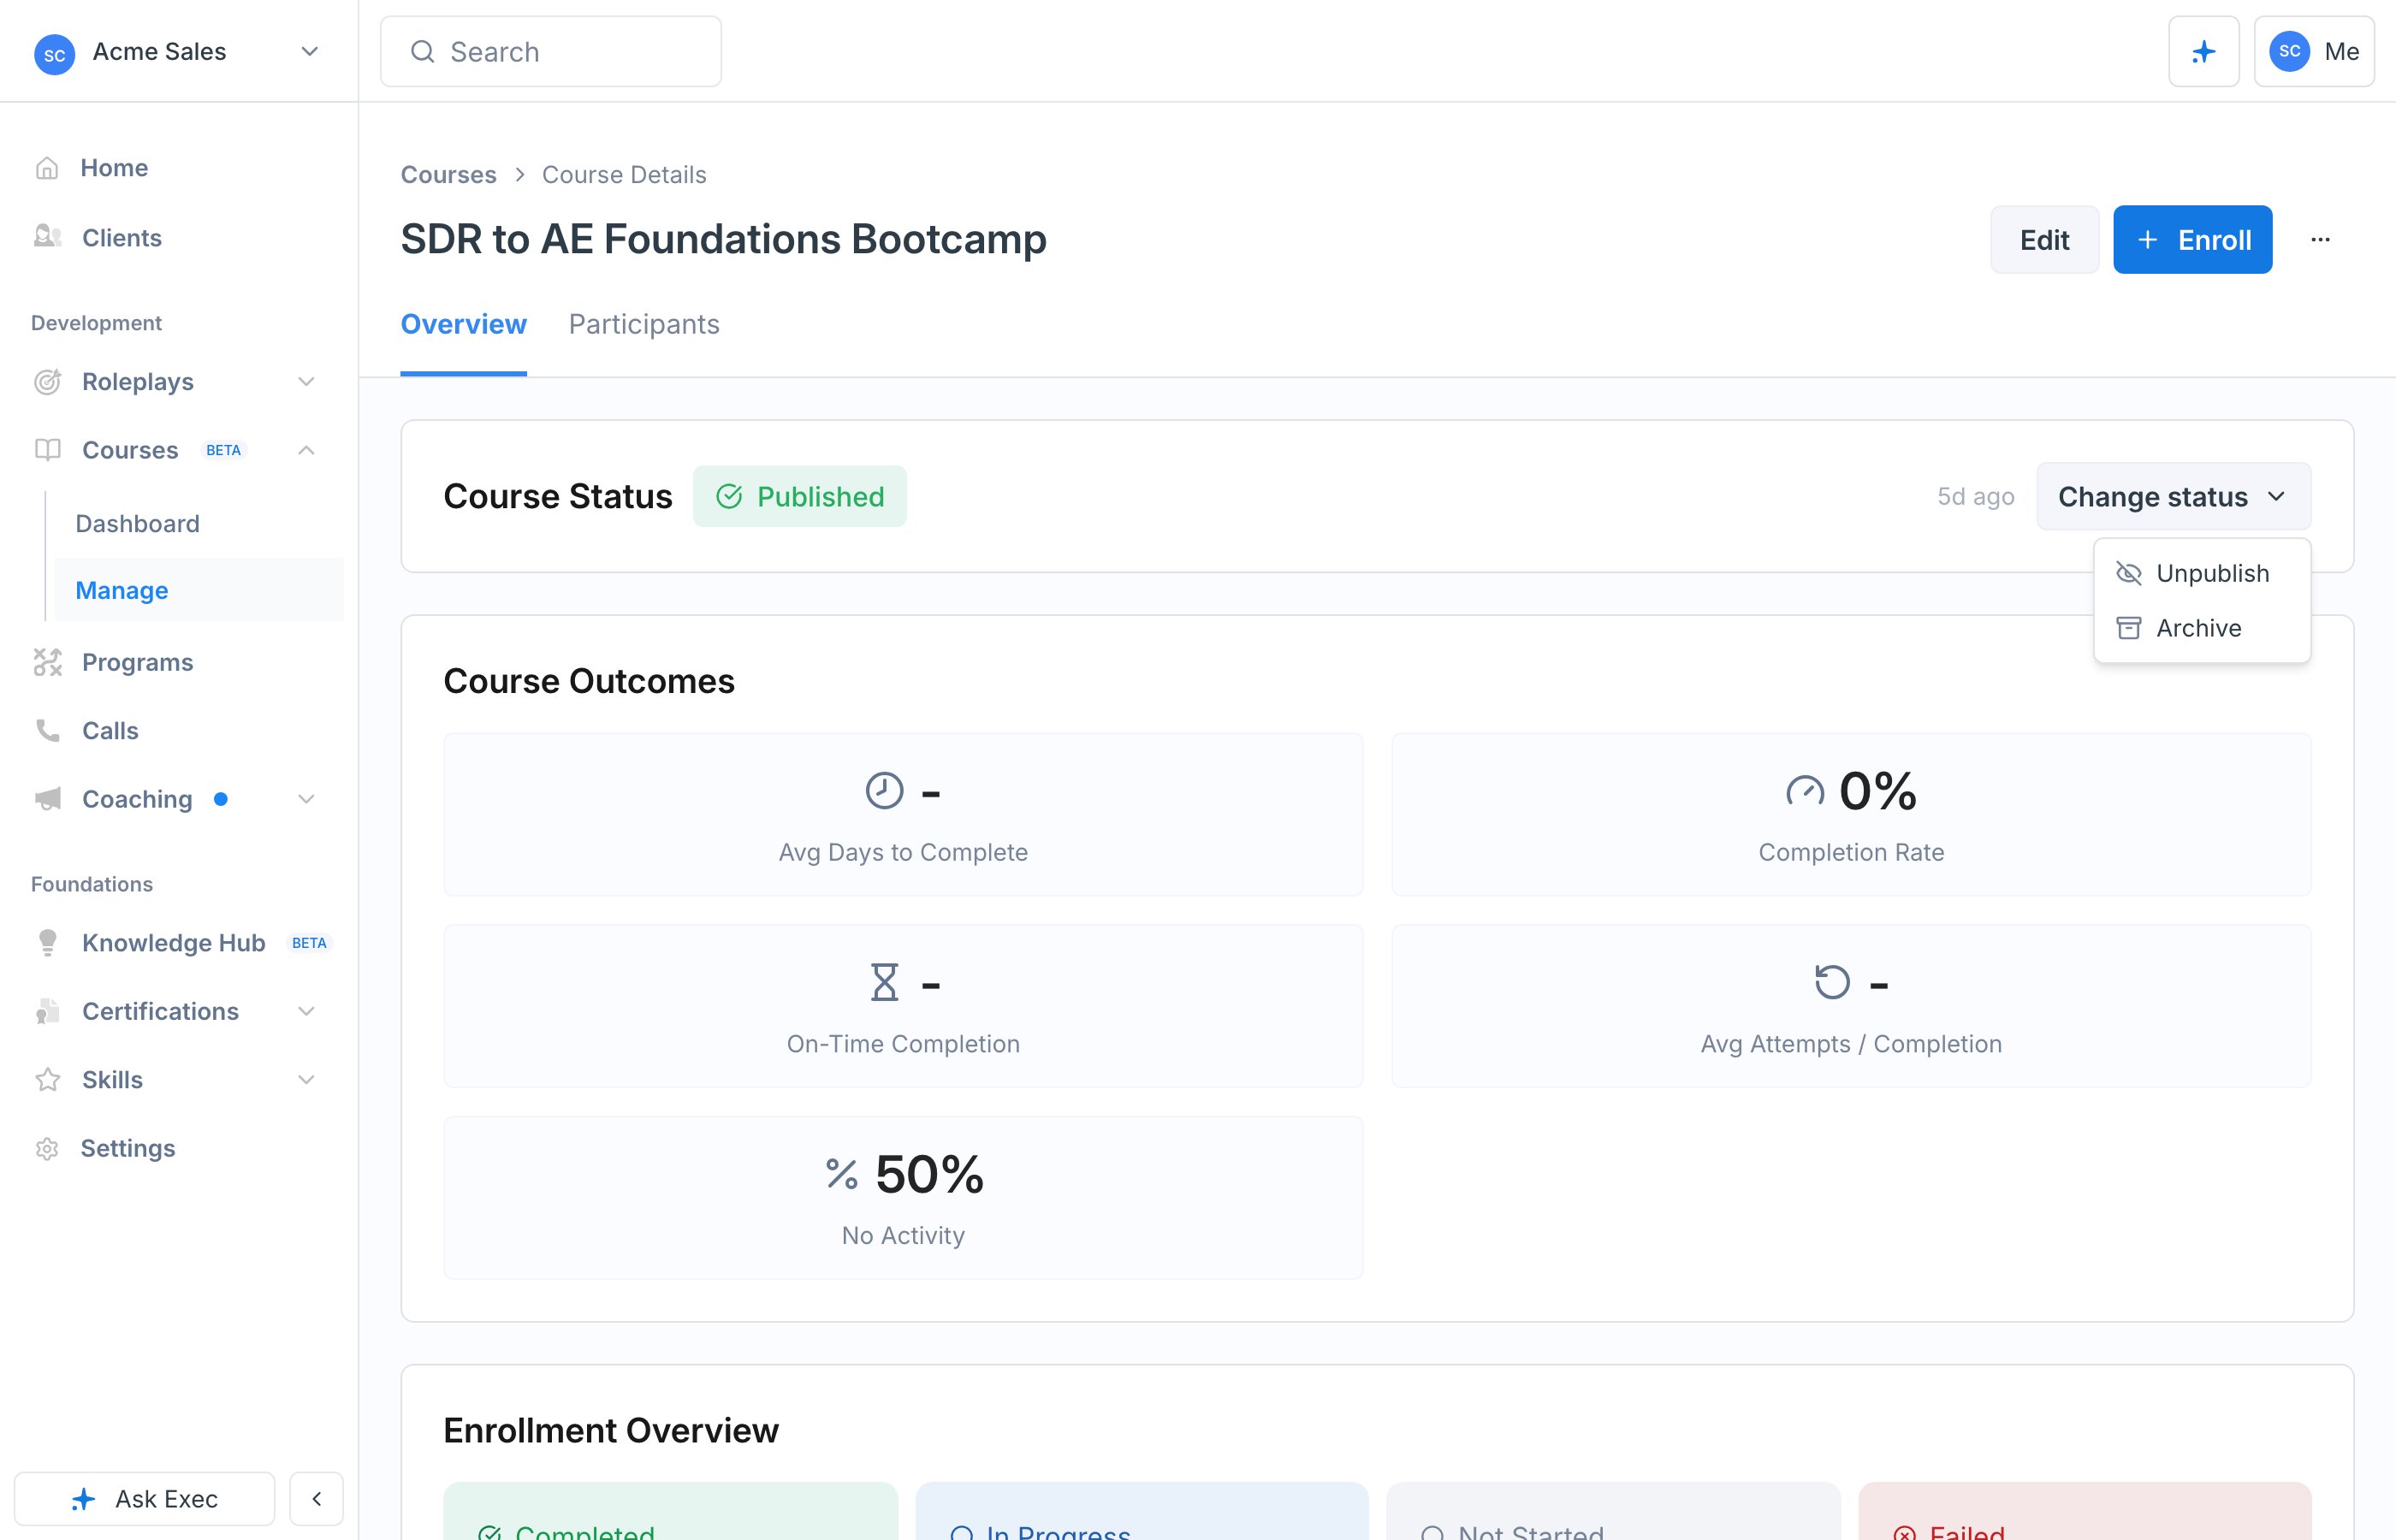
Restricted Scenarios Block Publish
If a page contains a roleplay block whose scenario is Restricted and hasn’t been shared with anyone else, publish is blocked and the publish sidebar highlights each affected page. Open the roleplay block and use the access strip to either flip the scenario to Workspace or share it with the users, groups, or programs who need to run it. Workspace and Global scenarios always publish. See Add a Roleplay for the full access model.Fix Optional Pages with Required Blocks at Publish
If publish is blocked only because an optional page still contains required blocks — for example a required quiz was added to a page that’s already marked optional — you’ll get a Make blocks optional and publish? prompt listing the affected pages. Confirming flips the required blocks on those pages to optional and retries the publish in one step, so you don’t have to open each page to fix it manually. See Optional Pages for how the cascade works.Editing a Published Course
Editing a published course never touches the live version directly. Instead, your edits clone the course into a fresh draft. While that draft has unpublished edits, the course shows a Changed status badge so you always know the live version is behind your latest work. The course dashboard’s Course Status card also shows a Publish changes button whenever the course is in the Changed state, so you can publish from there without opening the editor.When Another Admin Publishes While You Edit
Courses can be edited by more than one admin, so the published version can move while your editor is open. The editor protects you in two ways instead of silently overwriting their work:- Live banner. When someone else publishes, your open editor refreshes with the latest content and shows an amber banner naming who published which version. If you have unpublished changes, the banner reminds you to review them before publishing and offers a Discard my draft button to start over from their version. If you have no draft of your own, the content refreshes silently with no banner.
- Publish conflict check. If you click Publish changes from a stale editor — for example a tab left open before their publish — the publish is refused and a Someone else published this course dialog names the publisher and version. Choose Cancel to go back and review, or Publish anyway to create a new version from your content on top of theirs. Their version stays in the version history either way.
Admins share a single draft per course. If another admin publishes the shared draft while your editor is open, your saved edits are already included in their published version, so there is nothing left for you to publish. The editor tells you this instead of showing a conflict dialog.
How Versions Affect Enrolled Learners
Enrollments are version-pinned: each learner keeps the version of the course they enrolled on. When you publish a new version:
This means you can publish improvements freely: no one who is partway through the course will see pages change underneath them, and anyone who has not started yet automatically gets the newest version.
See Which Version Each Learner Is On
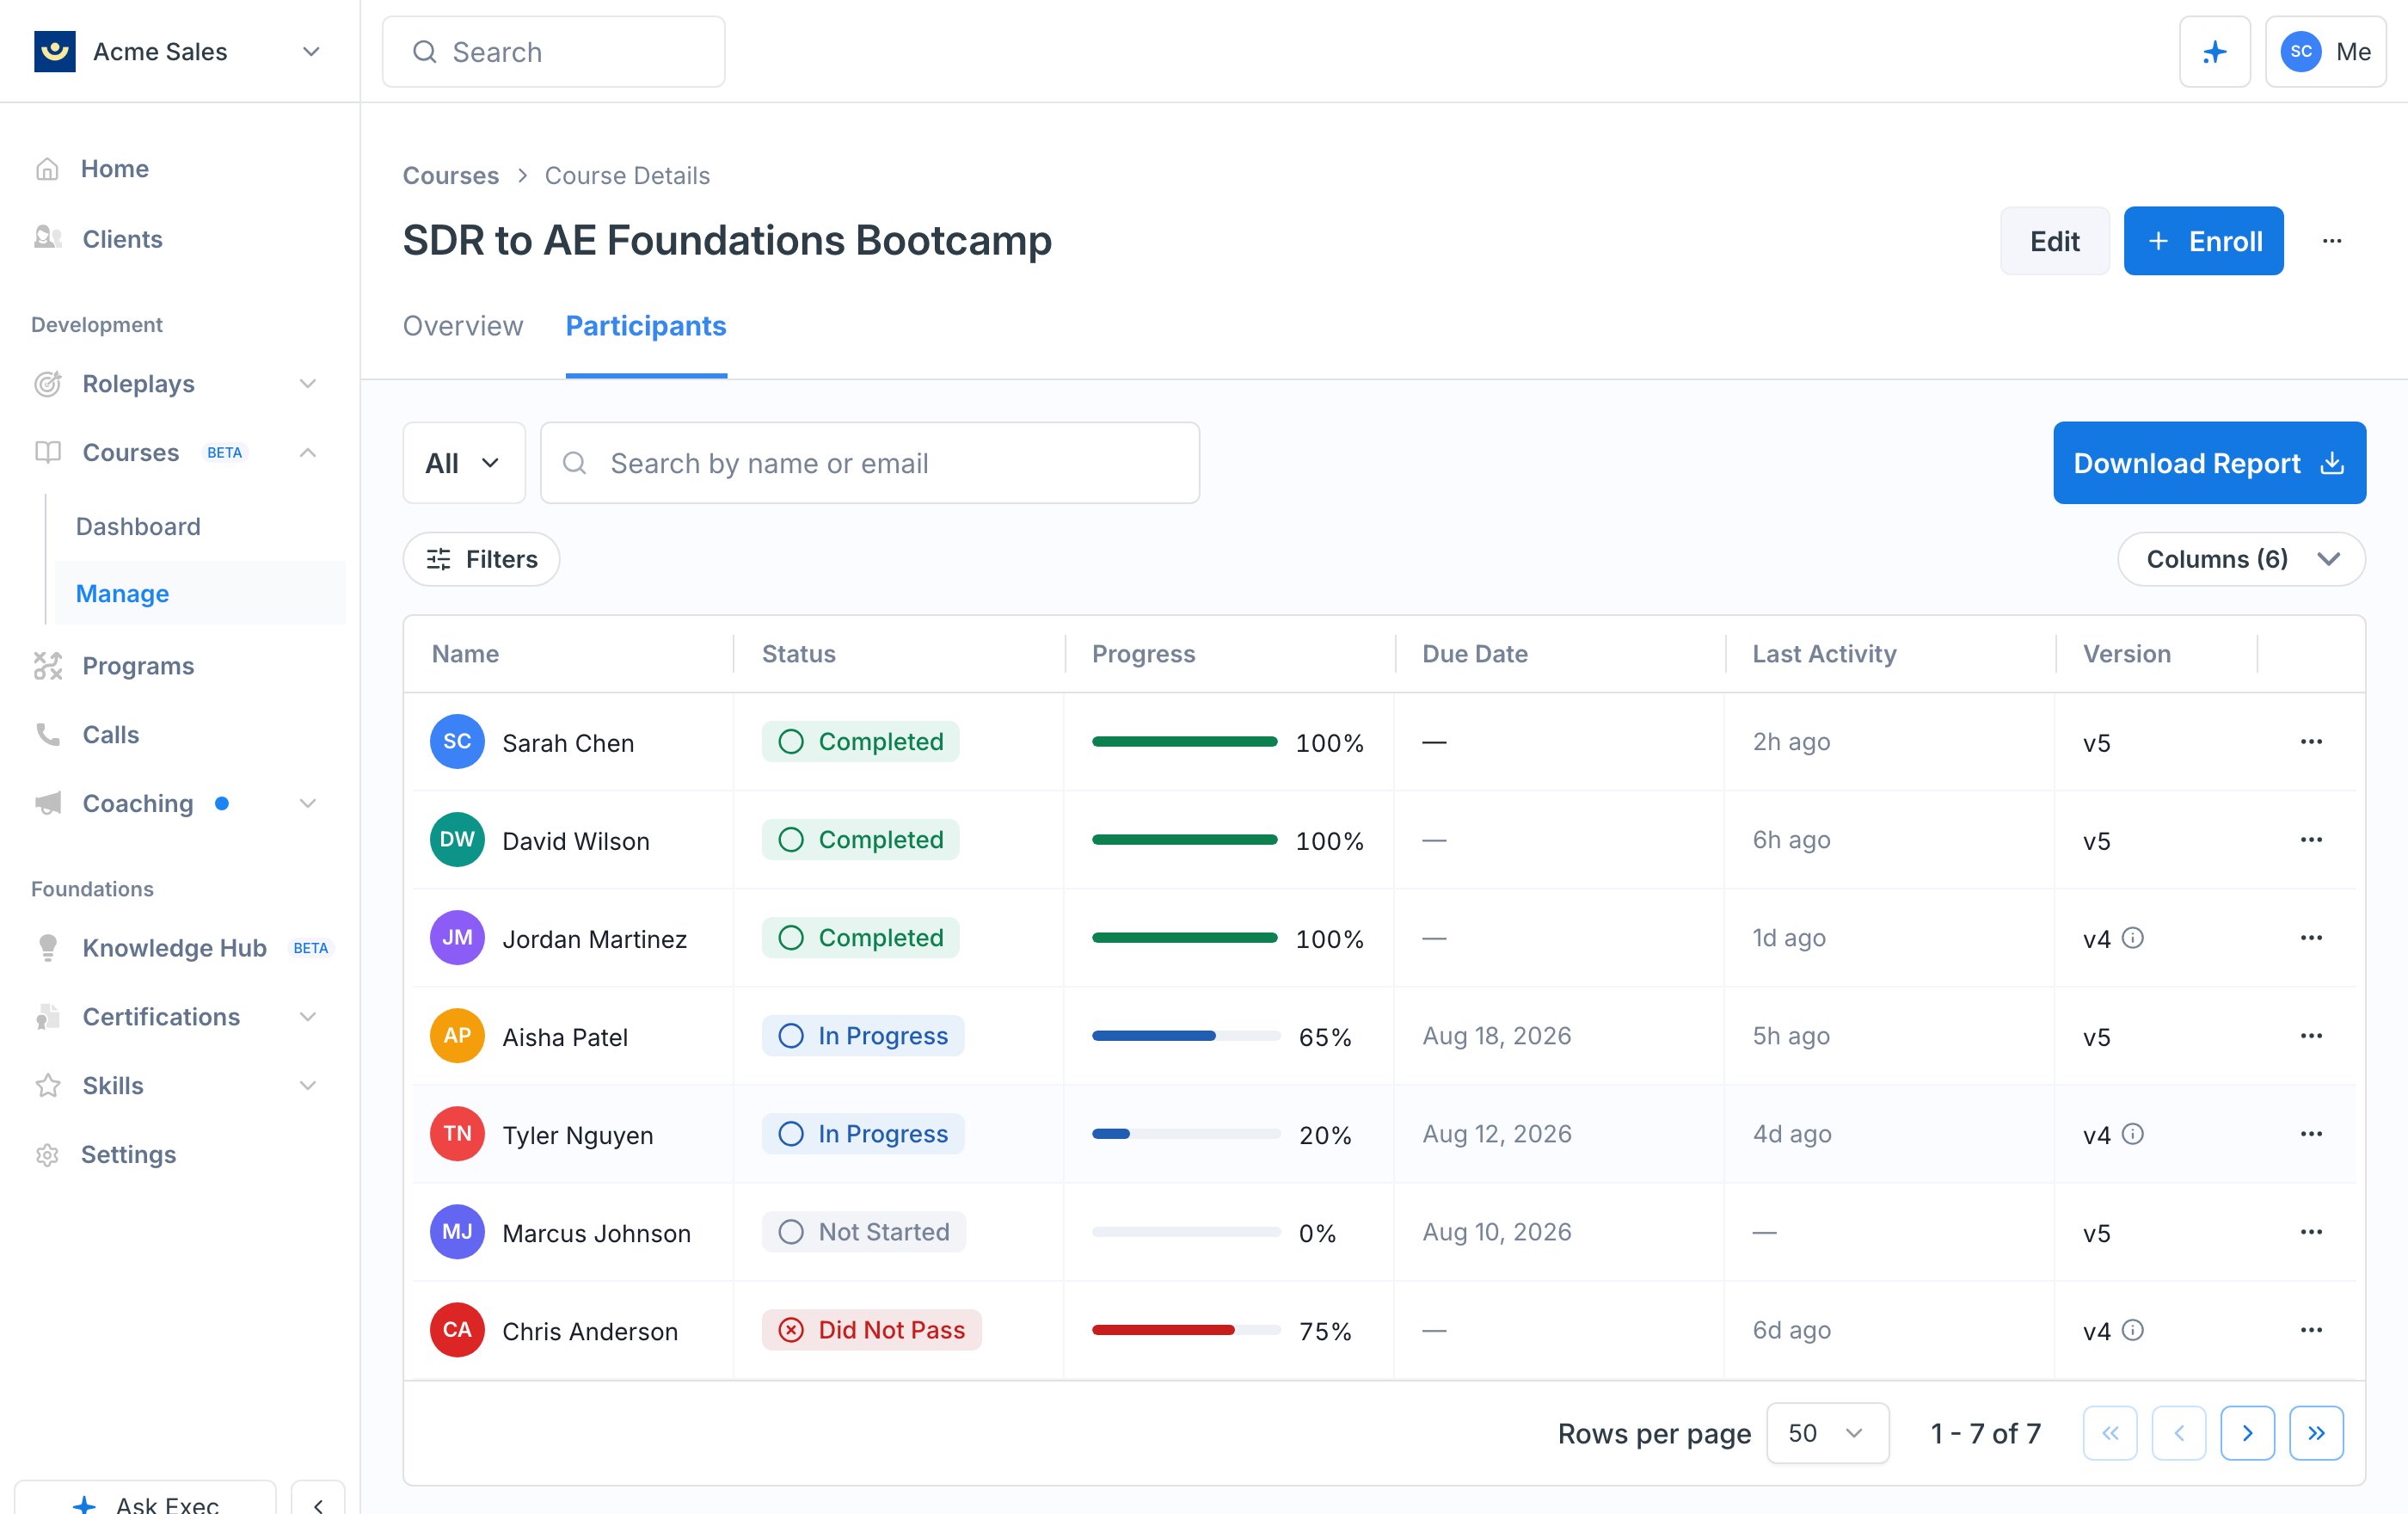
The Participants tab on the course dashboard has a Version column, hidden on initial load so the table stays lean. Turn it on from the columns toggle and each row shows the version that learner is pinned to, such asv5. When a learner’s pinned version is not the current published one, the cell carries an info icon noting that their results came from that older version rather than the latest.
Move Someone onto a Newer Version
Only Not Started enrollments move on their own. For everyone else:Version History
Every published version is kept in the version history, where you can review past versions and take two actions:- Restore re-publishes a copy of an old version as a new version. Restoring does not rewind the version number; it creates the next version with the old content.
- Discard draft throws away unpublished edits, returning the course to a clean Published state and clearing the Changed badge.
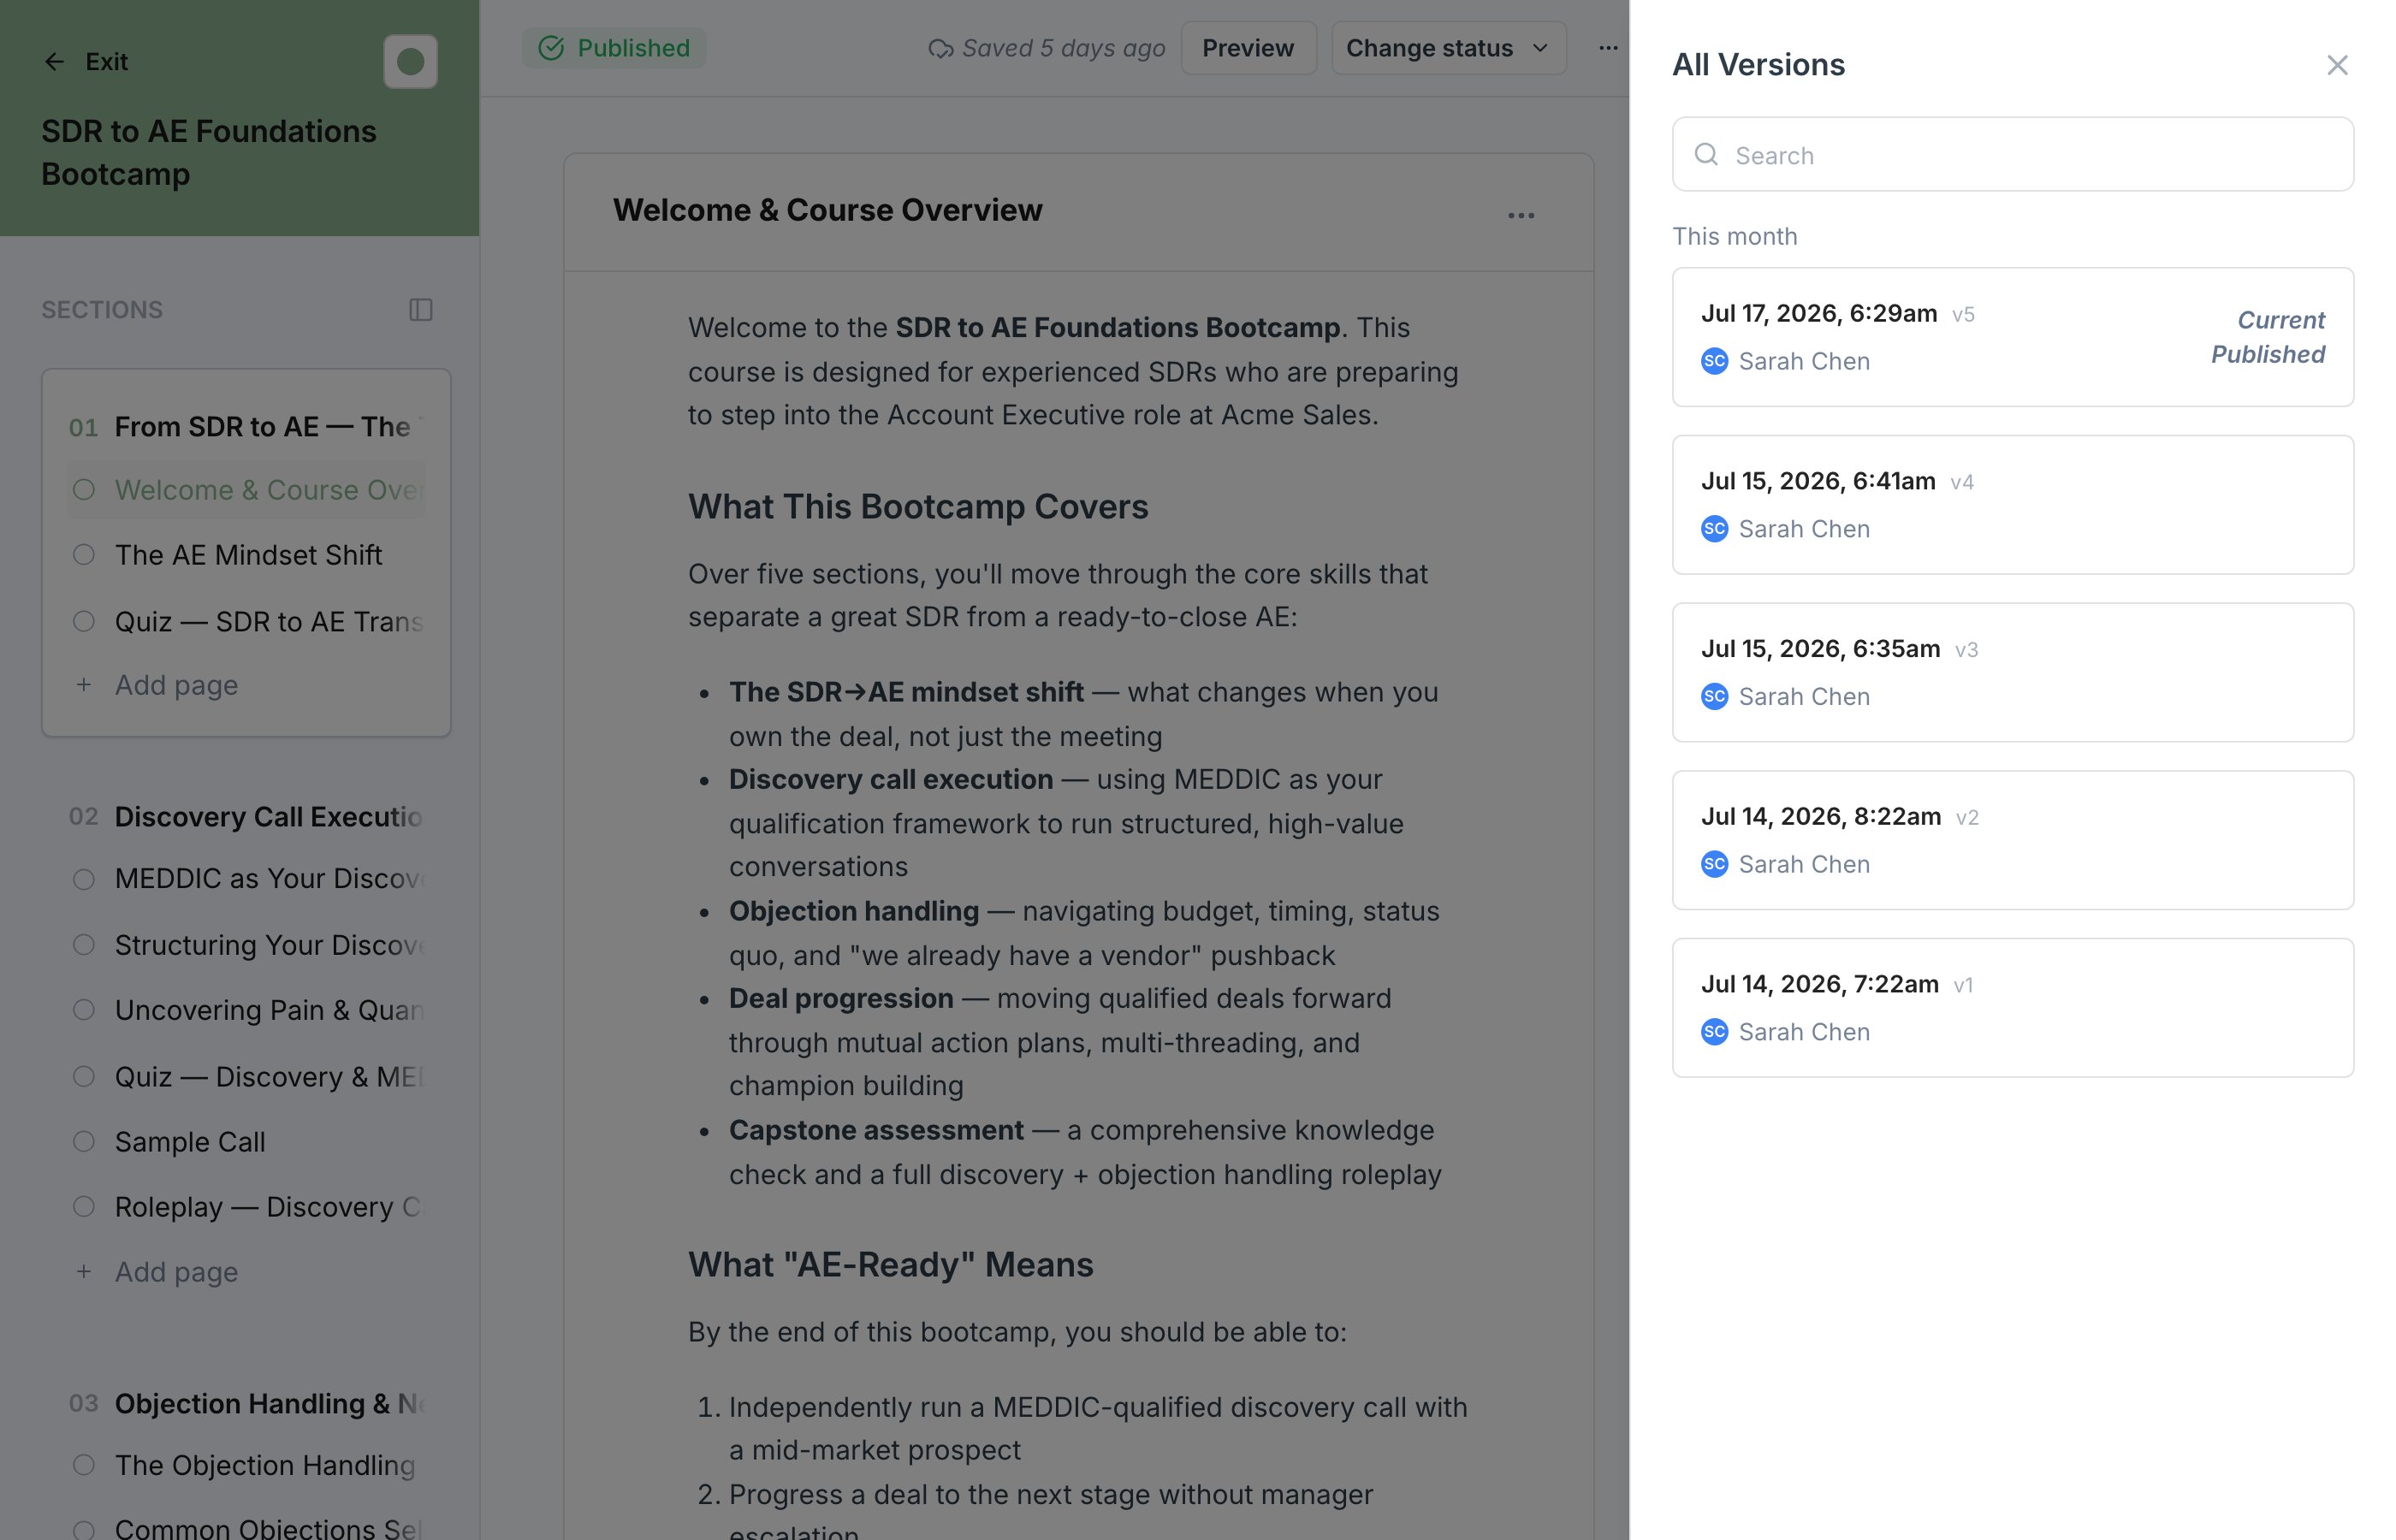
Because restore creates a new published version, the same enrollment rules apply: Not Started enrollments re-point to the restored version, while Active and Completed enrollments keep the version they are pinned to.
Archive a Course
Courses move through three statuses: Draft, Published, and Archived. Archive a course when it should no longer be available for new enrollments, and unarchive it if you need to bring it back. Archiving is a good fit for retired training you want to keep on record rather than delete.Archive Multiple Courses at Once
On the Manage Courses list you can archive or unarchive a batch of courses in one action. Select courses using the row checkboxes, hold Shift and click to select a range, or click and drag across the table to marquee-select. A floating action bar appears at the bottom of the page with Archive and Unarchive buttons and a count of what you selected. Archive and Unarchive only appear when your selection includes courses that can take that action, so a mixed selection of live and archived courses shows both buttons and each applies to the relevant subset. Clearing the selection or changing filters closes the action bar.Next Steps
Enroll Participants
List your published course in the catalog or assign it with deadlines.
Build Sections and Pages
Keep improving your draft in the course editor.