| If your LMS supports… | Use |
|---|---|
| LTI 1.3 Dynamic Registration | Dynamic registration |
| Manual LTI 1.3 platform configuration | Manual connection |
Open the LTI settings page
The page is divided into four sections:
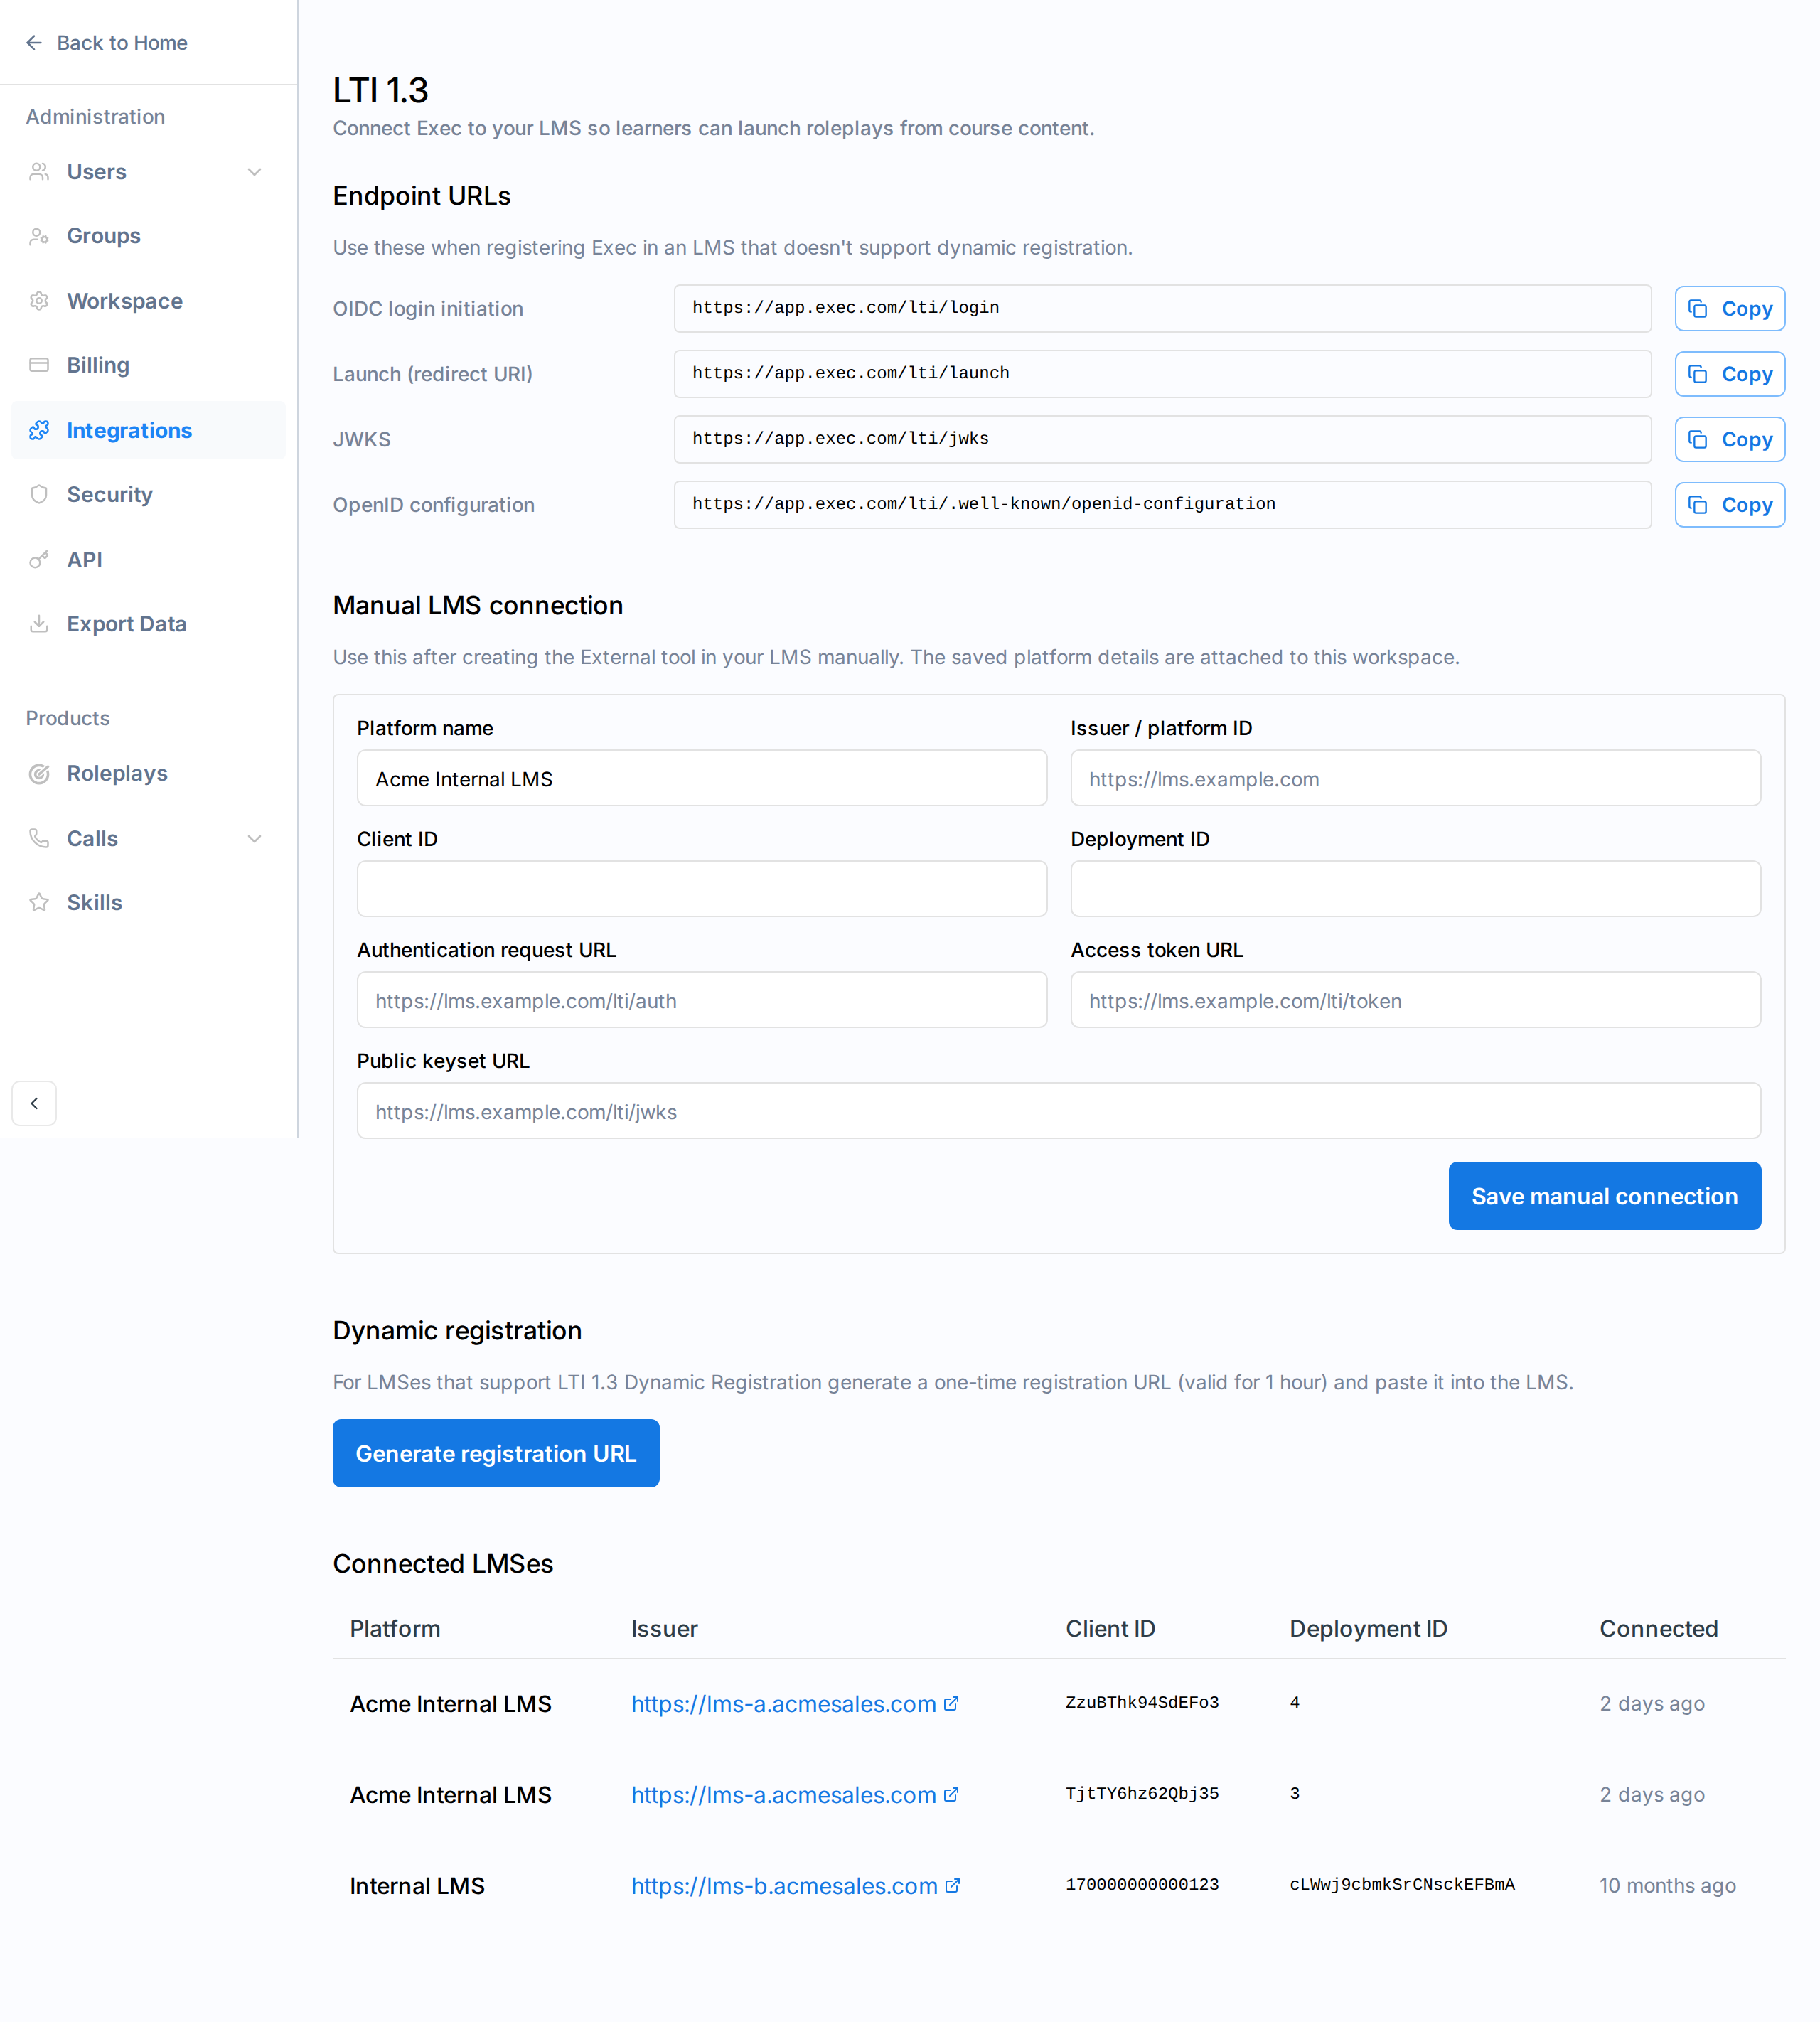
- Endpoint URLs — The four URLs your LMS needs when registering Exec as a tool.
- Manual LMS connection — A form for pasting platform details from LMSes that don’t support dynamic registration.
- Dynamic registration — A button that mints a one-time URL for LMSes that do.
- Connected LMSes — The list of platforms already wired up to this workspace.
Endpoint URLs
These four URLs uniquely identify Exec to your LMS. Every LTI 1.3 LMS asks for some subset of them when you register an external tool.| Endpoint | What it’s for |
|---|---|
| OIDC login initiation | Where the LMS sends learners to start the launch handshake. |
| Launch (redirect URI) | Where the LMS POSTs the signed launch token. |
| JWKS | Exec’s public keys, used by the LMS to verify our outbound requests (e.g., grade passback). |
| OpenID configuration | Discovery document. Some LMSes ask for this single URL and pull the others from it. |
These URLs are stable per environment. You only need to copy them once when registering Exec in your LMS.
Dynamic registration
For LMSes that support LTI 1.3 Dynamic Registration. The LMS opens a one-time URL we generate, exchanges configuration with Exec automatically, and the connection appears in Connected LMSes with no manual copy-paste.Generate a registration URL
On the LTI settings page, click Generate registration URL in the Dynamic registration section.Exec creates a signed URL valid for 1 hour and copies it to your clipboard. The URL is also displayed below the button so you can copy it again if needed.
Paste the URL into your LMS
In your LMS’s LTI 1.3 settings, find the field labelled “Dynamic Registration URL”, “Register from URL”, or similar, and paste the URL Exec generated. Submit the form.Your LMS will open Exec’s registration endpoint in a popup or new tab.
Manual connection
For LMSes that don’t support dynamic registration. You first create the External tool inside the LMS using Exec’s Endpoint URLs, then paste the platform details the LMS gives you back into Exec. This is a two-sided handshake:- In your LMS: create an External tool / LTI 1.3 platform, paste in Exec’s four endpoint URLs, save. The LMS gives you back its own issuer, client ID, deployment ID, authentication URL, token URL, and public keyset URL.
- In Exec: open the LTI settings page, paste those values into the Manual LMS connection form, and save.
Step 1 — Create the External tool in your LMS
The exact field names vary by LMS. Match them like this:| In your LMS | Paste from Exec’s Endpoint URLs |
|---|---|
| Tool URL / Launch URL / Target Link URI | Launch (redirect URI) |
| Initiate login URL / OIDC login URL | OIDC login initiation |
| Public keyset URL / JWKS URL (Exec side) | JWKS |
| Redirect URI(s) | Launch (redirect URI) |
| LTI version | LTI 1.3 |
- Configure the LMS to use a keyset URL (not an inline public key) so key rotation works automatically.
- Enable Assignment and Grade Services if you want grade passback — without it, scores won’t post back to the gradebook.
- If your LMS offers a launch container choice, use New window when the LMS is on a different domain than Exec.
Step 2 — Save the platform details in Exec
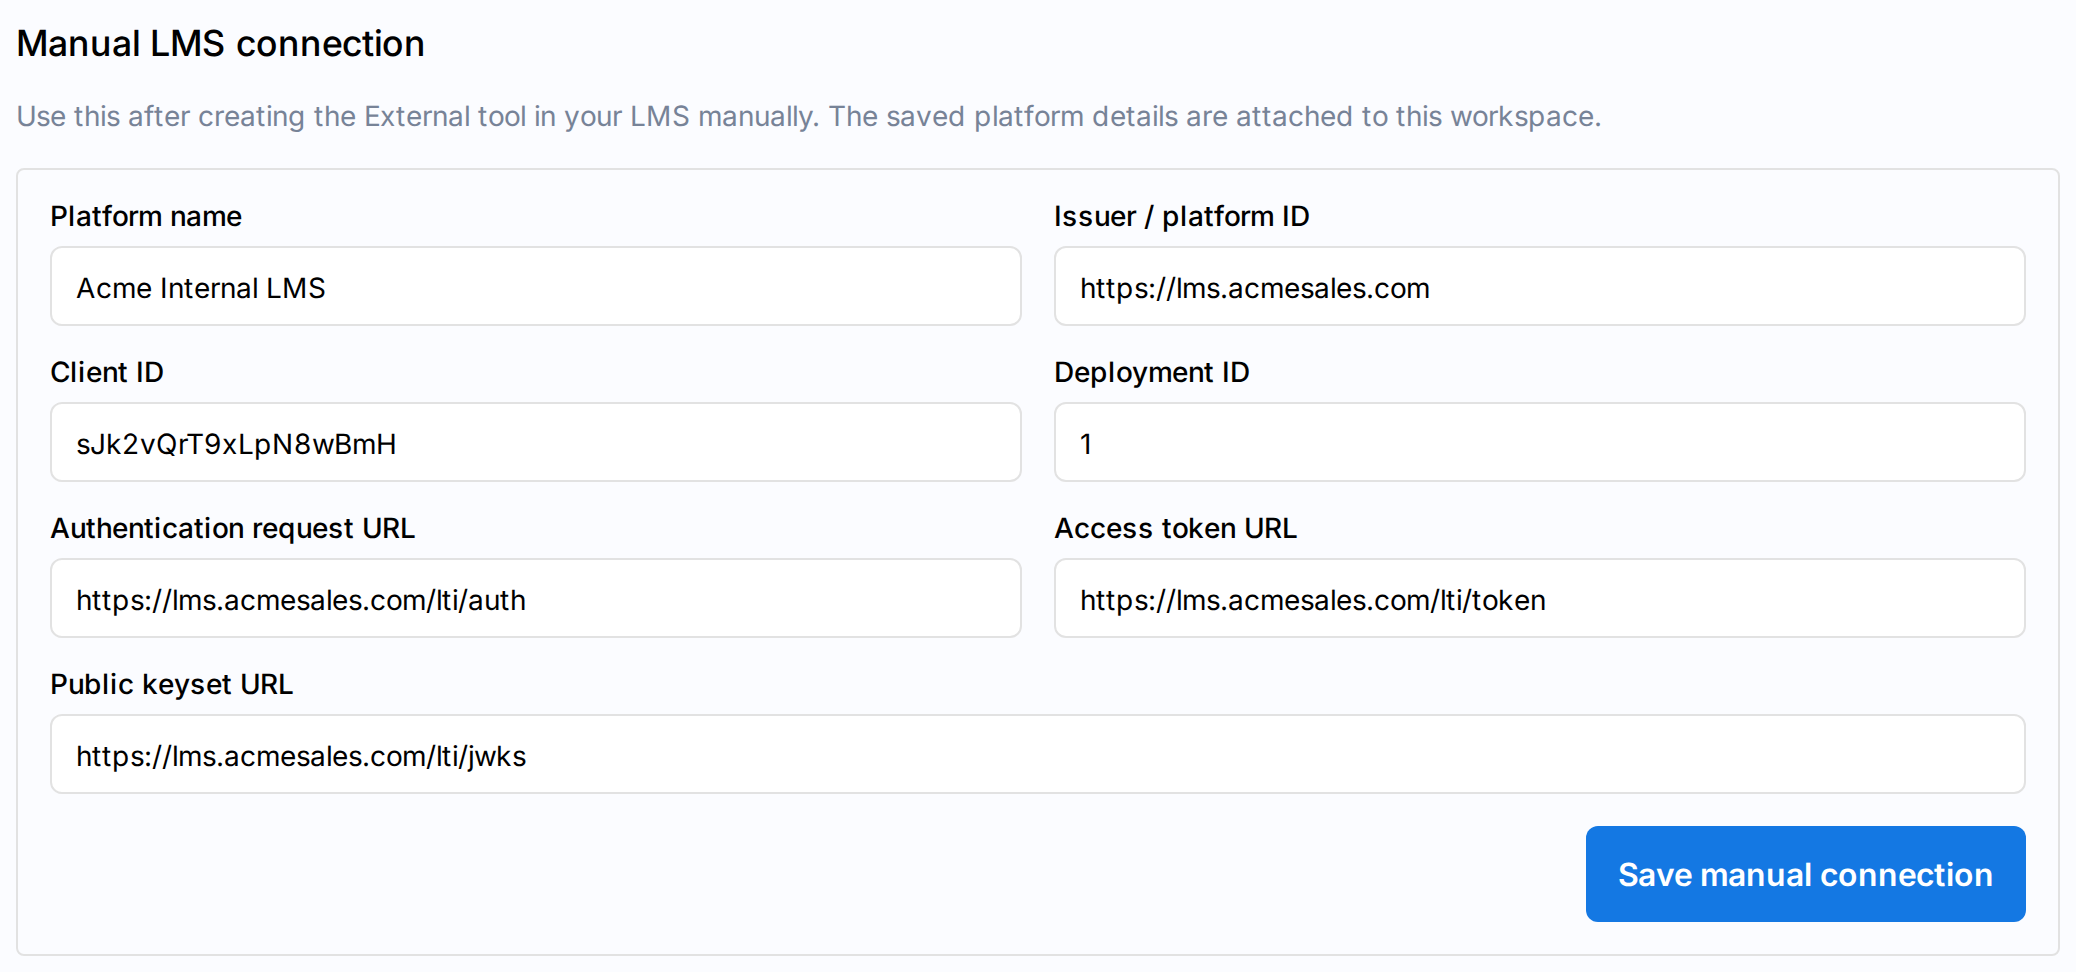
Fill in the form
Paste the values your LMS issued you:
- Platform name — A label for this connection (e.g., “Internal LMS” or your LMS product name).
- Issuer / platform ID — The LMS’s issuer URL, usually the site URL (e.g.,
https://lms.example.com). - Client ID — The client ID the LMS generated when you saved the External tool.
- Deployment ID — The deployment ID for this tool registration. Most LMSes give you a single deployment ID; if you have several, separate them with spaces or commas.
- Authentication request URL — Your LMS’s OIDC authorization endpoint.
- Access token URL — Your LMS’s token endpoint.
- Public keyset URL — Your LMS’s JWKS URL (where Exec fetches your LMS’s public keys).
Connected LMSes
Once a connection is saved (manual or dynamic), it appears in the Connected LMSes table at the bottom of the page.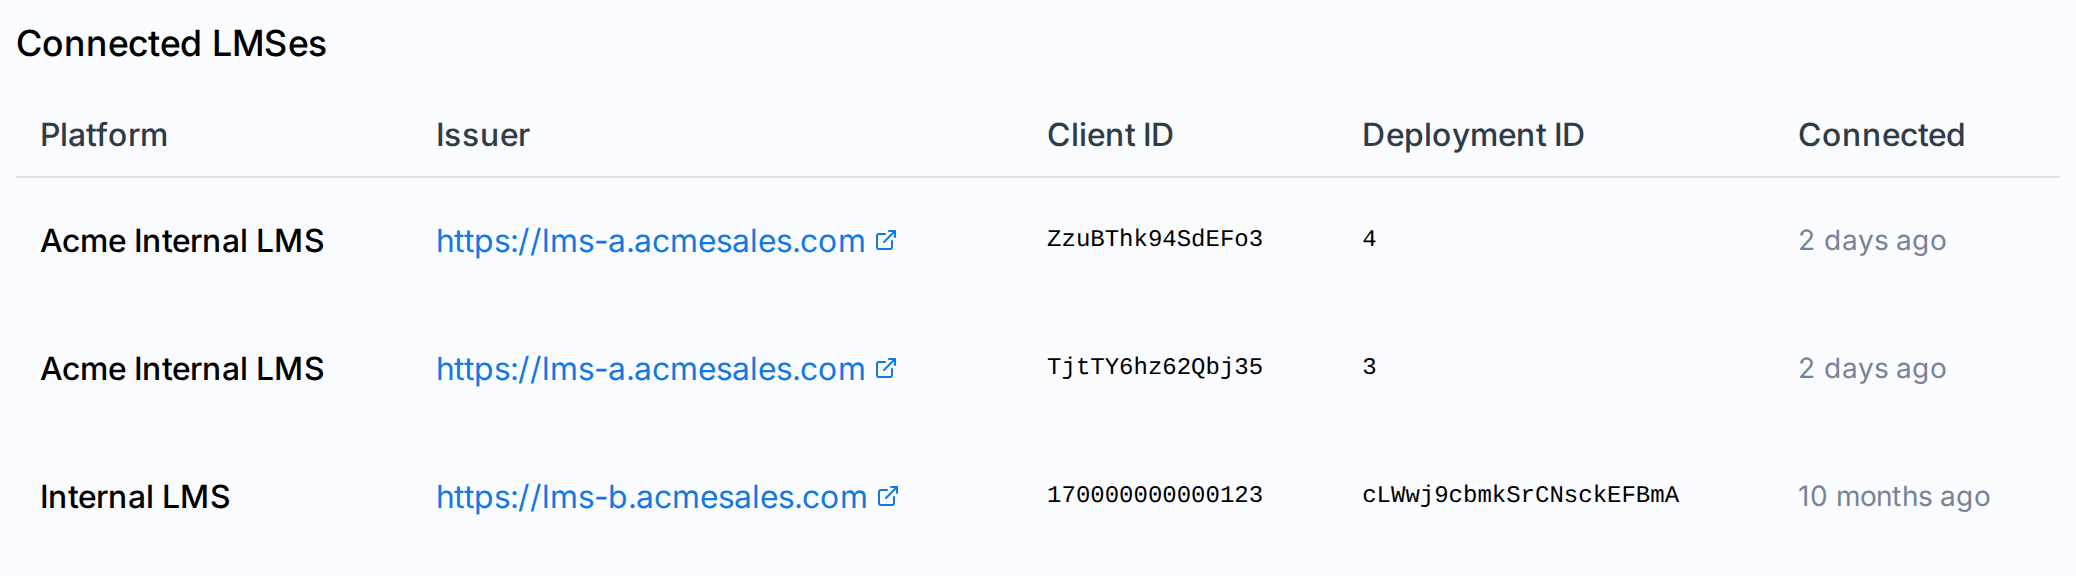
| Column | What it shows |
|---|---|
| Platform | Display name of the LMS. |
| Issuer | Issuer URL — links out to the LMS. |
| Client ID | Identifier the LMS issued for Exec as a tool. |
| Deployment ID | Per-tool deployment identifier. |
| Connected | When this connection was created (relative time). |