> ## Documentation Index
> Fetch the complete documentation index at: https://docs.exec.com/llms.txt
> Use this file to discover all available pages before exploring further.
# Understand the Settings Tab
> Configure workspace settings including users, groups, billing, integrations, and more
The Settings area is where workspace admins and owners manage everything about the workspace: users and seats, groups, profile fields, billing, integrations, security, data exports, and the controls for each product (Roleplays, Calls, Skills, and Rubrics).
## Video walkthrough
The walkthrough below mirrors the video, tab by tab. Use it as a reference while you set up your workspace.
Only [workspace admins](/platform/admin-capabilities) and workspace owners can access Settings. If you don't see these options, you may not have the required permissions.
***
## Accessing Settings
Click **Settings** in the bottom left of the left-hand navigation on your Exec workspace. This opens the Settings area and lands you on the **Users** page by default.
***
## Users
The Users page is the hub for managing workspace members.
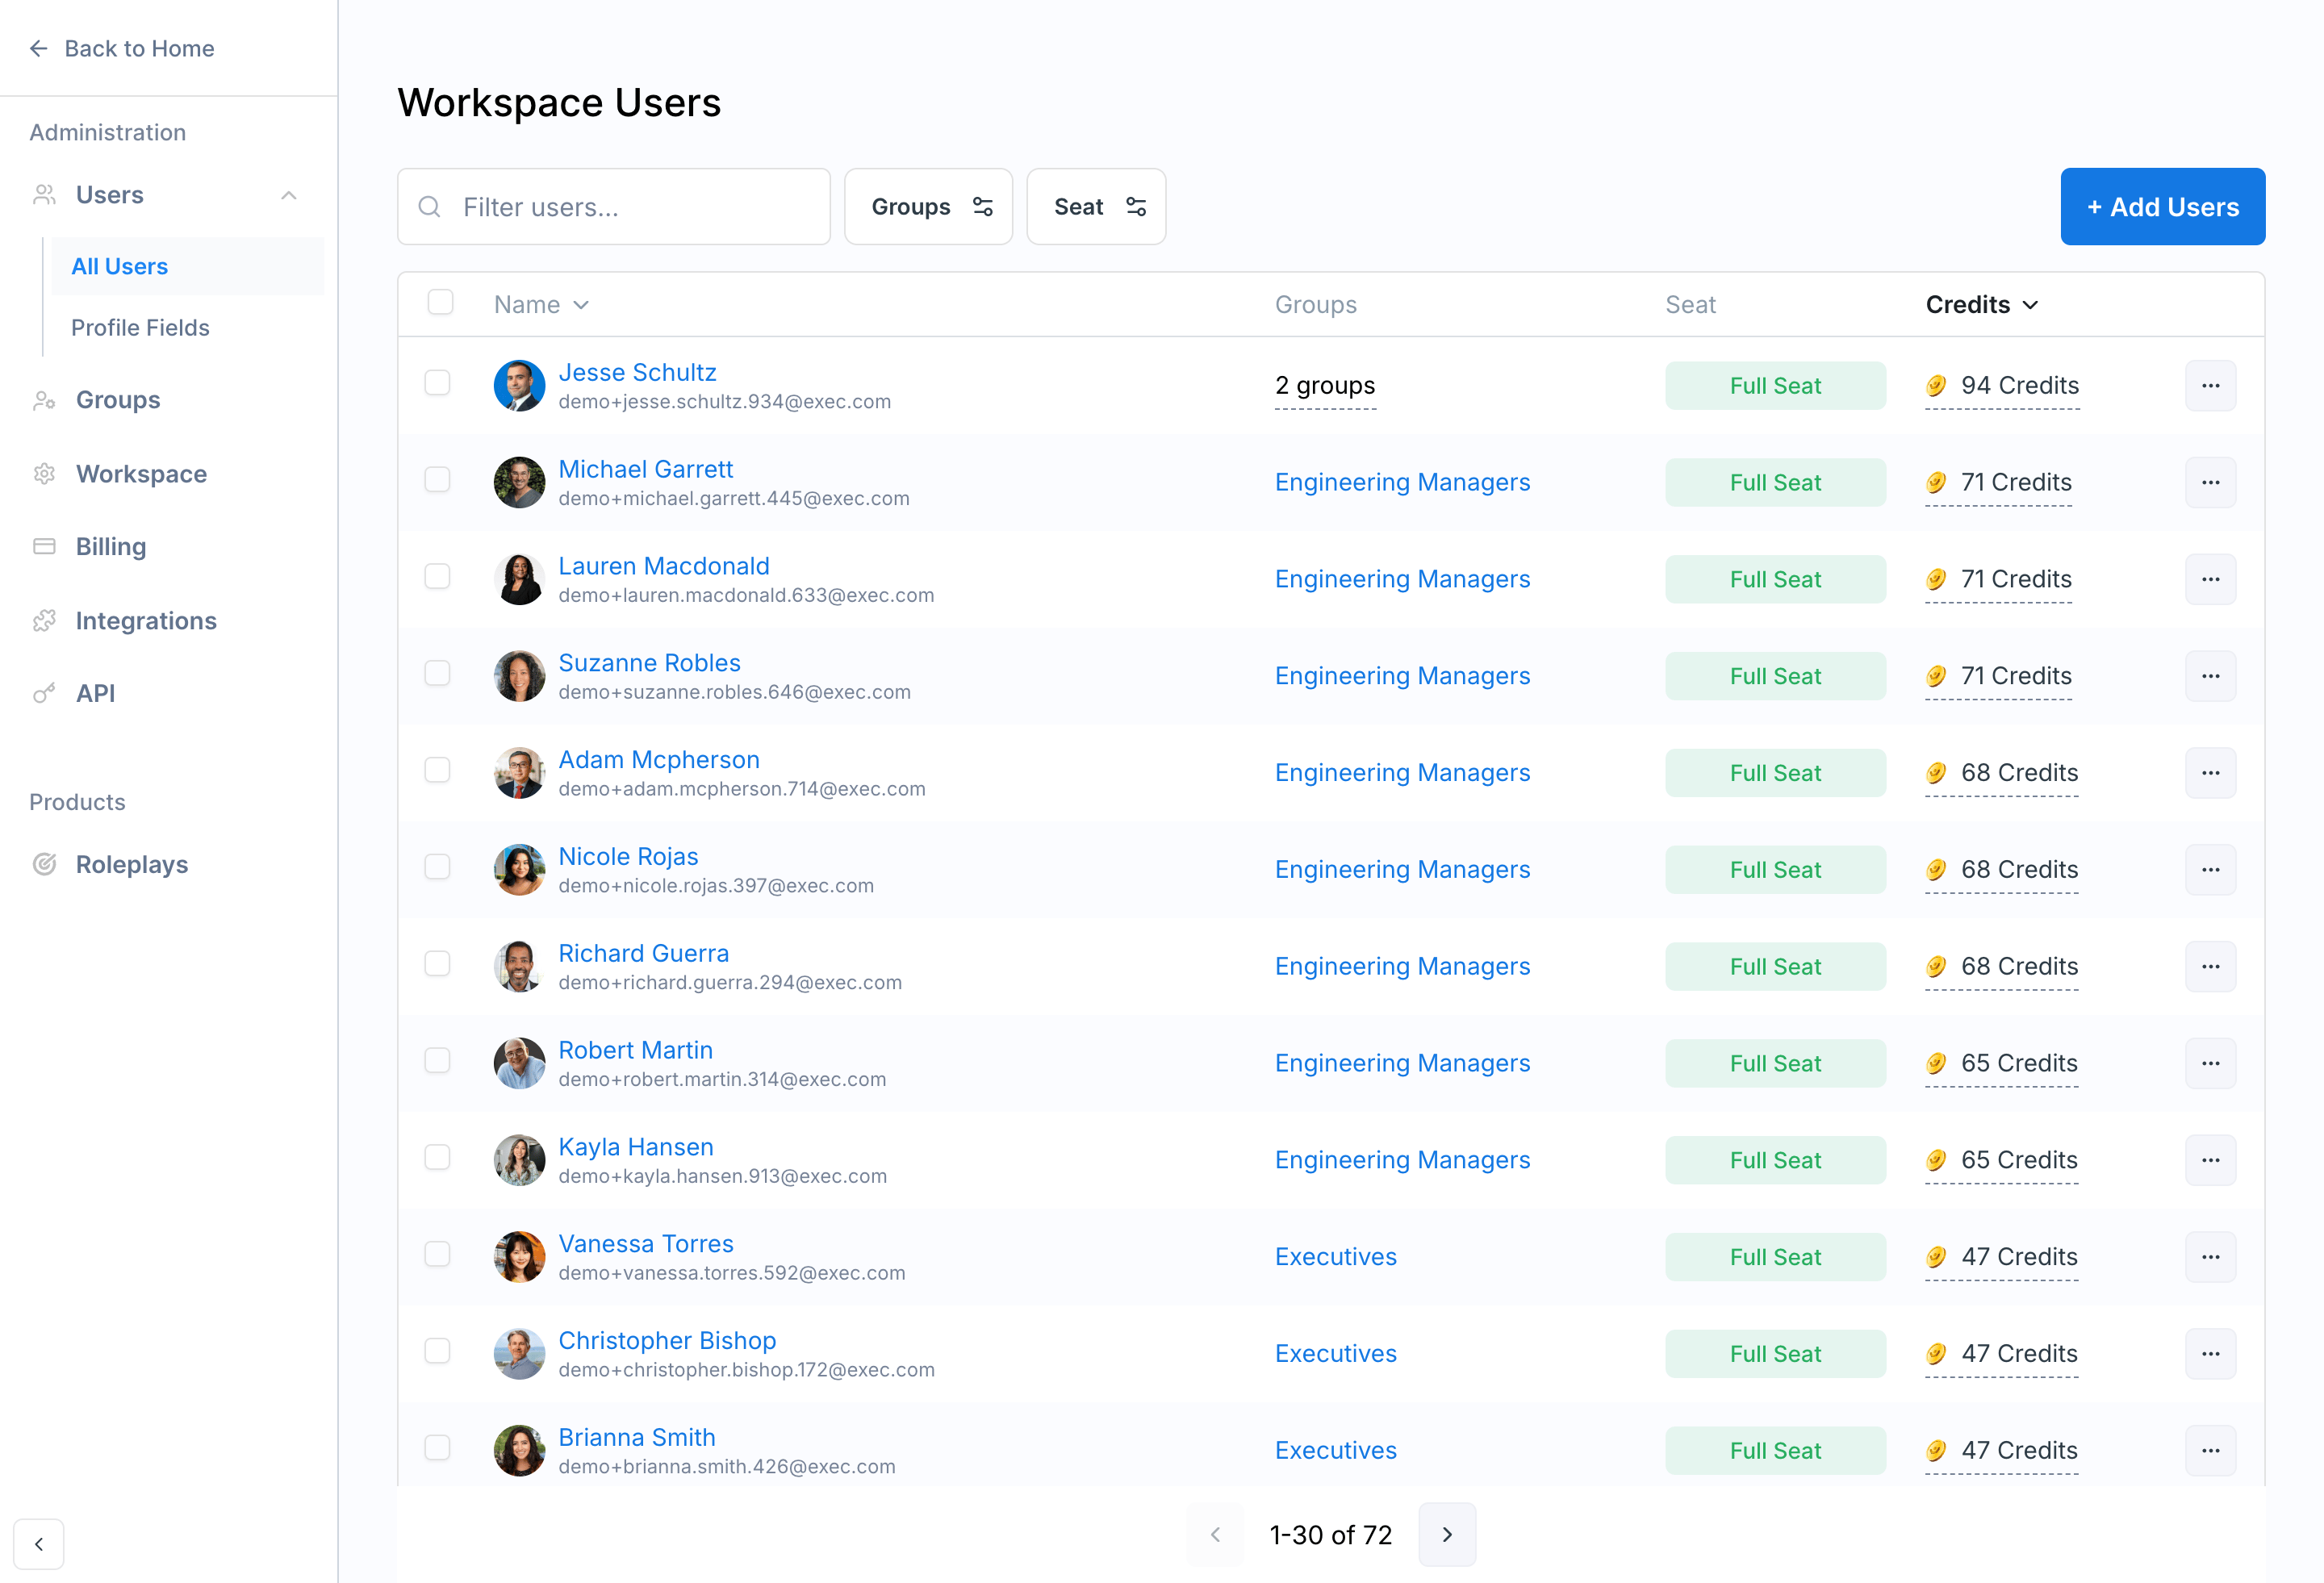 To invite people, click **+ Add Users**. In the **Add Users** panel you can:
* **Invite by email** - paste a list of emails separated by commas. You can copy a column of addresses straight out of a Google Sheet or Excel file to add people in bulk, or add them one at a time. (Exec uses paste-to-invite, not a CSV file upload.)
* **Assign to groups** - drop invitees into one or more [groups](#groups) as you invite them.
* **Set the seat type** - choose a **Basic Seat** or a **Full Seat**. Assign a **Full Seat** to anyone who needs access to roleplays. See [Basic Seats vs. Full Seats](/platform/basic-full-seats) for the difference.
* **Schedule the invitation** - send invites now, or schedule them for a future date (for example, a new hire's start date or a program launch). When a date is set, the button reads **Send Scheduled Invitations**.
* **Grant credits** and **assign coaches** - if coaching is enabled in your workspace.
Once a member exists, the row's **"..." menu** lets you **Transfer Credits**, **Assign** or **Revoke Seat**, **Set Groups**, **Convert to Admin** / **Convert to Member**, or **Remove User**. Bulk actions across selected users (Set Groups, Assign Seat, Modify Credits, Remove) and a **Download CSV** export are available from the top of the table.
See [Add a New User](/platform/add-user) and [Remove a User](/platform/remove-user) for the full flows.
***
## Groups
Groups organize members into teams or service areas (for example, "SDR Outbound" in a sales workspace).
To invite people, click **+ Add Users**. In the **Add Users** panel you can:
* **Invite by email** - paste a list of emails separated by commas. You can copy a column of addresses straight out of a Google Sheet or Excel file to add people in bulk, or add them one at a time. (Exec uses paste-to-invite, not a CSV file upload.)
* **Assign to groups** - drop invitees into one or more [groups](#groups) as you invite them.
* **Set the seat type** - choose a **Basic Seat** or a **Full Seat**. Assign a **Full Seat** to anyone who needs access to roleplays. See [Basic Seats vs. Full Seats](/platform/basic-full-seats) for the difference.
* **Schedule the invitation** - send invites now, or schedule them for a future date (for example, a new hire's start date or a program launch). When a date is set, the button reads **Send Scheduled Invitations**.
* **Grant credits** and **assign coaches** - if coaching is enabled in your workspace.
Once a member exists, the row's **"..." menu** lets you **Transfer Credits**, **Assign** or **Revoke Seat**, **Set Groups**, **Convert to Admin** / **Convert to Member**, or **Remove User**. Bulk actions across selected users (Set Groups, Assign Seat, Modify Credits, Remove) and a **Download CSV** export are available from the top of the table.
See [Add a New User](/platform/add-user) and [Remove a User](/platform/remove-user) for the full flows.
***
## Groups
Groups organize members into teams or service areas (for example, "SDR Outbound" in a sales workspace).
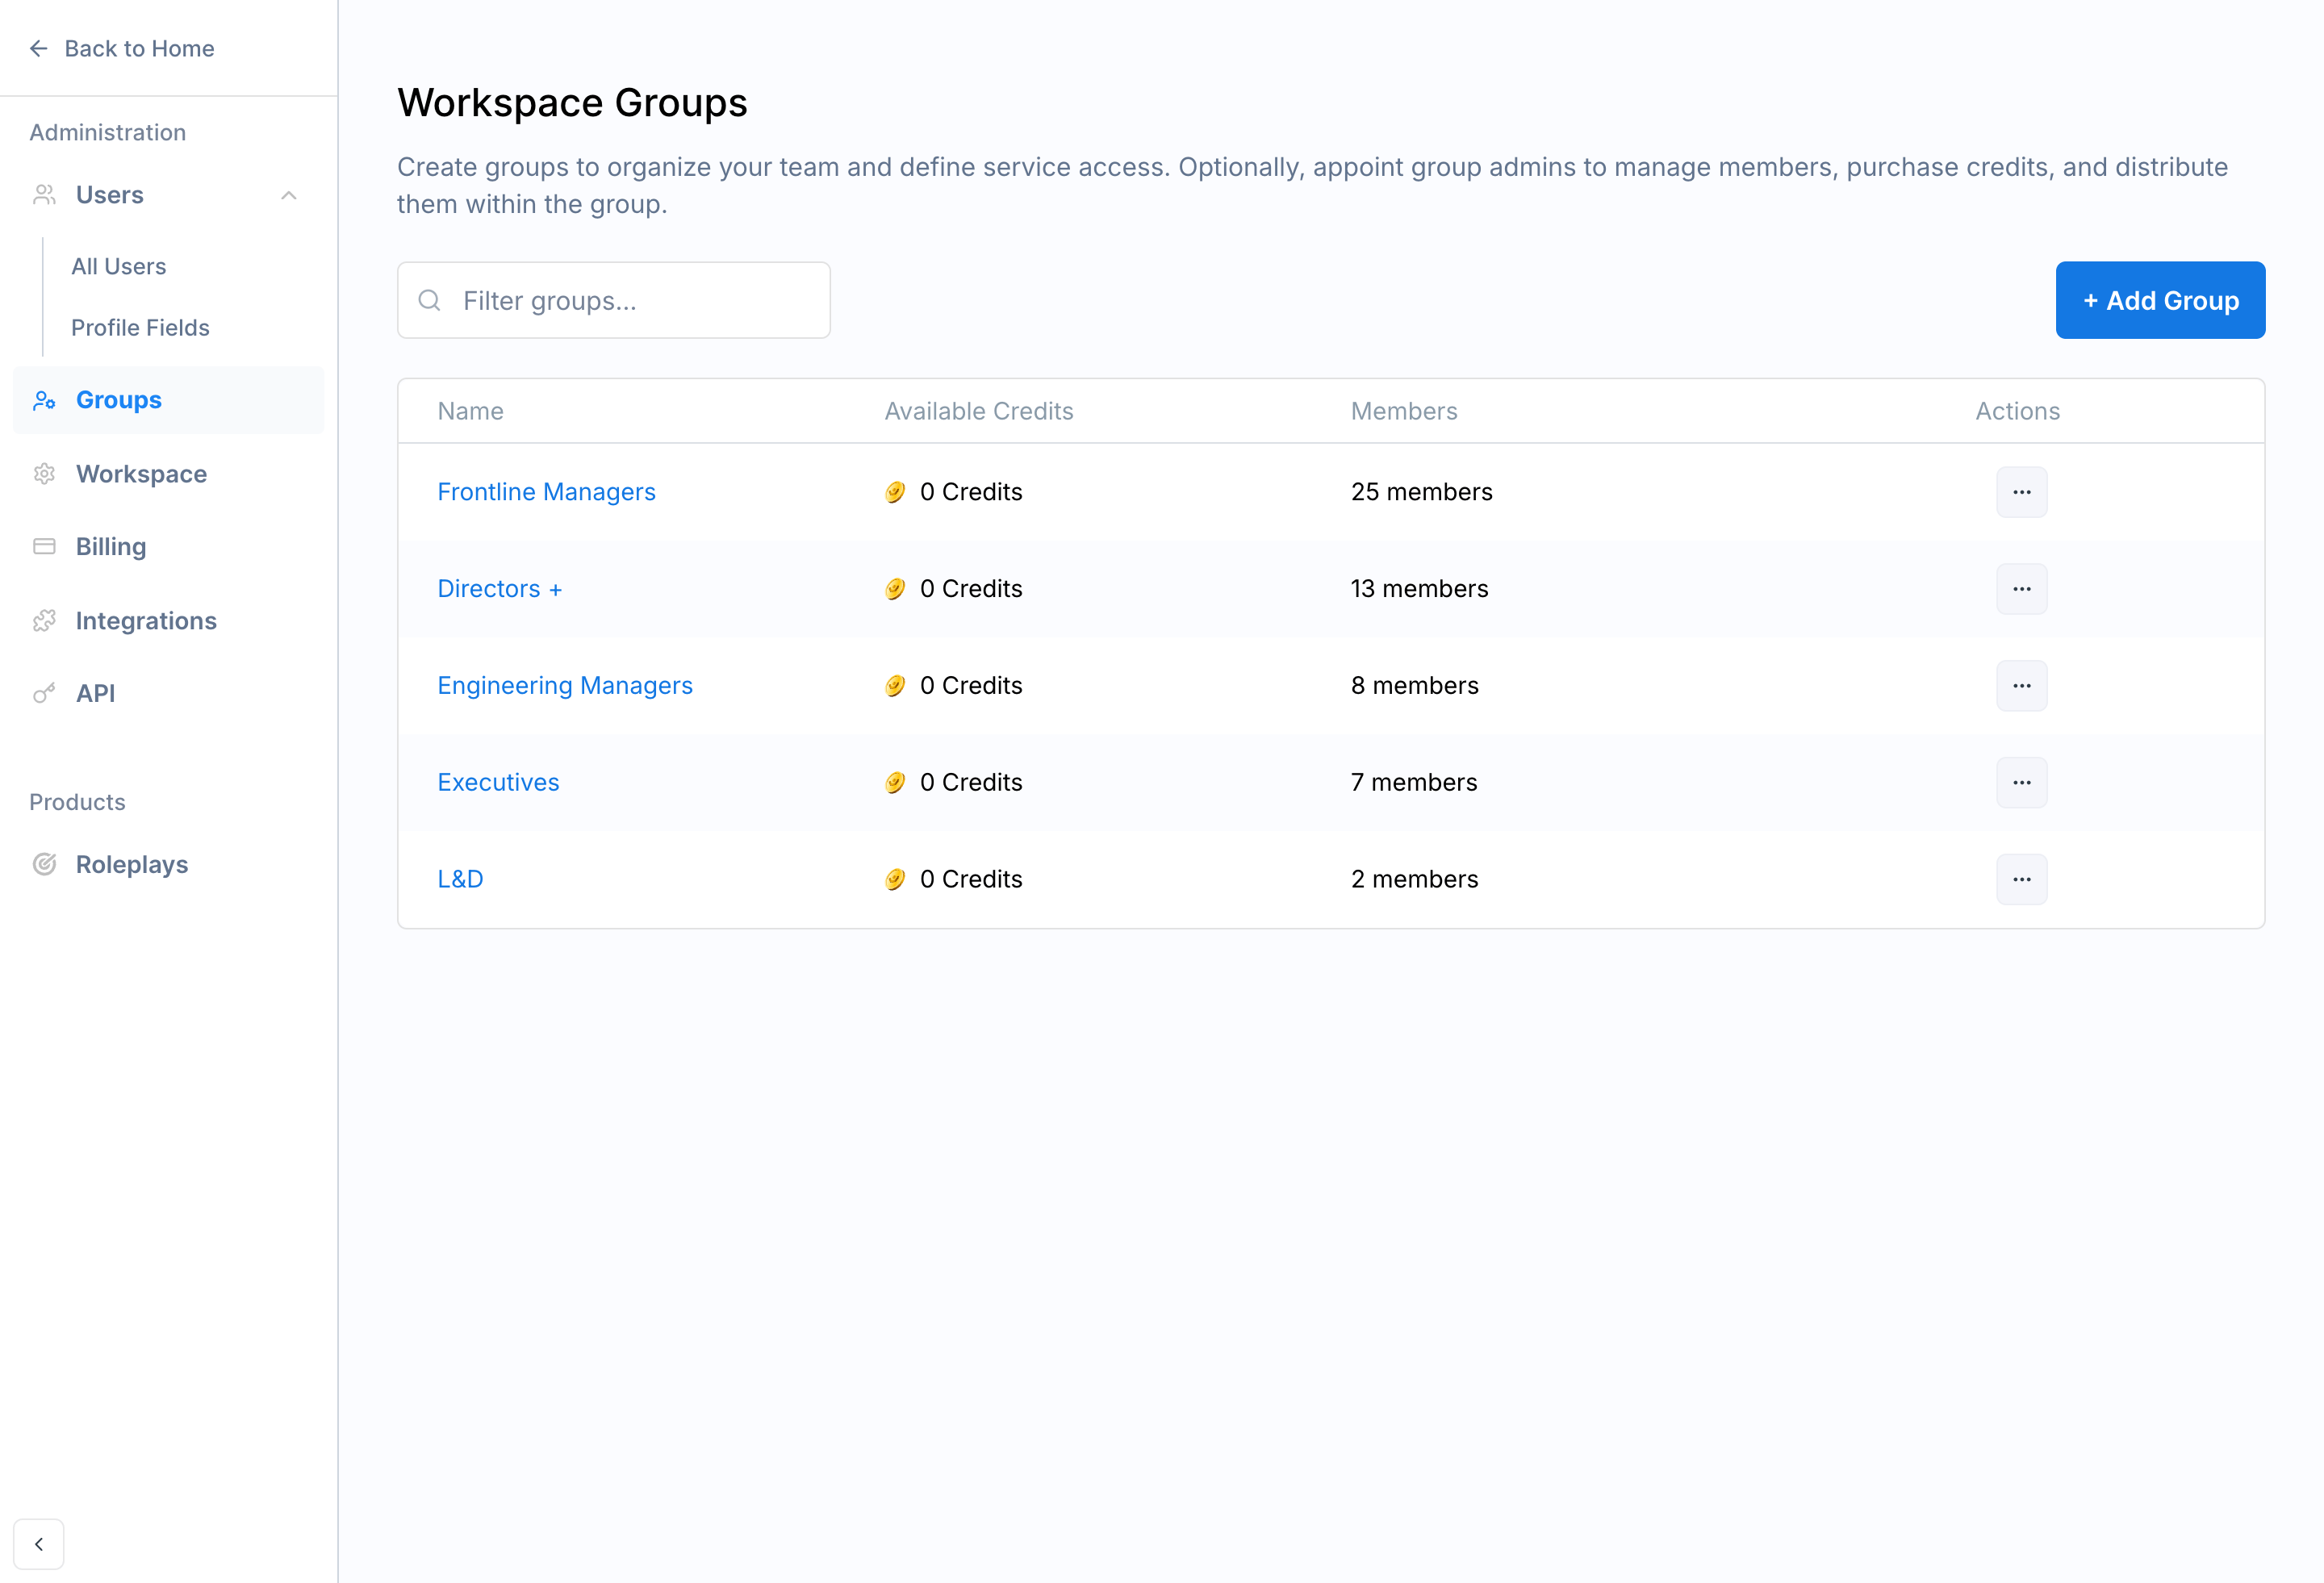 From here you can:
* **Download CSV** of all groups and their members
* **+ Add Group** - name the group and add members
* Open any group to **Make Group Admin** or **Revoke Admin Rights** for a member
A **group admin** has admin powers scoped to their own group only. They can view every member of that group, see all of their sessions and activity, and manage them as an admin would, without seeing other groups or anyone outside their group. See [Admin Capabilities](/platform/admin-capabilities) for the full breakdown of workspace admin vs. group admin.
***
## Profile Fields
Profile fields are custom attributes attached to every user's account, such as **Segment**, **Industry**, or **Department**.
Create a field (a **Dropdown** with options, or a free **Text** field) and it appears on each user's profile, which they can fill in from the top-right menu under **Account**. For example, a user might set their Segment to "Enterprise" and their Industry to "Healthcare."
Profile fields power [conditional context](/roleplays/conditional-context) in roleplays: a scenario can read a user's profile field and adjust the character's behavior accordingly (for example, behaving differently for an enterprise rep vs. an SMB rep). This is optional and used by a subset of workspaces. To deep dive on using them in scenarios, see the [Advanced Roleplay Building](/roleplays/conditional-context) walkthrough.
***
## Workspace
General workspace-level settings.
From here you can:
* **Download CSV** of all groups and their members
* **+ Add Group** - name the group and add members
* Open any group to **Make Group Admin** or **Revoke Admin Rights** for a member
A **group admin** has admin powers scoped to their own group only. They can view every member of that group, see all of their sessions and activity, and manage them as an admin would, without seeing other groups or anyone outside their group. See [Admin Capabilities](/platform/admin-capabilities) for the full breakdown of workspace admin vs. group admin.
***
## Profile Fields
Profile fields are custom attributes attached to every user's account, such as **Segment**, **Industry**, or **Department**.
Create a field (a **Dropdown** with options, or a free **Text** field) and it appears on each user's profile, which they can fill in from the top-right menu under **Account**. For example, a user might set their Segment to "Enterprise" and their Industry to "Healthcare."
Profile fields power [conditional context](/roleplays/conditional-context) in roleplays: a scenario can read a user's profile field and adjust the character's behavior accordingly (for example, behaving differently for an enterprise rep vs. an SMB rep). This is optional and used by a subset of workspaces. To deep dive on using them in scenarios, see the [Advanced Roleplay Building](/roleplays/conditional-context) walkthrough.
***
## Workspace
General workspace-level settings.
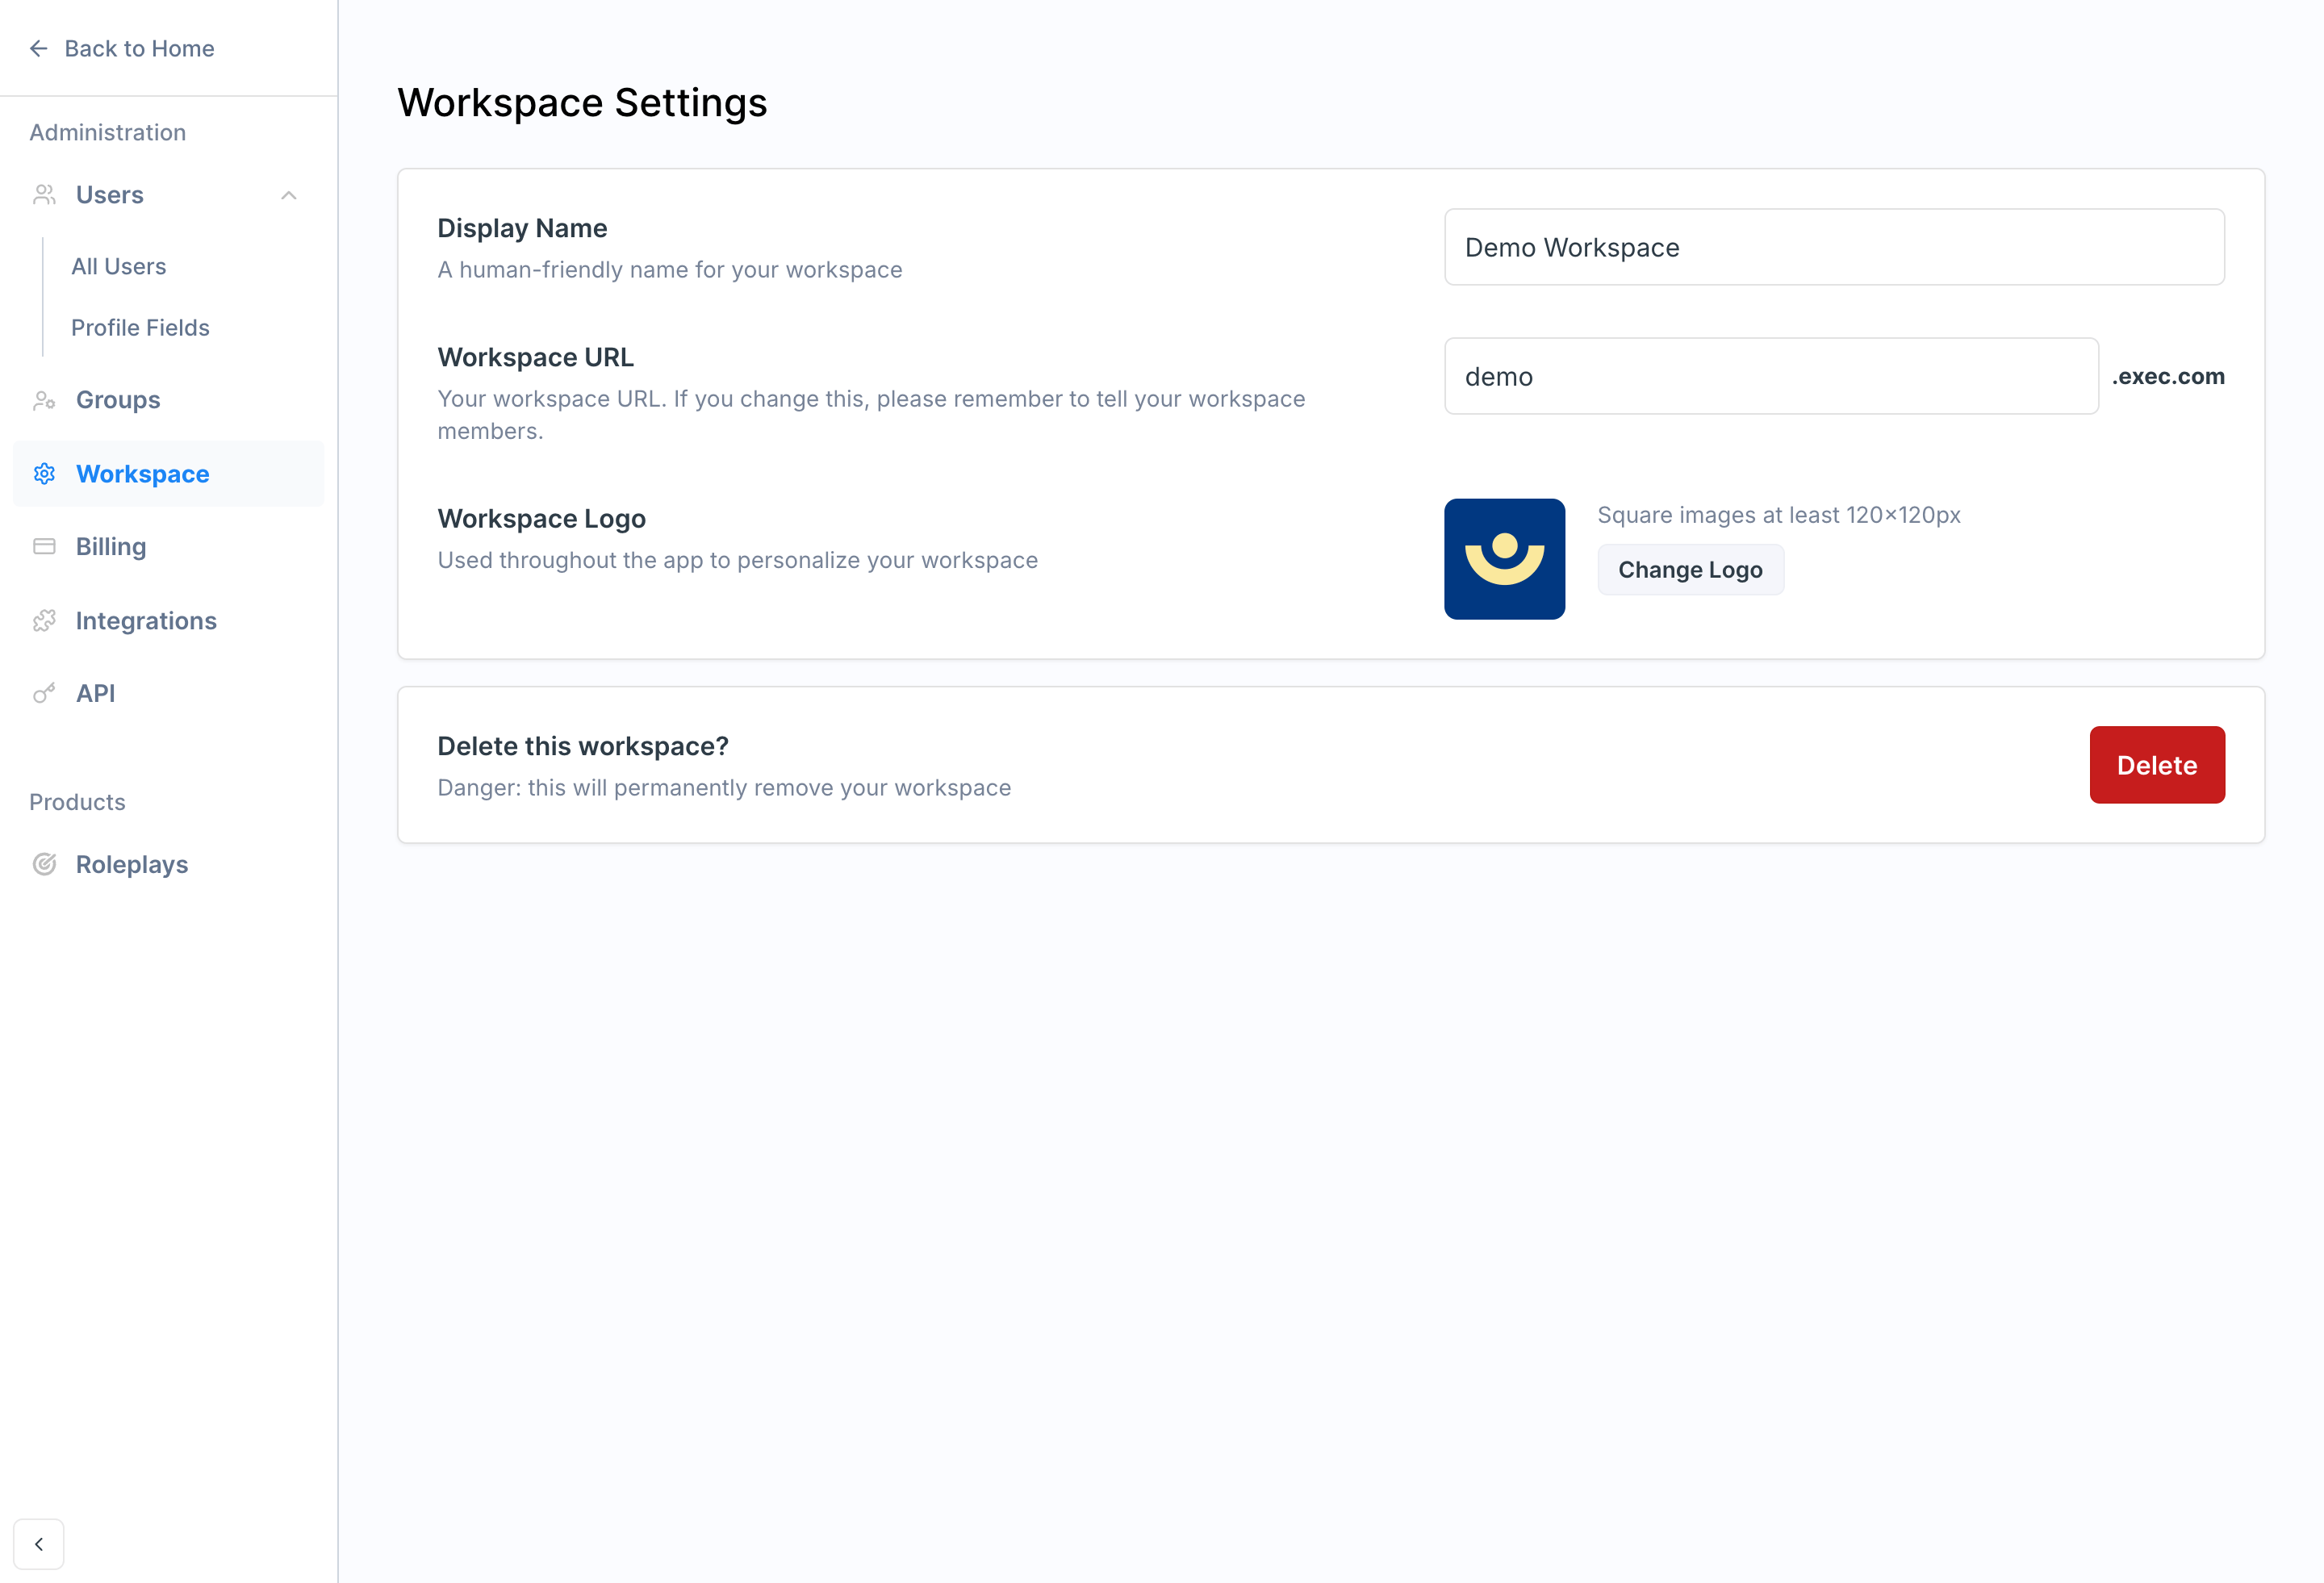 Here you can update your workspace's:
* **Display Name** - a human-friendly name for your workspace
* **Workspace URL** - if you change this, let your members know, since their sign-in link changes
* **Workspace Logo** - used throughout the app to personalize the experience
This page also contains **Delete Workspace**. This is irreversible and removes all workspace data. Avoid it unless you are certain.
***
## Billing
An overview of your plan and seat allocation.
Here you can update your workspace's:
* **Display Name** - a human-friendly name for your workspace
* **Workspace URL** - if you change this, let your members know, since their sign-in link changes
* **Workspace Logo** - used throughout the app to personalize the experience
This page also contains **Delete Workspace**. This is irreversible and removes all workspace data. Avoid it unless you are certain.
***
## Billing
An overview of your plan and seat allocation.
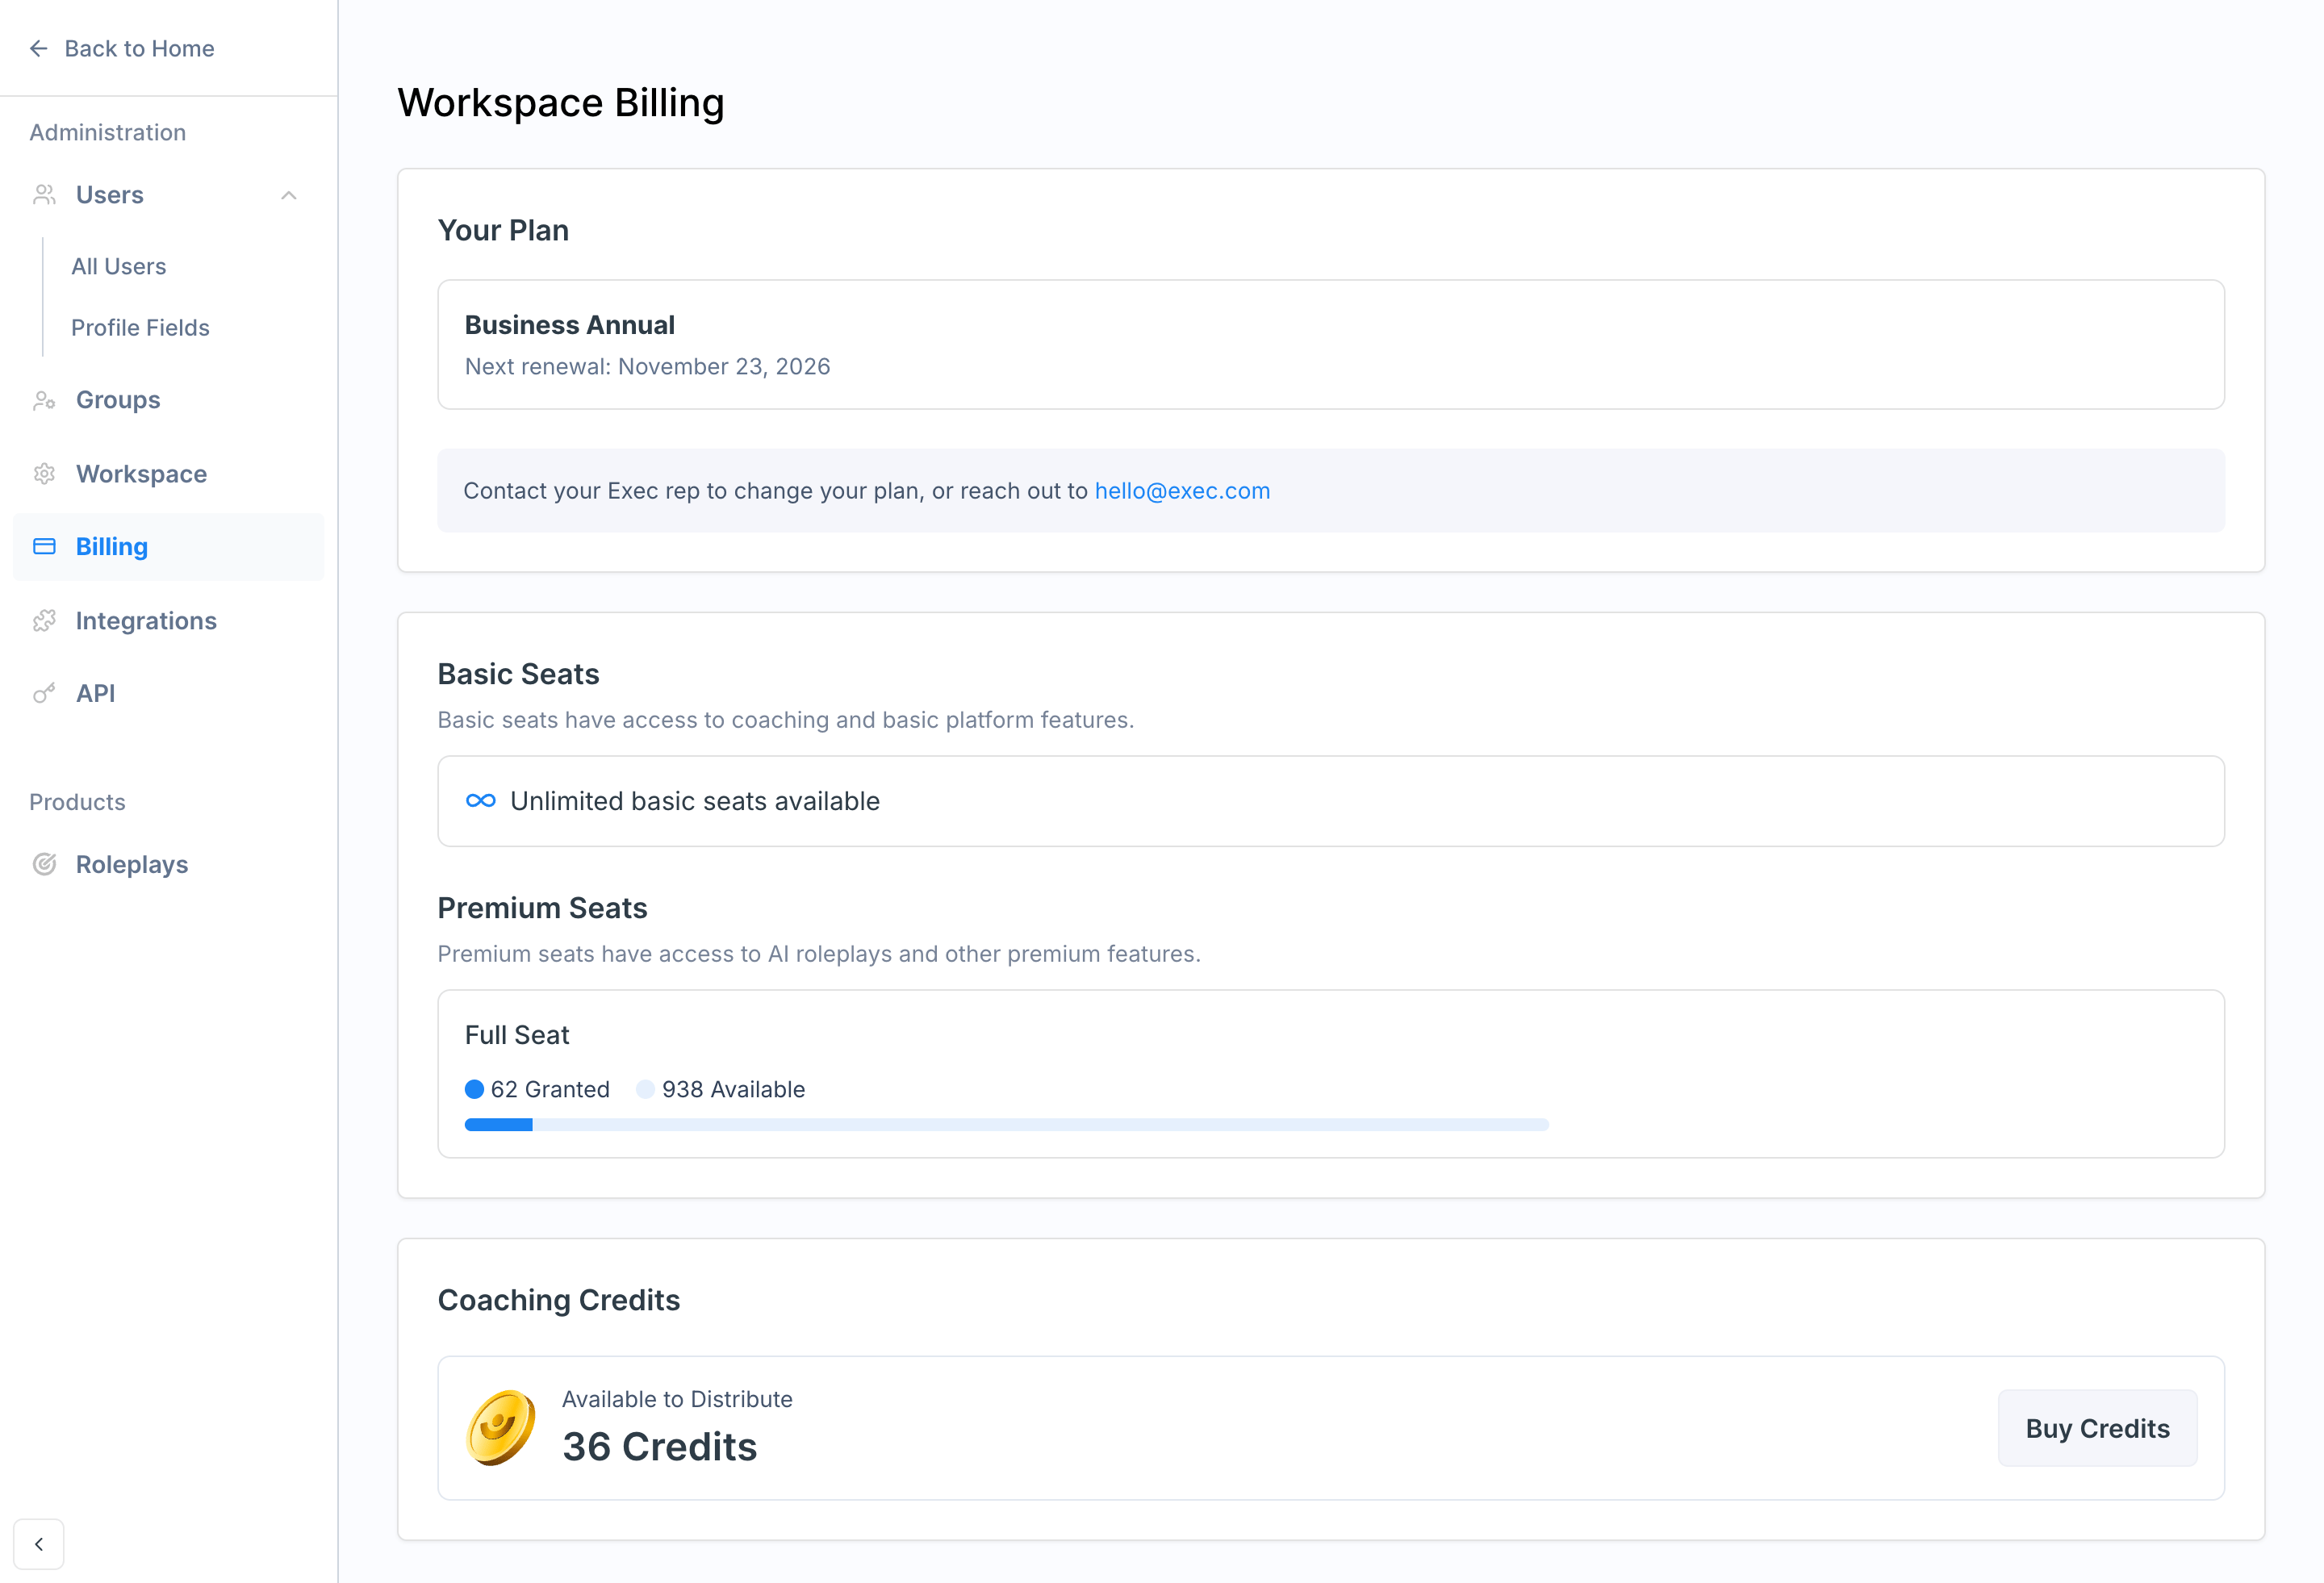 Billing shows your current plan, your **basic** and **full (premium)** seat inventory (granted, reserved, and remaining), and any coaching credits available.
***
## Integrations
Connect external tools to your workspace. Integrations are grouped into three sections:
Billing shows your current plan, your **basic** and **full (premium)** seat inventory (granted, reserved, and remaining), and any coaching credits available.
***
## Integrations
Connect external tools to your workspace. Integrations are grouped into three sections:
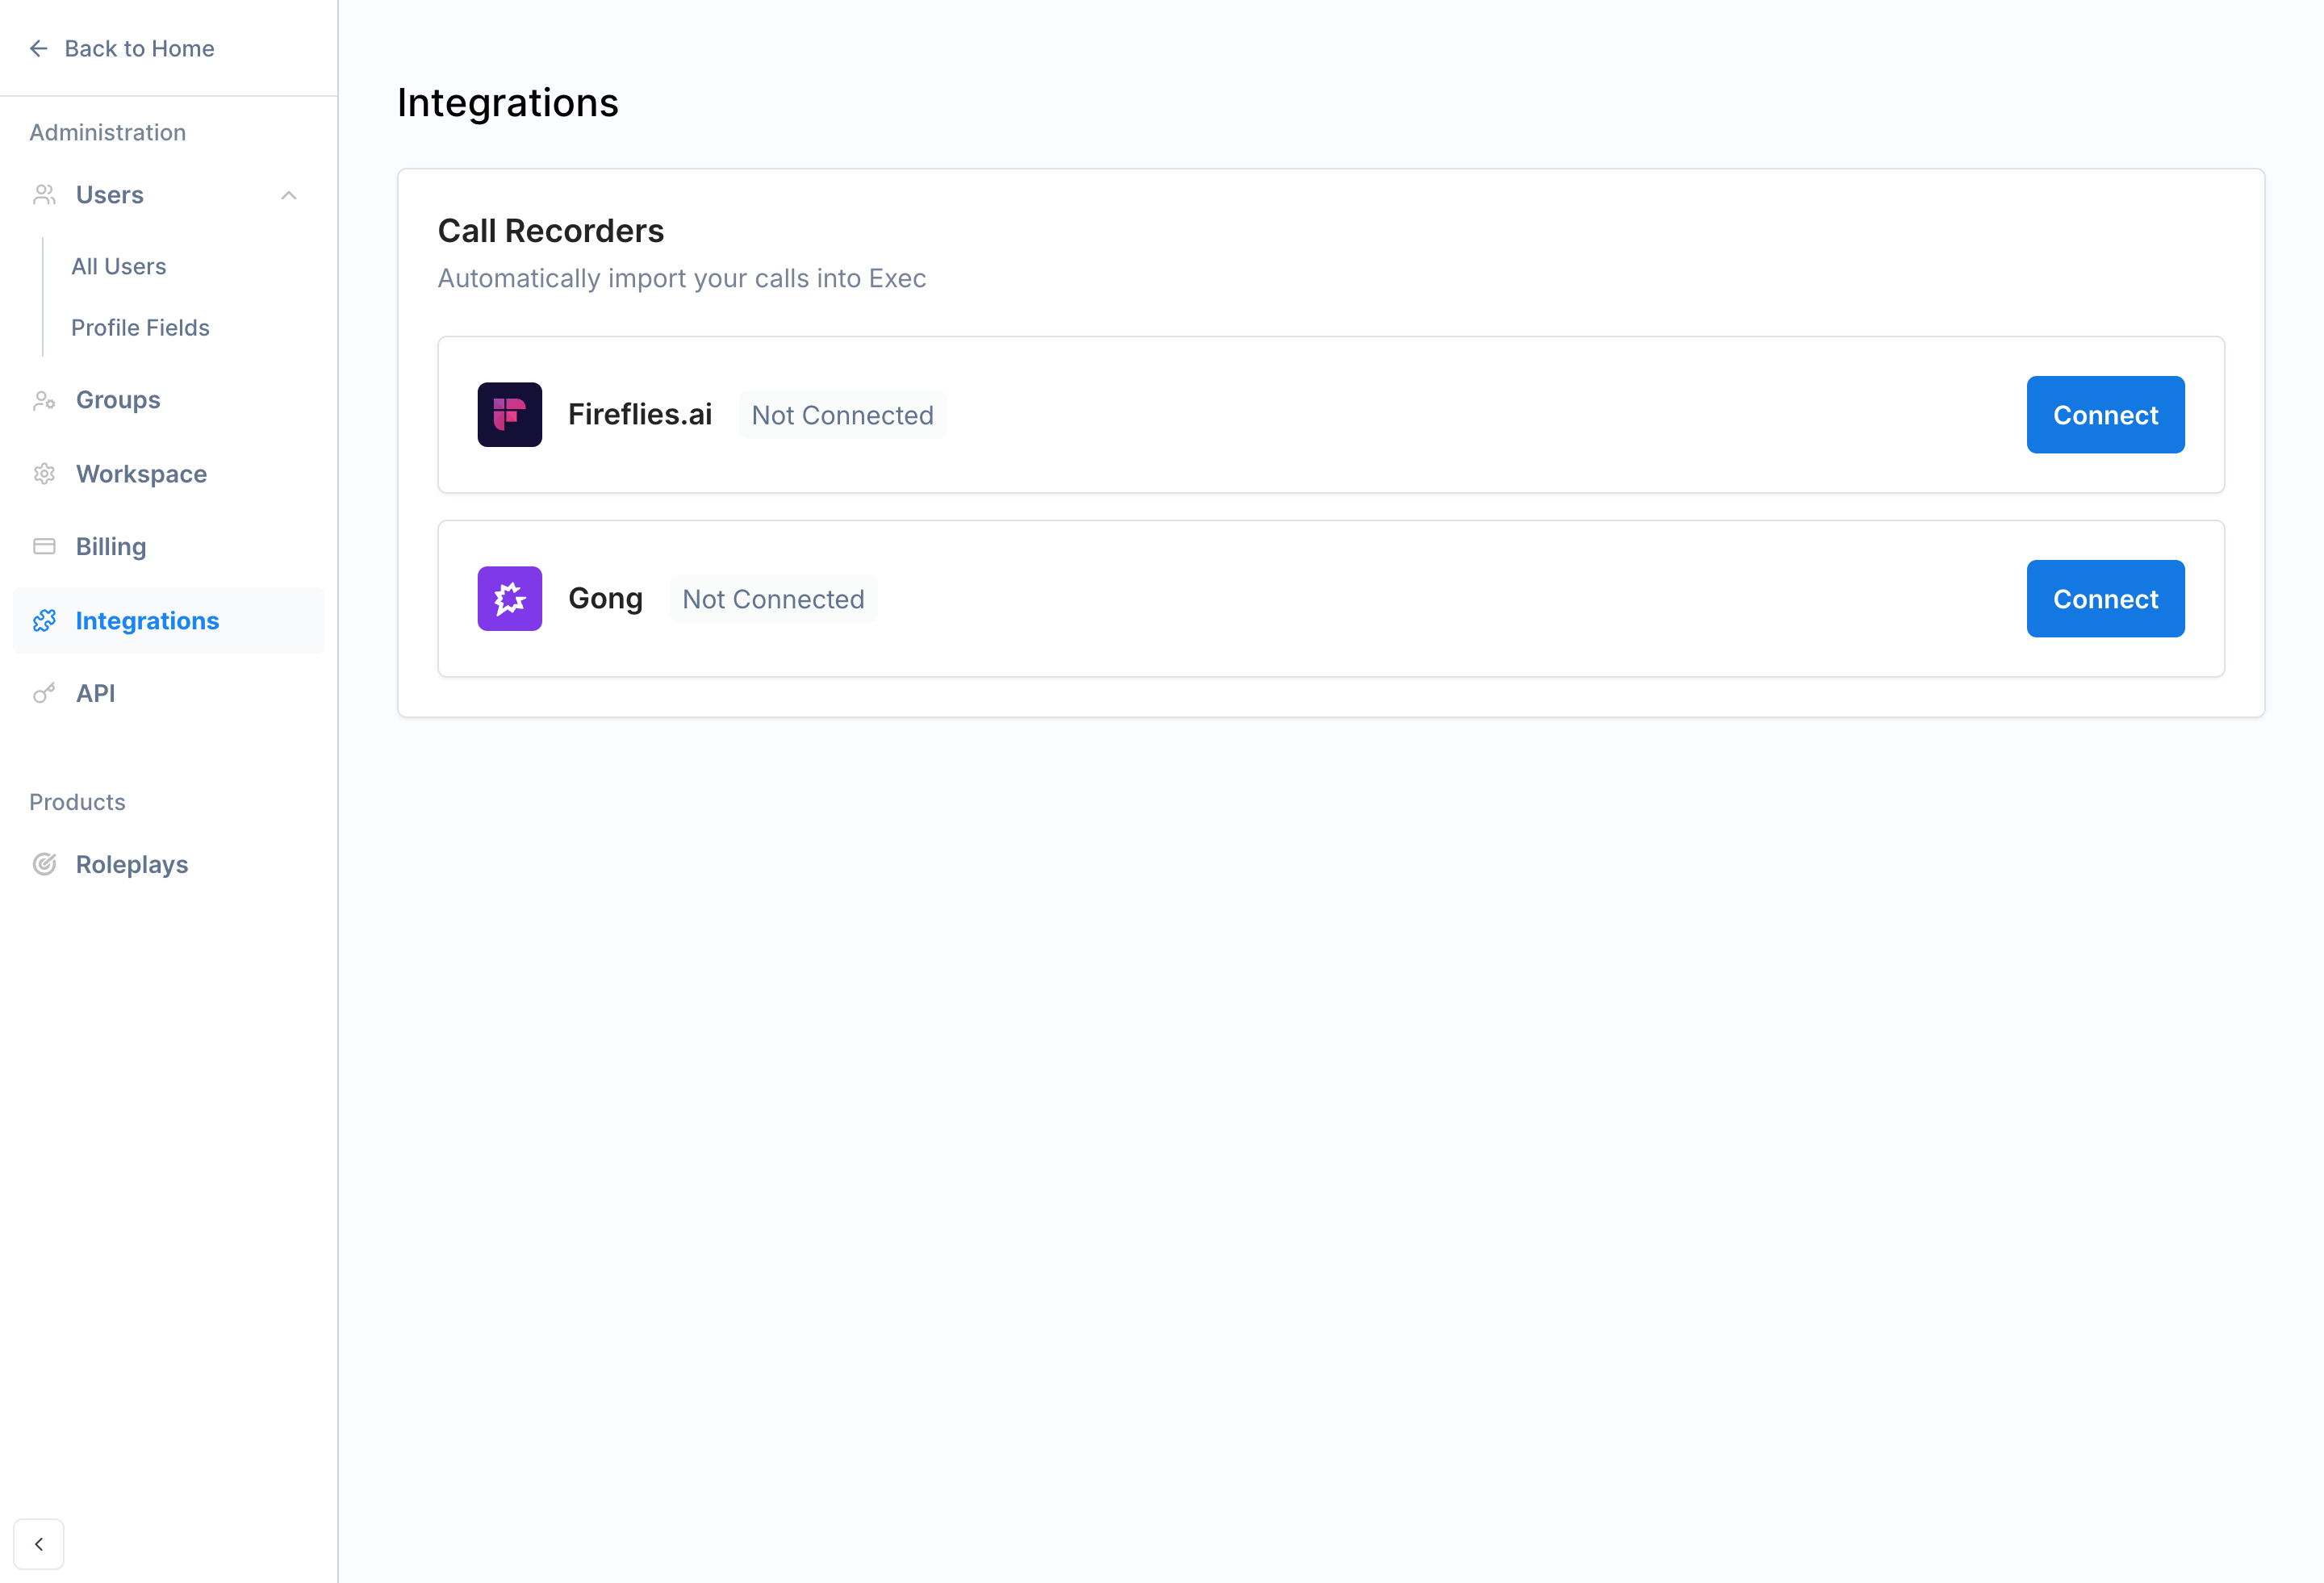 * **Learning** - connect learning platforms via [LMS / LTI 1.3](/lti/overview)
* **Call Recorders** - automatically import calls from tools like **Fireflies** and **Gong** for [call scoring](/calls/call-analyst)
* **Content** - connect **Notion**, **Google Drive**, and **Guru** to feed the [Knowledge Hub](/knowledge-hub/overview) (visible if Knowledge Hub is enabled)
***
## Security
Manage **Single Sign-On (SSO)** and **Directory Sync (SCIM)**.
From here you can set up SSO with your identity provider (start by adding and verifying your company's email domain), enable Directory Sync for automated user provisioning, choose the default seat type for provisioned users, and disable SSO or SCIM when needed.
The Security tab appears on plans that include the SSO entitlement. See [Single Sign-On and Directory Sync](/sso-directory-sync) for full setup instructions.
***
## API
Create and manage API keys to access the Exec REST API.
Click **Create API Key** to generate a key, then manage existing keys (activate, deactivate, or delete) from the table. The **View API documentation →** link opens the [API reference](/api-reference/overview), which walks through authentication and endpoints.
***
## Export Data
Download CSV exports of your workspace data. Three export types are available:
* **Sessions** - all roleplay session data, including scores, attempt numbers, assignments, and program info
* **Users** - all members with roles, seat types, admin status, and group memberships
* **Groups** - all groups with their member lists and roles
See [Export Data](/platform/export-data) for details on what each export includes.
***
## Product settings
Below the workspace tabs, the **Products** section controls each Exec product.
### Roleplays
Control who can create and assign AI roleplay scenarios.
* **Learning** - connect learning platforms via [LMS / LTI 1.3](/lti/overview)
* **Call Recorders** - automatically import calls from tools like **Fireflies** and **Gong** for [call scoring](/calls/call-analyst)
* **Content** - connect **Notion**, **Google Drive**, and **Guru** to feed the [Knowledge Hub](/knowledge-hub/overview) (visible if Knowledge Hub is enabled)
***
## Security
Manage **Single Sign-On (SSO)** and **Directory Sync (SCIM)**.
From here you can set up SSO with your identity provider (start by adding and verifying your company's email domain), enable Directory Sync for automated user provisioning, choose the default seat type for provisioned users, and disable SSO or SCIM when needed.
The Security tab appears on plans that include the SSO entitlement. See [Single Sign-On and Directory Sync](/sso-directory-sync) for full setup instructions.
***
## API
Create and manage API keys to access the Exec REST API.
Click **Create API Key** to generate a key, then manage existing keys (activate, deactivate, or delete) from the table. The **View API documentation →** link opens the [API reference](/api-reference/overview), which walks through authentication and endpoints.
***
## Export Data
Download CSV exports of your workspace data. Three export types are available:
* **Sessions** - all roleplay session data, including scores, attempt numbers, assignments, and program info
* **Users** - all members with roles, seat types, admin status, and group memberships
* **Groups** - all groups with their member lists and roles
See [Export Data](/platform/export-data) for details on what each export includes.
***
## Product settings
Below the workspace tabs, the **Products** section controls each Exec product.
### Roleplays
Control who can create and assign AI roleplay scenarios.
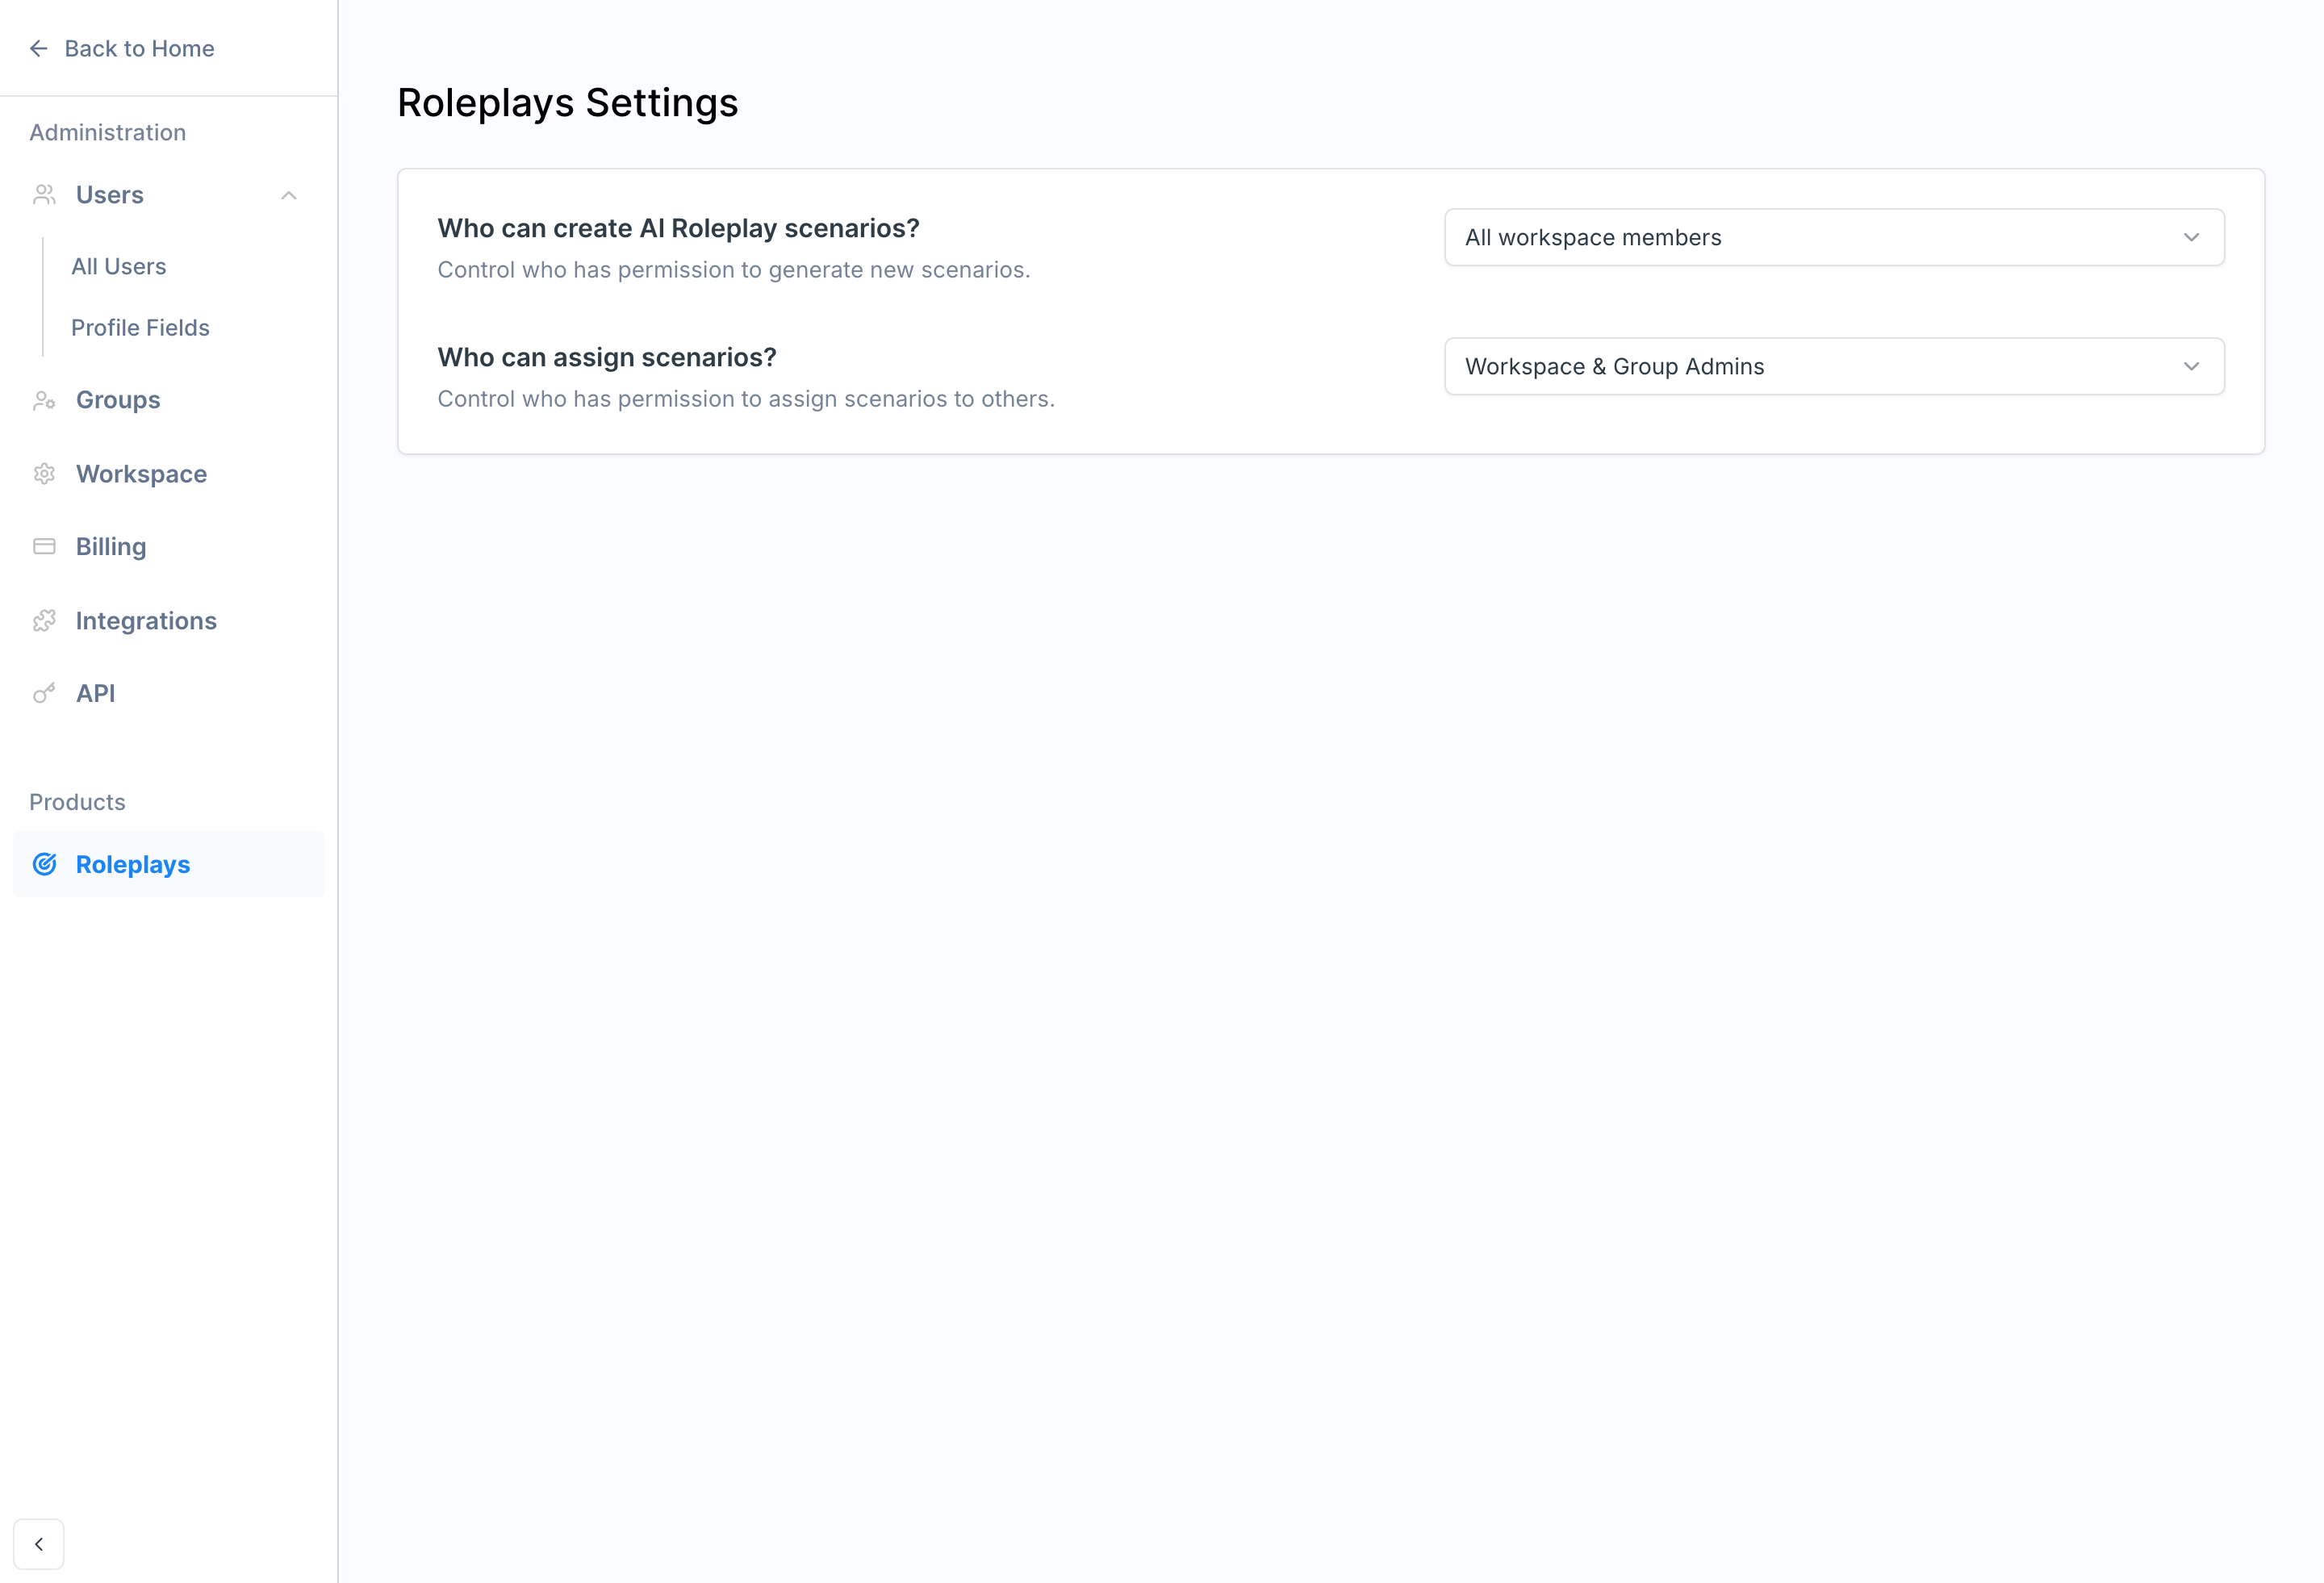 * **Who can create AI Roleplay scenarios?** - **All workspace members**, **Workspace Admins**, or **Workspace & Group Admins**. We recommend **All workspace members** unless you want to tightly control scenario volume and quality.
* **Who can assign scenarios?** - **Workspace & Group Admins** or **All workspace members**. **Workspace & Group Admins** is a good default.
Roleplays must be active in your workspace for this tab to appear.
### Calls
Settings for recording and scoring real calls, split into **General Settings** and **Categories**. Setup is covered end to end in the [Call Scoring](/calls/call-analyst) walkthrough.
### Skills
Configure the [Skills](/skills/overview) framework and skill analytics for your workspace.
### Rubrics
Build and manage reusable scoring [rubrics](/roleplays/rubrics/create) that scenarios can reference.
***
## Getting Help
**Need help?** Contact us at [hello@exec.com](mailto:hello@exec.com) for guidance on workspace settings or admin configuration.
* **Who can create AI Roleplay scenarios?** - **All workspace members**, **Workspace Admins**, or **Workspace & Group Admins**. We recommend **All workspace members** unless you want to tightly control scenario volume and quality.
* **Who can assign scenarios?** - **Workspace & Group Admins** or **All workspace members**. **Workspace & Group Admins** is a good default.
Roleplays must be active in your workspace for this tab to appear.
### Calls
Settings for recording and scoring real calls, split into **General Settings** and **Categories**. Setup is covered end to end in the [Call Scoring](/calls/call-analyst) walkthrough.
### Skills
Configure the [Skills](/skills/overview) framework and skill analytics for your workspace.
### Rubrics
Build and manage reusable scoring [rubrics](/roleplays/rubrics/create) that scenarios can reference.
***
## Getting Help
**Need help?** Contact us at [hello@exec.com](mailto:hello@exec.com) for guidance on workspace settings or admin configuration.