> ## Documentation Index
> Fetch the complete documentation index at: https://docs.exec.com/llms.txt
> Use this file to discover all available pages before exploring further.
# Generate a Course with AI
> Turn existing training material, or just a description, into a complete draft course you can edit and publish
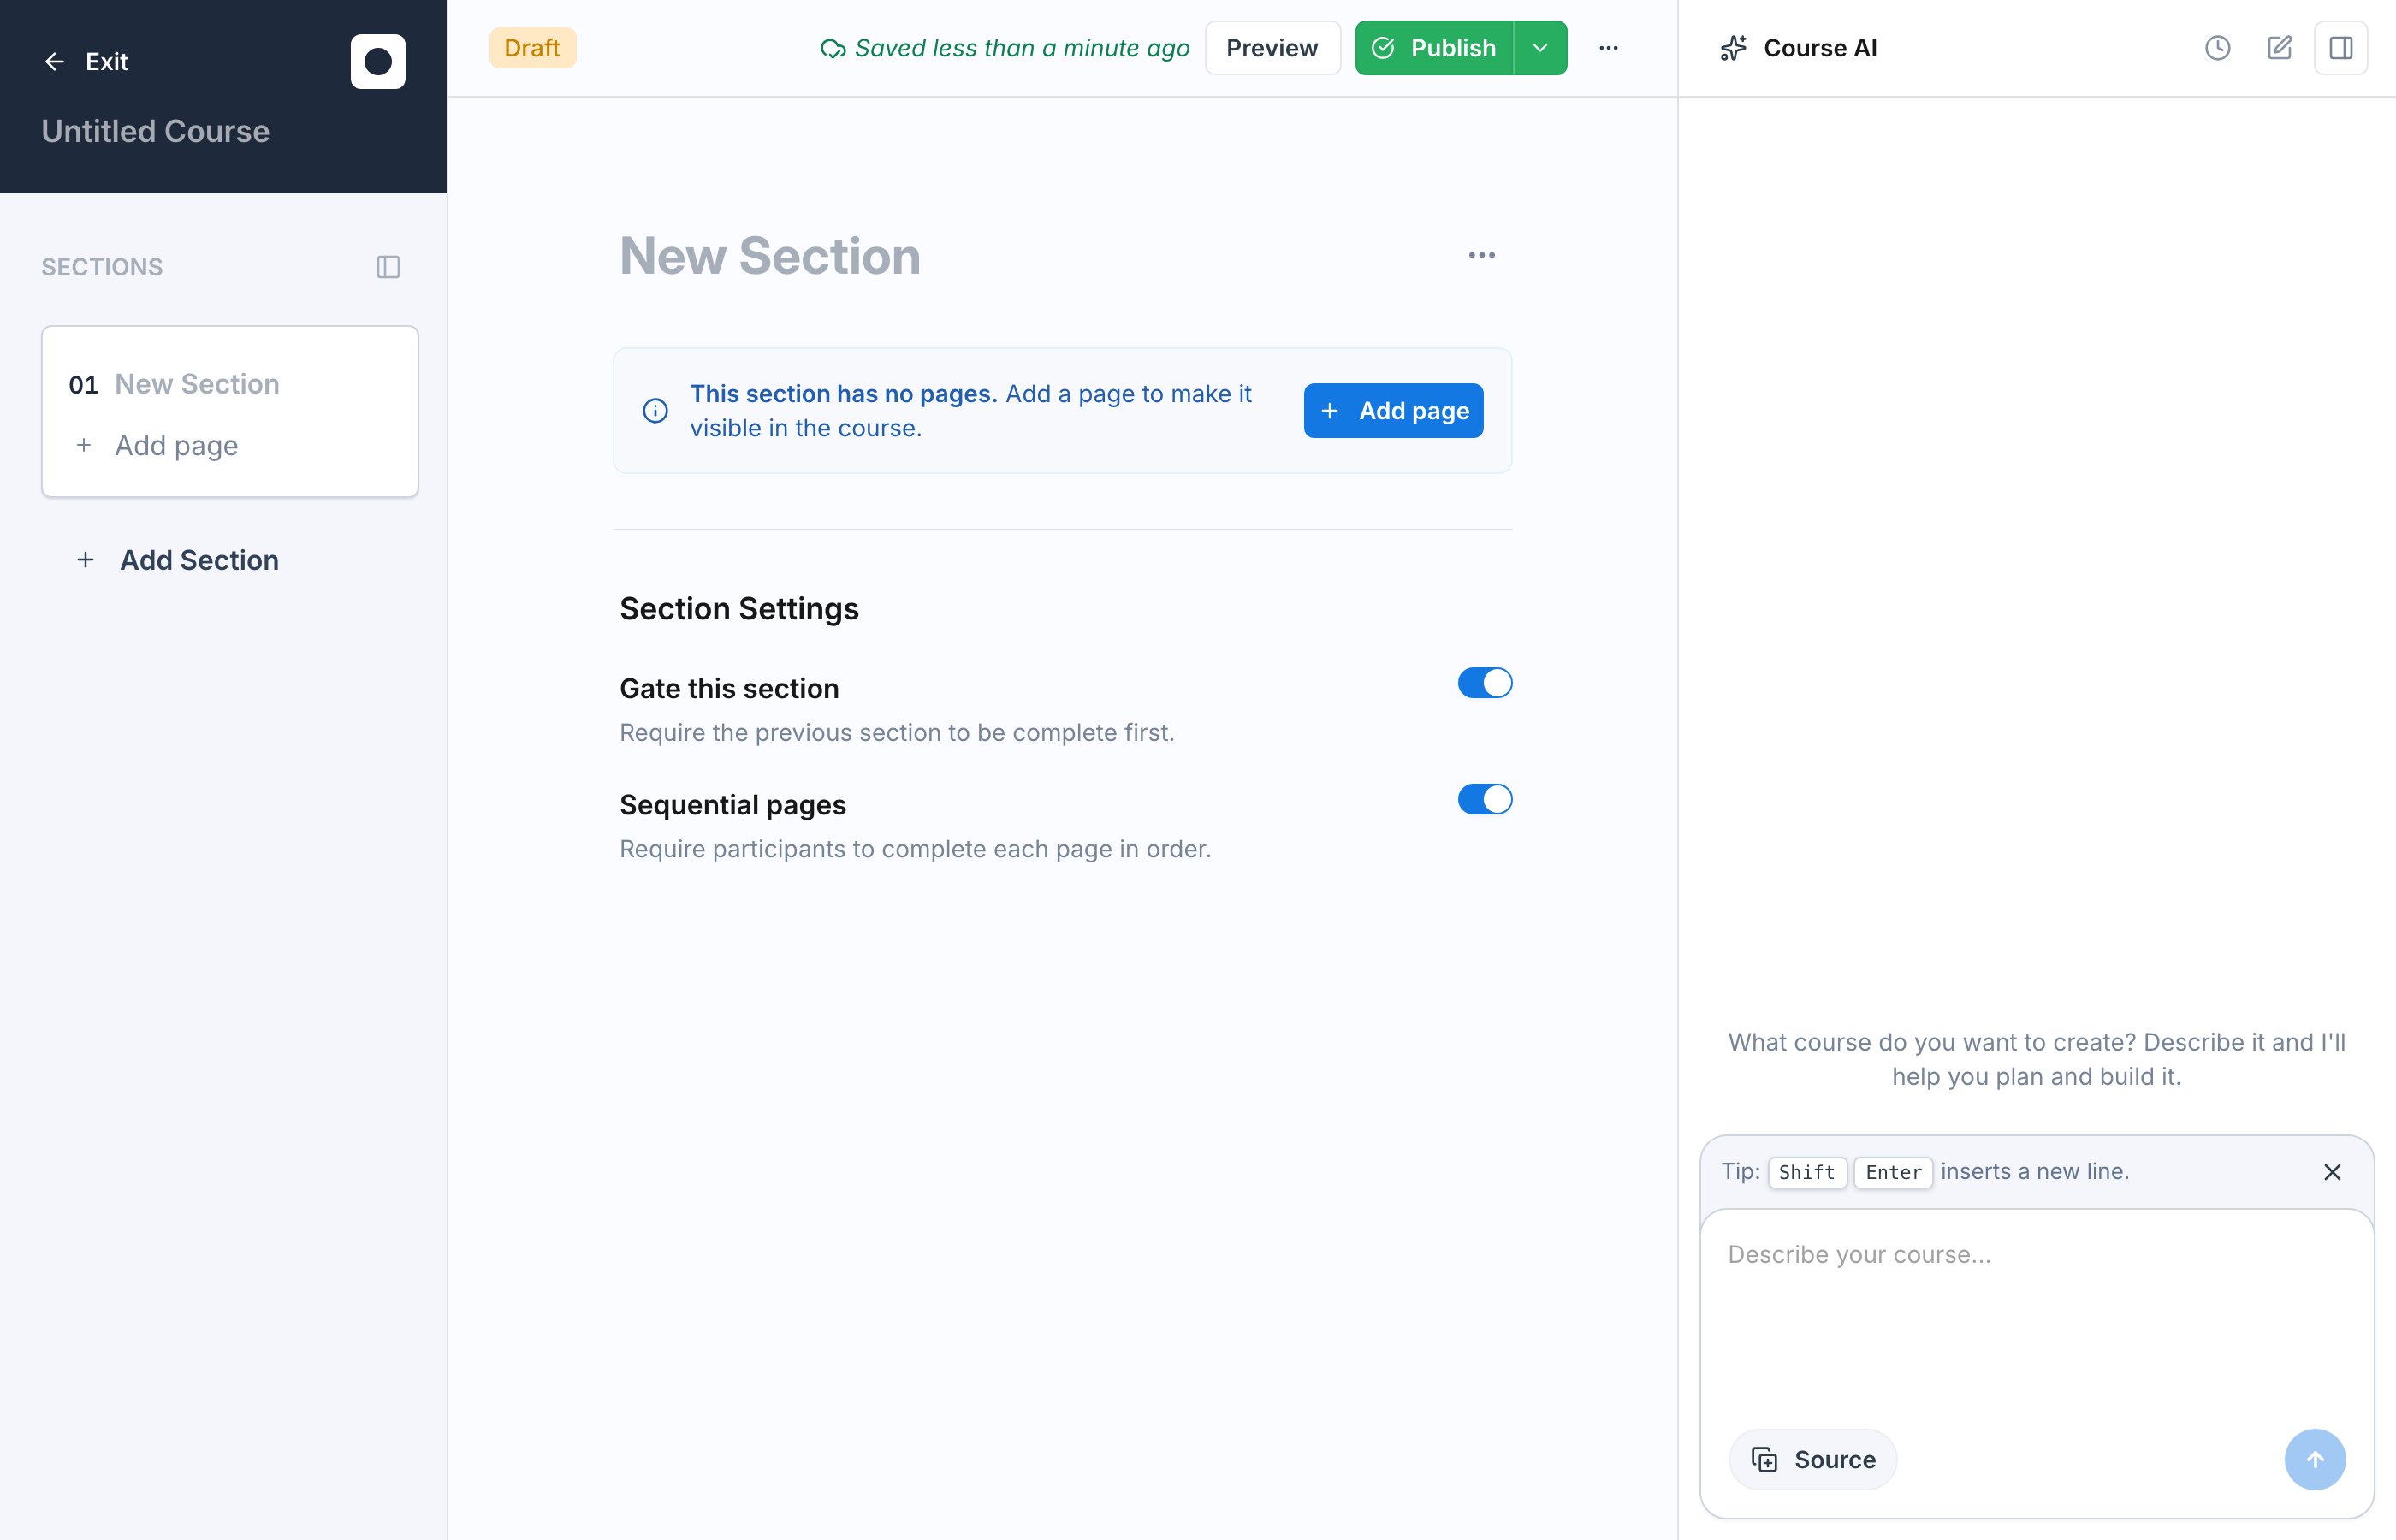
If you already have training material, you do not have to rebuild it block by block. Choose **Generate Course with AI** on the new course screen and a chat-based course studio drafts the whole thing for you: the outline, the lessons, the quizzes, and the roleplay scenarios.
 ## How It Works
 Attach the material you want the course built from. Use **Browse Knowledge Hub** to pull in a page or source your workspace already has, such as a framework guide or playbook, or upload files directly from your computer. No material yet? Describe the course you want instead.
The AI reads what you provided and drafts the full course: an outline of sections and pages, lesson content, knowledge-check quizzes, and roleplay scenarios that match your material.
The draft opens in the editor with everything in place. Review it, edit anything, and publish when you are happy with it.
## The Studio Asks Before It Builds
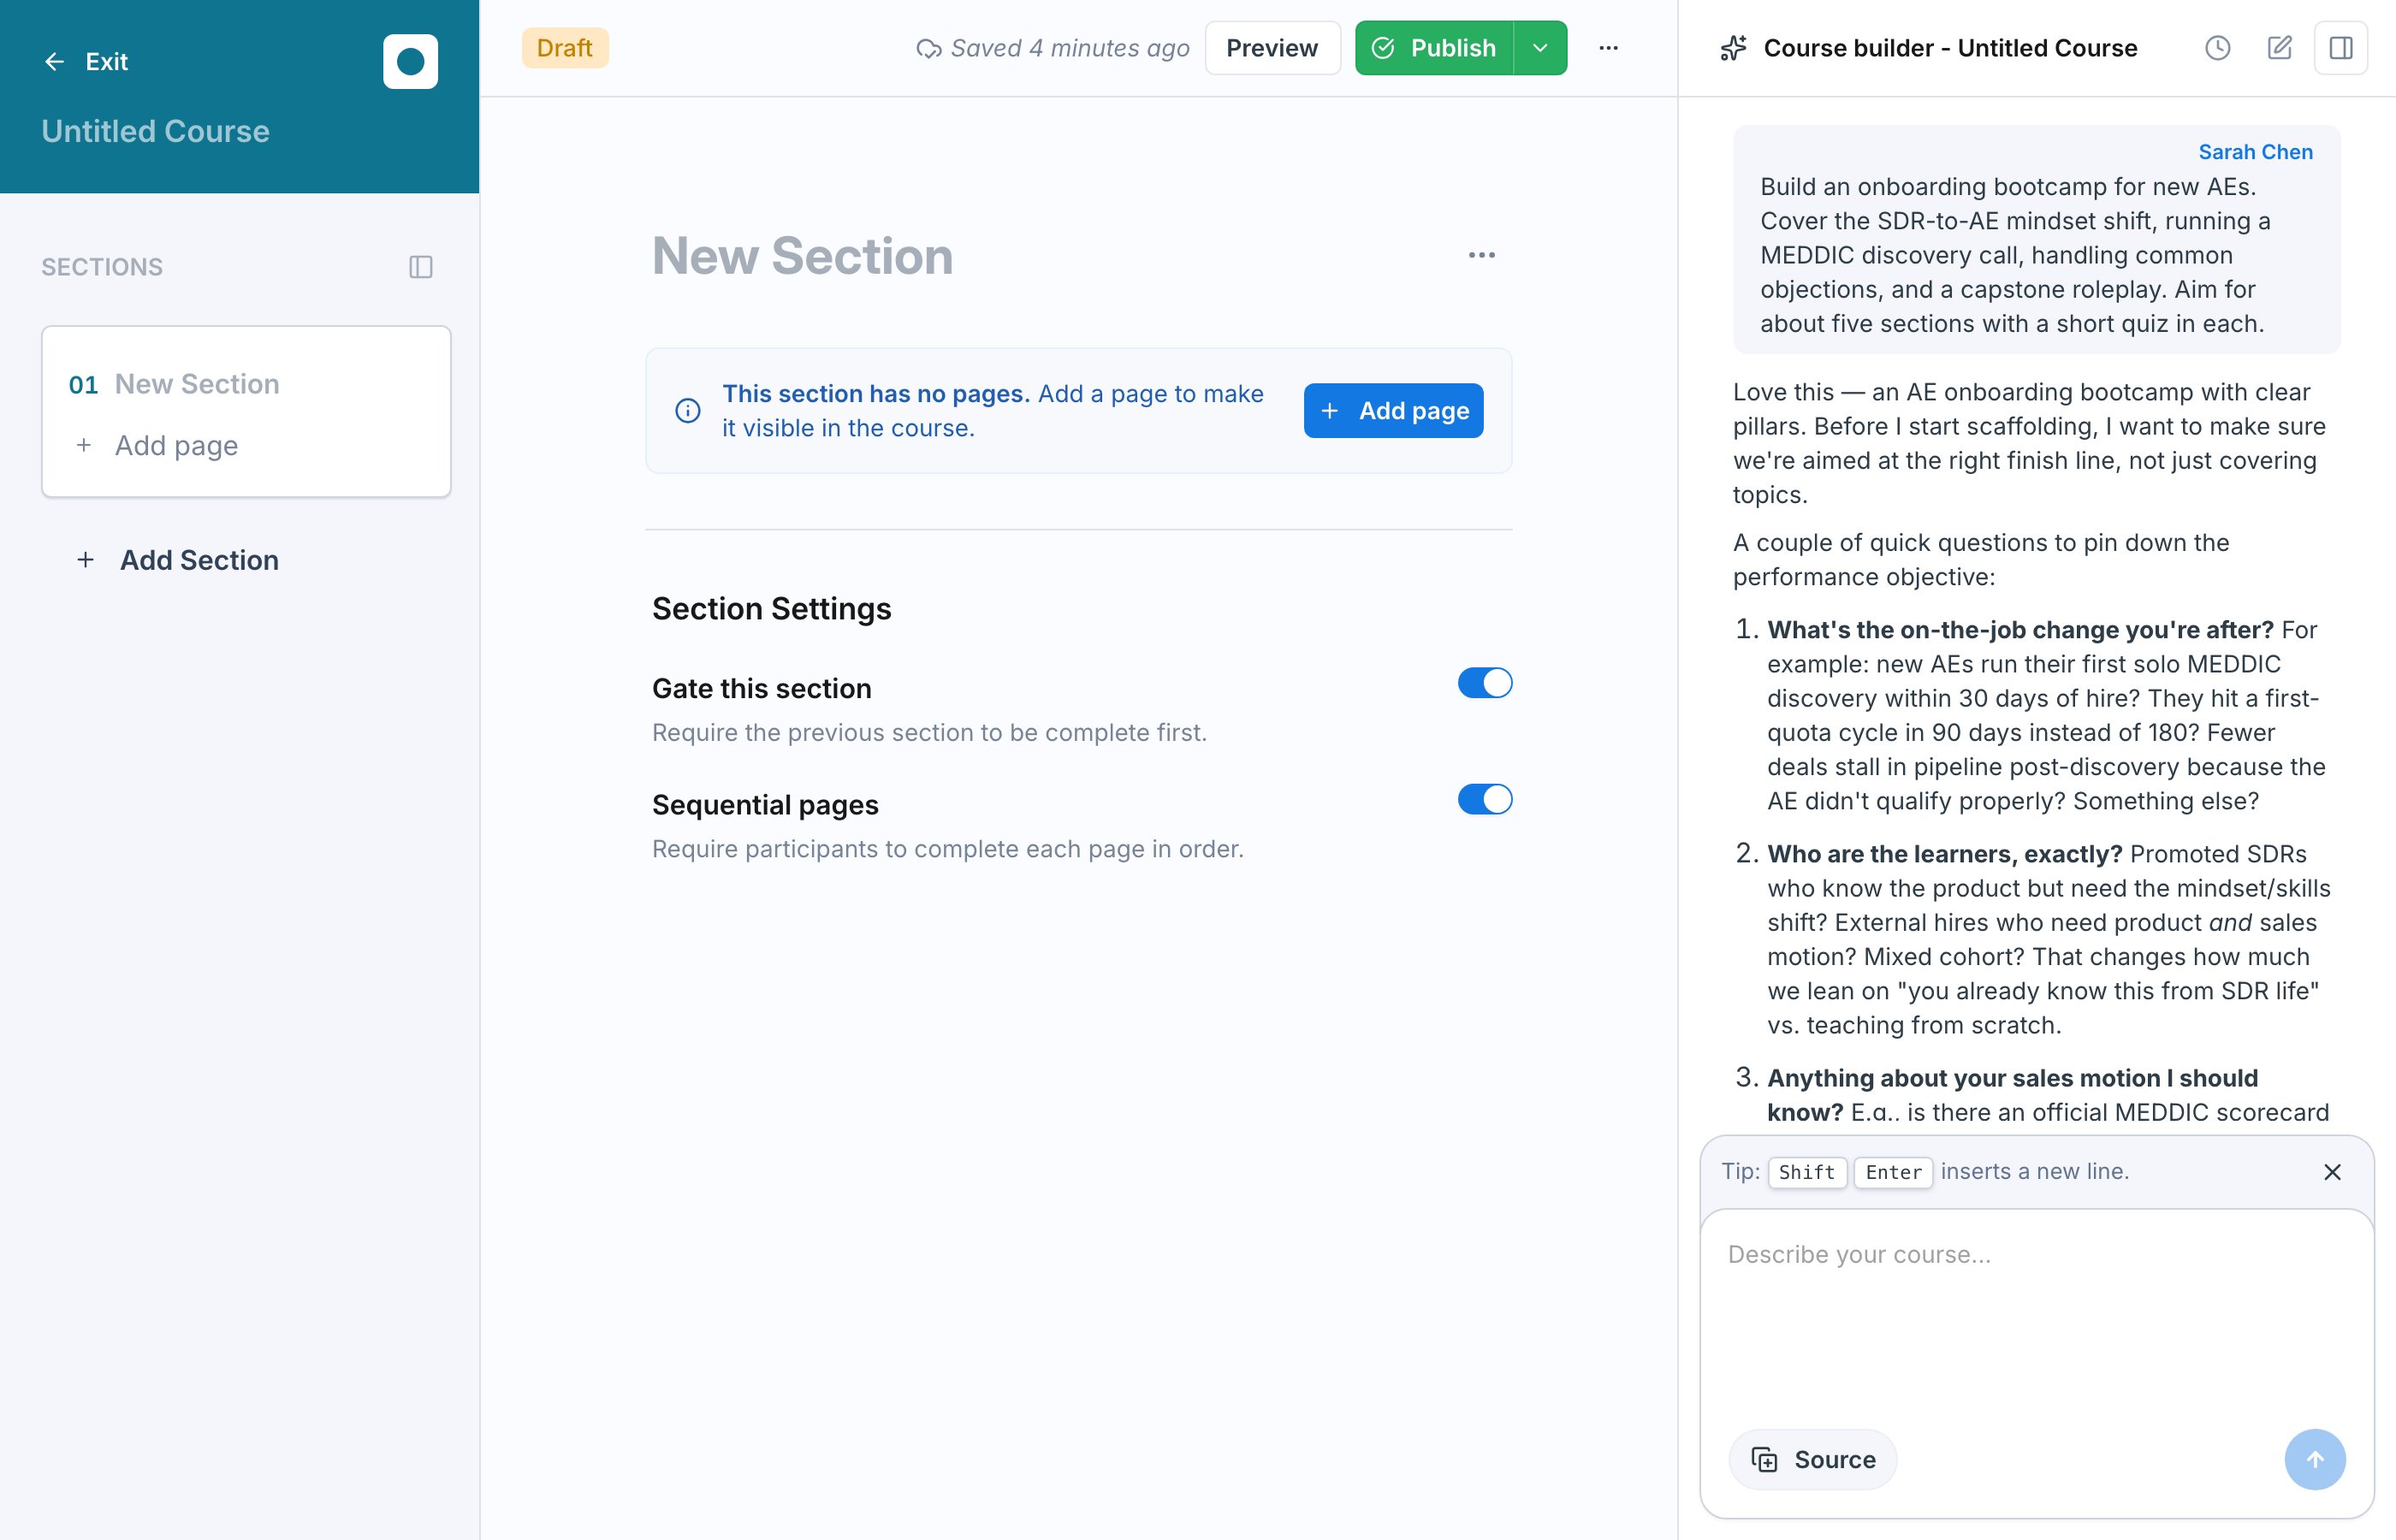
When you send your first message, the studio does not build blindly. It confirms the outcome you are after and asks a few clarifying questions first, such as the performance gap you are trying to close today, who the learners are, and whether you have an existing framework or playbook to ground the content in.
## Fill In the Quick Brief
Once you answer, the studio issues a short brief as a form you fill in rather than another round of typing. The questions are tailored to what you asked for, and typically cover choices like how long the course should take, the mix of quizzes and roleplays you want, the tone the content should take, and whether the course is must-pass or awareness-level. There is a free-text field for anything else it should know.
## It Designs the Course Before Building It
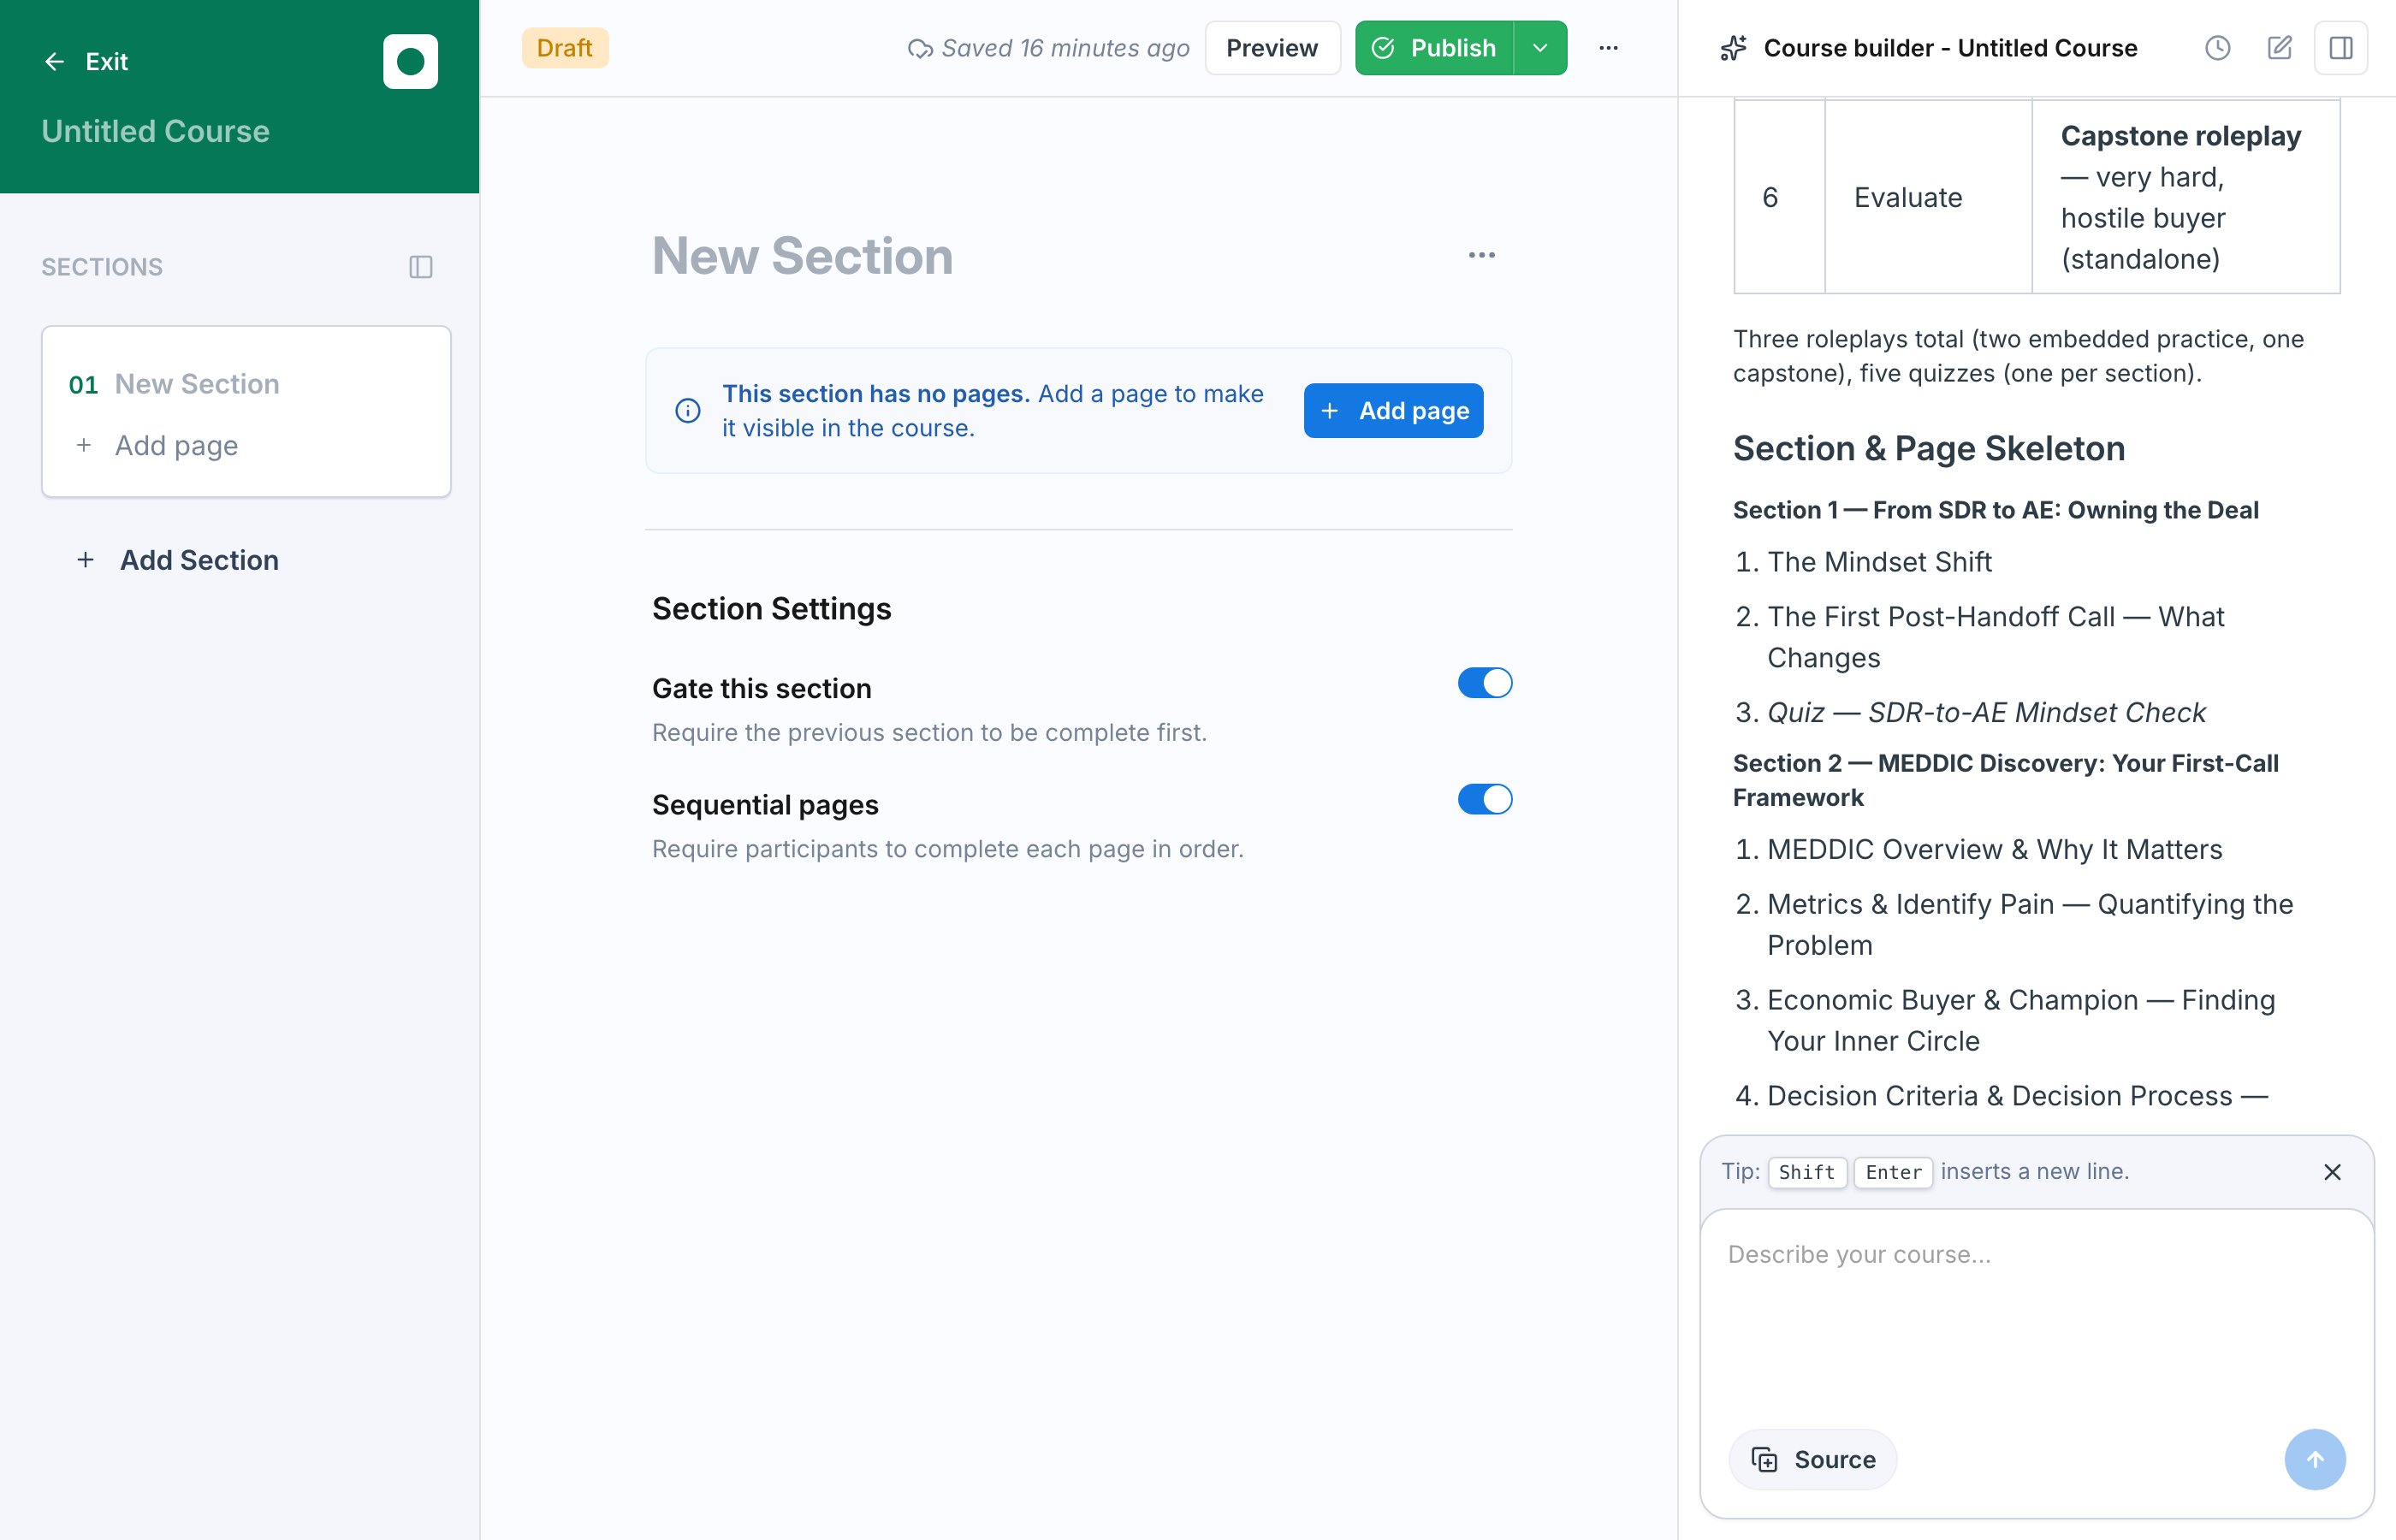
Submit the brief and the studio turns your input into a concrete plan before writing a single block: the performance objective, learning outcomes mapped to how each one is assessed, and a full section-and-page skeleton. Review it and course-correct while the course is still an outline.
Attach the material you want the course built from. Use **Browse Knowledge Hub** to pull in a page or source your workspace already has, such as a framework guide or playbook, or upload files directly from your computer. No material yet? Describe the course you want instead.
The AI reads what you provided and drafts the full course: an outline of sections and pages, lesson content, knowledge-check quizzes, and roleplay scenarios that match your material.
The draft opens in the editor with everything in place. Review it, edit anything, and publish when you are happy with it.
## The Studio Asks Before It Builds
When you send your first message, the studio does not build blindly. It confirms the outcome you are after and asks a few clarifying questions first, such as the performance gap you are trying to close today, who the learners are, and whether you have an existing framework or playbook to ground the content in.
## Fill In the Quick Brief
Once you answer, the studio issues a short brief as a form you fill in rather than another round of typing. The questions are tailored to what you asked for, and typically cover choices like how long the course should take, the mix of quizzes and roleplays you want, the tone the content should take, and whether the course is must-pass or awareness-level. There is a free-text field for anything else it should know.
## It Designs the Course Before Building It
Submit the brief and the studio turns your input into a concrete plan before writing a single block: the performance objective, learning outcomes mapped to how each one is assessed, and a full section-and-page skeleton. Review it and course-correct while the course is still an outline.
 ## Then It Builds the Course
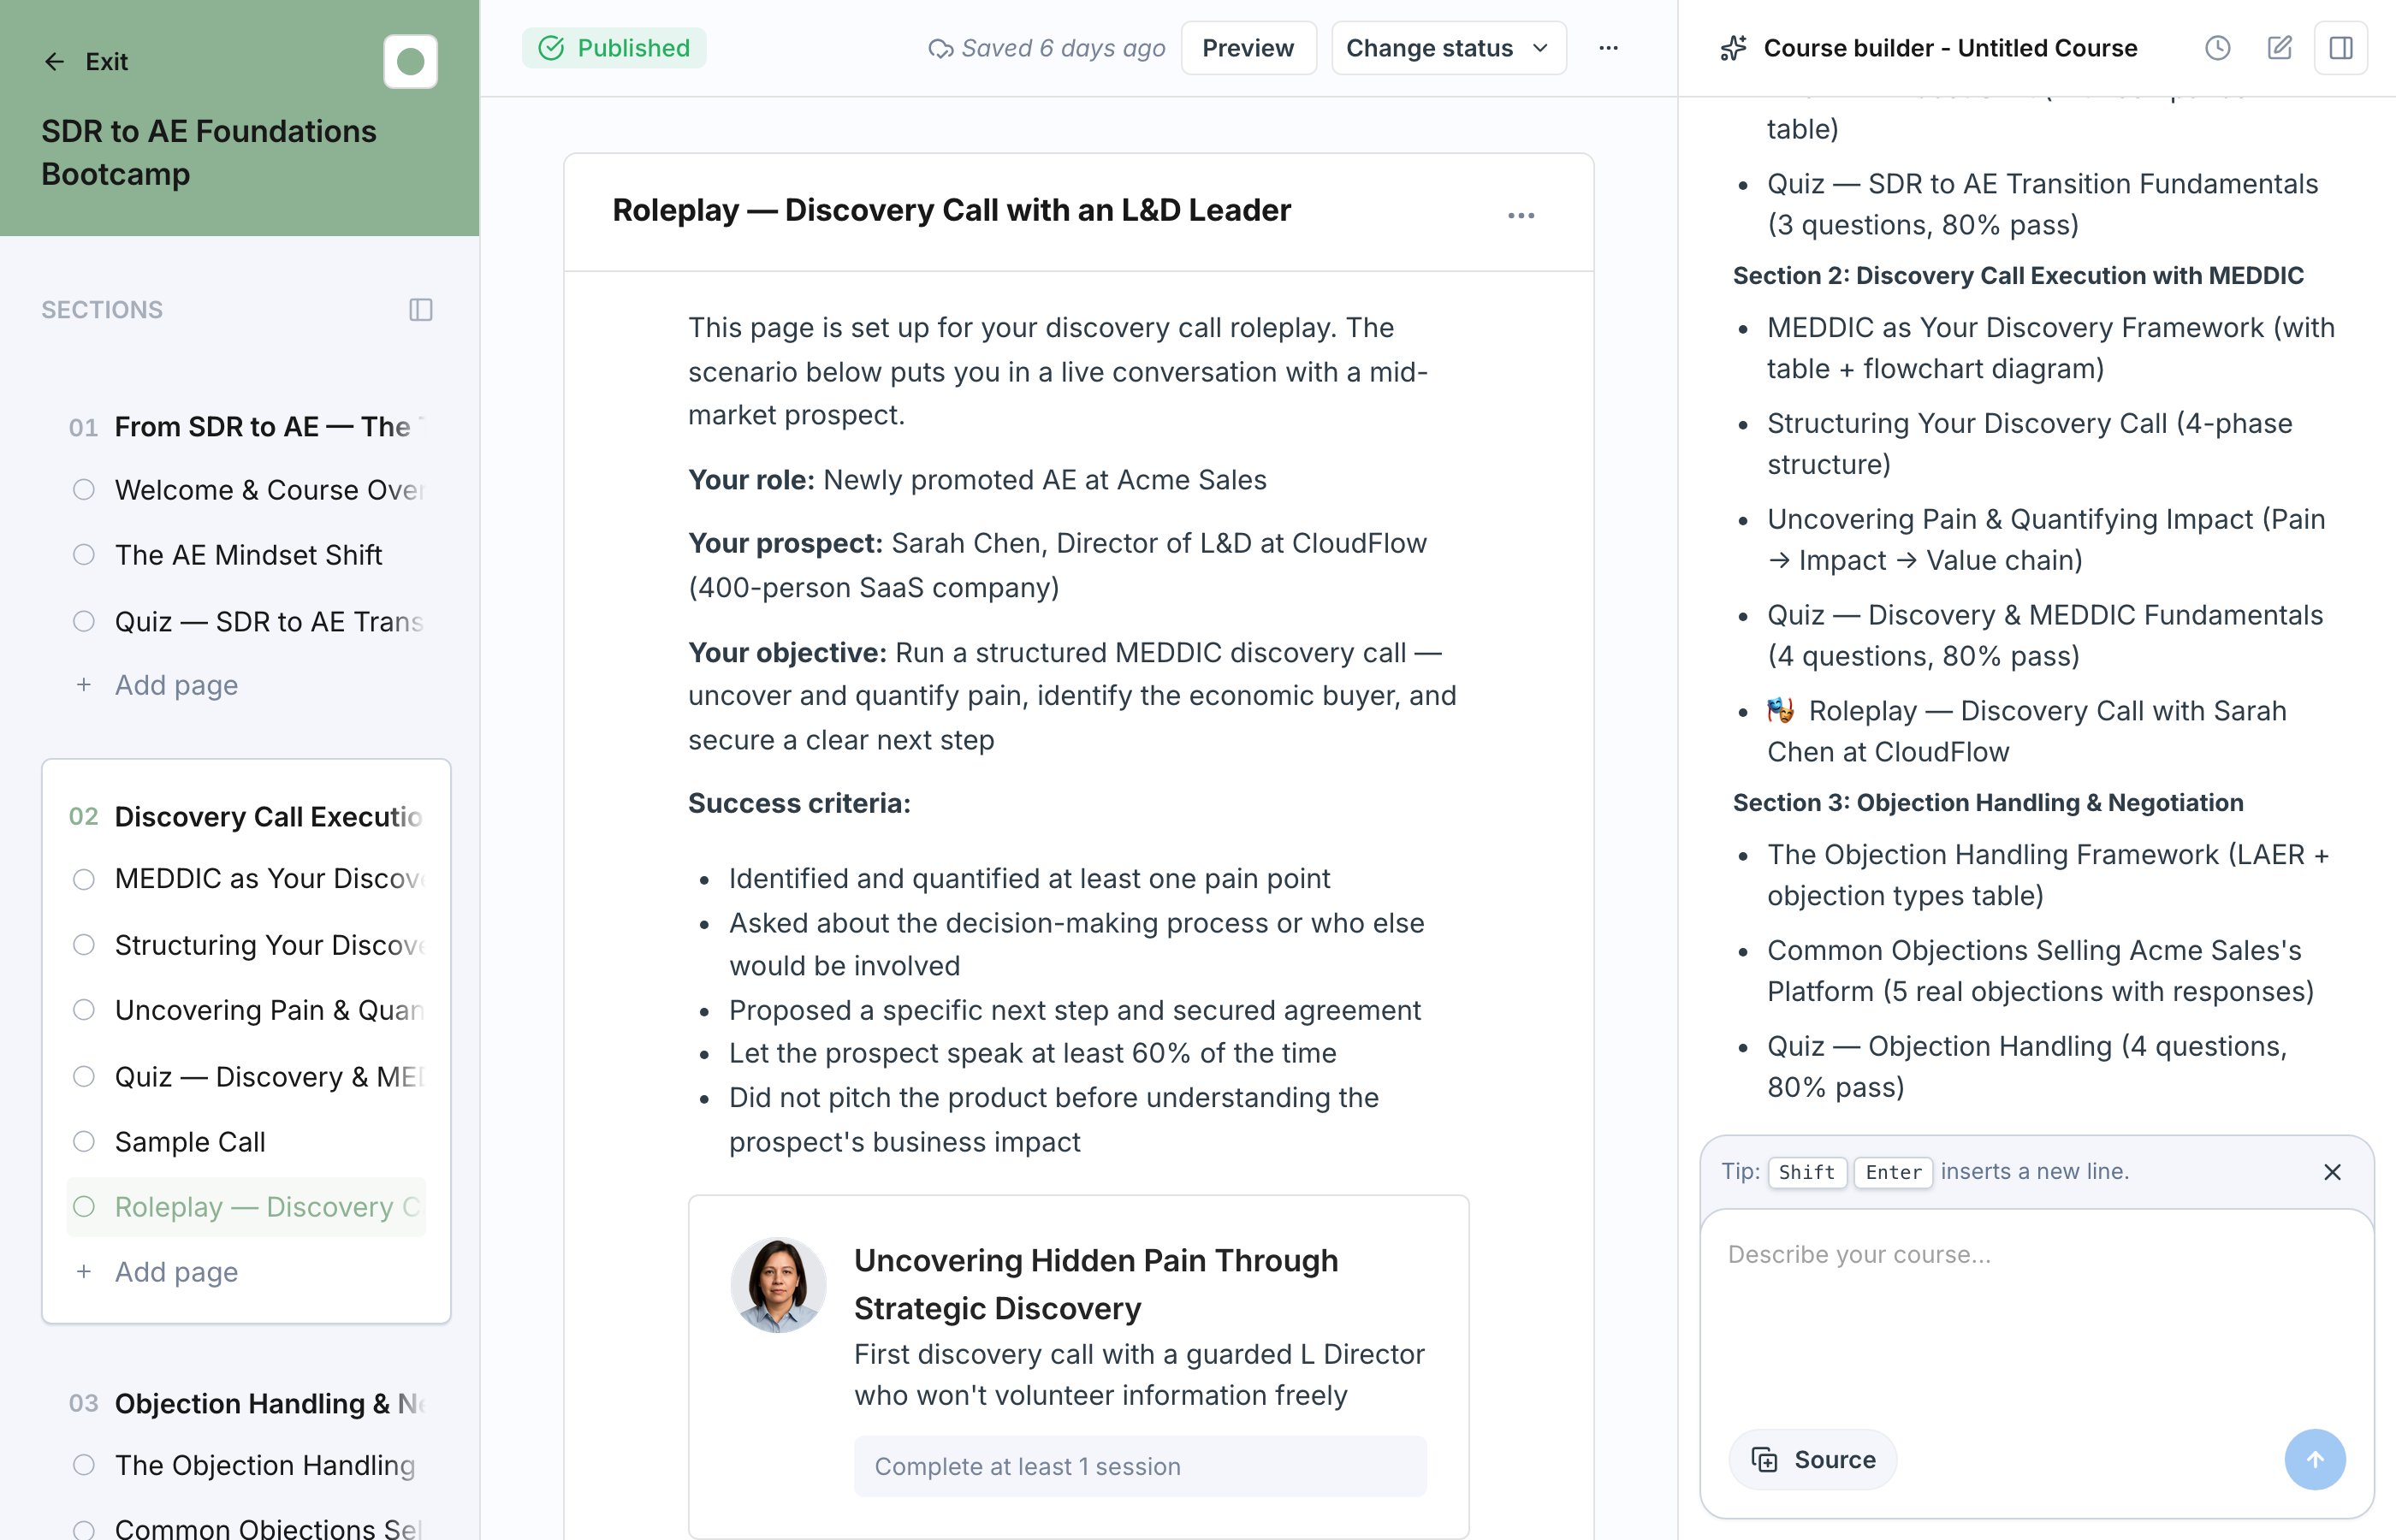
Approve the plan and the studio builds the full draft, sections, pages, lessons, quizzes, and roleplays included, then opens it in the editor for you to review and edit.
Roleplays get their own checkpoint. Before building them, the studio shows you the scenario outlines it intends to create, so you can approve or redirect them first. It can generate brand-new scenarios or reuse ones that already exist in your workspace. Building the scenarios runs in the background, so you can review the rest of the course while it works rather than waiting.
## Then It Builds the Course
Approve the plan and the studio builds the full draft, sections, pages, lessons, quizzes, and roleplays included, then opens it in the editor for you to review and edit.
Roleplays get their own checkpoint. Before building them, the studio shows you the scenario outlines it intends to create, so you can approve or redirect them first. It can generate brand-new scenarios or reuse ones that already exist in your workspace. Building the scenarios runs in the background, so you can review the rest of the course while it works rather than waiting.
 ## It Is a Head Start, Not a Finished Product
Everything the AI produces is fully editable. Nothing goes in front of learners until you publish, so treat the generated draft as a strong first pass:
* **Review every page.** Rework wording, reorder sections, and cut anything that does not fit. The editor works exactly the same as it does for a manually built course. See [Build Sections and Pages](/courses/build-sections-and-pages).
* **Check the quizzes and roleplays.** Make sure questions test what actually matters and roleplay scenarios reflect the conversations your team really has. You can regenerate or rebuild any block.
* **Publish when it is ready.** The course stays in draft until you publish it. See [Publish and Versioning](/courses/publish-and-versioning).
The better the material you attach, the better the draft. A real training deck or playbook gives the AI much more to work with than a one-line description.
## Next Steps
Refine the generated draft in the editor.
Release the course to learners when the draft is ready.
## It Is a Head Start, Not a Finished Product
Everything the AI produces is fully editable. Nothing goes in front of learners until you publish, so treat the generated draft as a strong first pass:
* **Review every page.** Rework wording, reorder sections, and cut anything that does not fit. The editor works exactly the same as it does for a manually built course. See [Build Sections and Pages](/courses/build-sections-and-pages).
* **Check the quizzes and roleplays.** Make sure questions test what actually matters and roleplay scenarios reflect the conversations your team really has. You can regenerate or rebuild any block.
* **Publish when it is ready.** The course stays in draft until you publish it. See [Publish and Versioning](/courses/publish-and-versioning).
The better the material you attach, the better the draft. A real training deck or playbook gives the AI much more to work with than a one-line description.
## Next Steps
Refine the generated draft in the editor.
Release the course to learners when the draft is ready.