> ## Documentation Index
> Fetch the complete documentation index at: https://docs.exec.com/llms.txt
> Use this file to discover all available pages before exploring further.
# Collections
> Group courses into collections, nest them into sub-collections, and keep a growing course library navigable
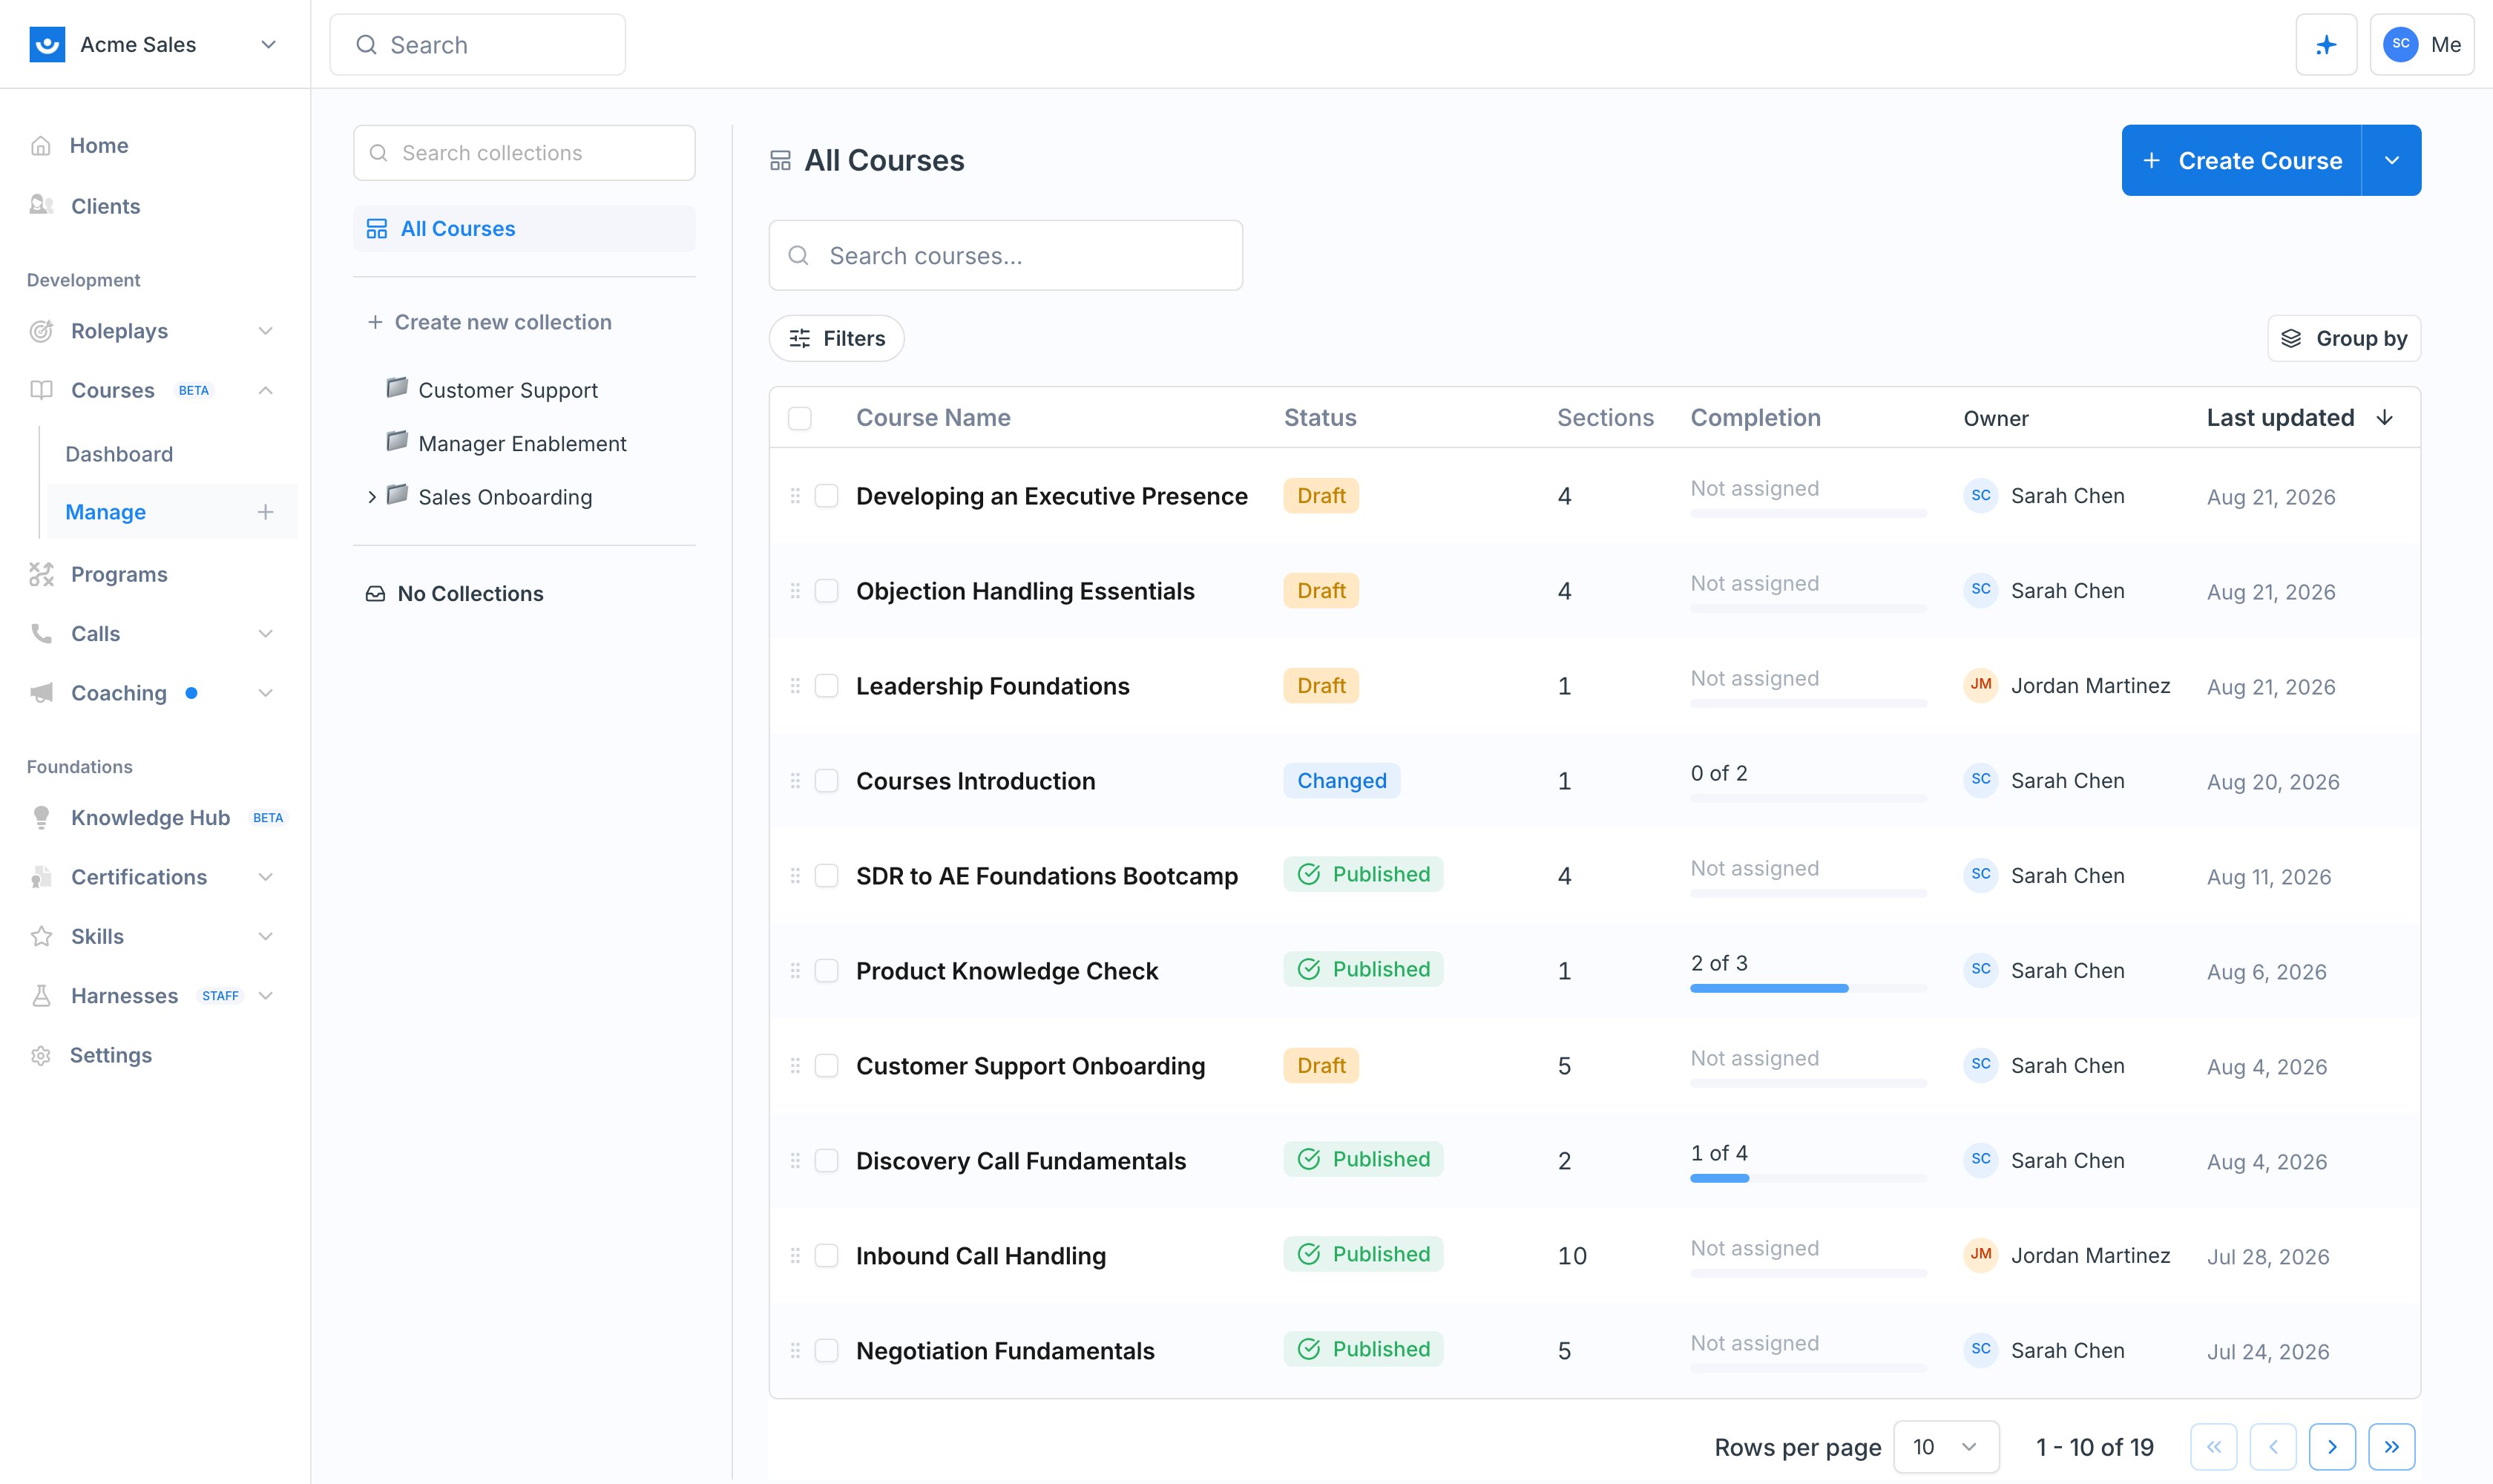
Collections are folders for your courses. As a workspace builds up training, a flat list stops being useful, and collections let you group courses by team, topic, or program so the library stays navigable. They work the same way collections do for [scenarios](/roleplays/collections) and hubs in the [Knowledge Hub](/knowledge-hub/hubs).
Collections live in a rail on the left of **Courses > Manage**, alongside **All Courses** and **No Collections**.
 Collections are an organizational layer for admins, not a permission layer. Putting a course in a collection does not change who can see or enroll in it. To control access, use the course's self-enrollment setting and group restrictions. See [Enroll Participants](/courses/enroll-participants).
## Create a Collection
It sits just under **All Courses** in the rail.
Give it a name your team will recognize, such as a team, a role, or a program. The emoji button to the left of the name field sets an icon so the collection is easy to spot in the rail.
Collections are an organizational layer for admins, not a permission layer. Putting a course in a collection does not change who can see or enroll in it. To control access, use the course's self-enrollment setting and group restrictions. See [Enroll Participants](/courses/enroll-participants).
## Create a Collection
It sits just under **All Courses** in the rail.
Give it a name your team will recognize, such as a team, a role, or a program. The emoji button to the left of the name field sets an icon so the collection is easy to spot in the rail.
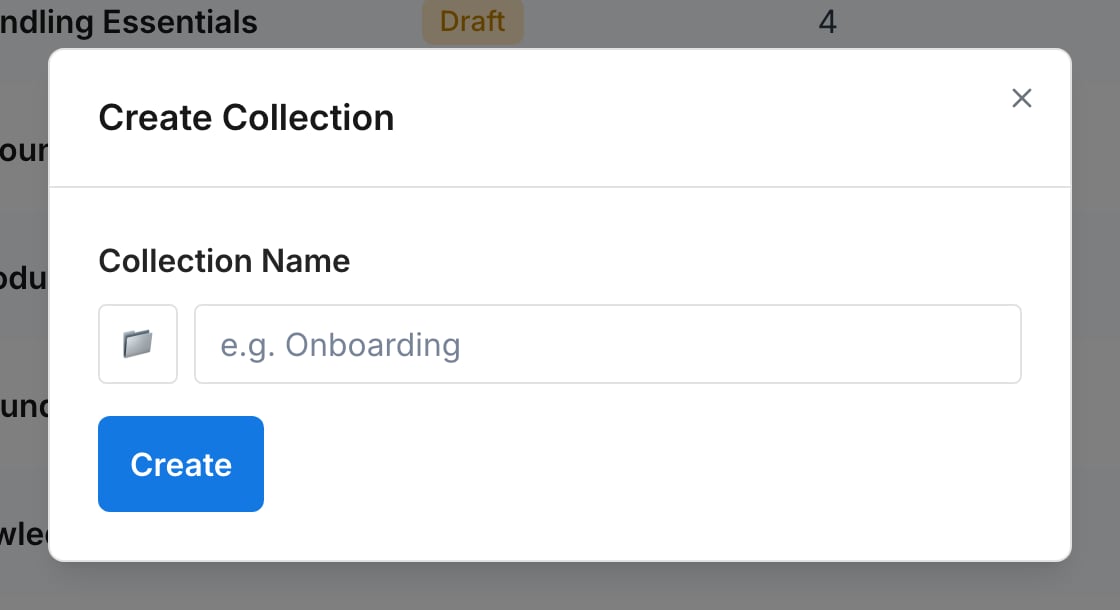 The collection appears in the rail right away, ready for courses.
## Add Courses to a Collection
There are three ways in, and they suit different moments:
* **Drag and drop.** Drag a course row from the list onto a collection in the rail. The collection highlights when you are over a valid target.
* **From inside the collection.** Open the collection, then use the dropdown next to **Create Course** and choose **Add courses**. You get a picker of every course in the workspace with an **Add** button on each.
* **In bulk.** Select **Select** above the list, tick several courses, and use **Add to collection** on the action bar that appears at the bottom.
The collection appears in the rail right away, ready for courses.
## Add Courses to a Collection
There are three ways in, and they suit different moments:
* **Drag and drop.** Drag a course row from the list onto a collection in the rail. The collection highlights when you are over a valid target.
* **From inside the collection.** Open the collection, then use the dropdown next to **Create Course** and choose **Add courses**. You get a picker of every course in the workspace with an **Add** button on each.
* **In bulk.** Select **Select** above the list, tick several courses, and use **Add to collection** on the action bar that appears at the bottom.
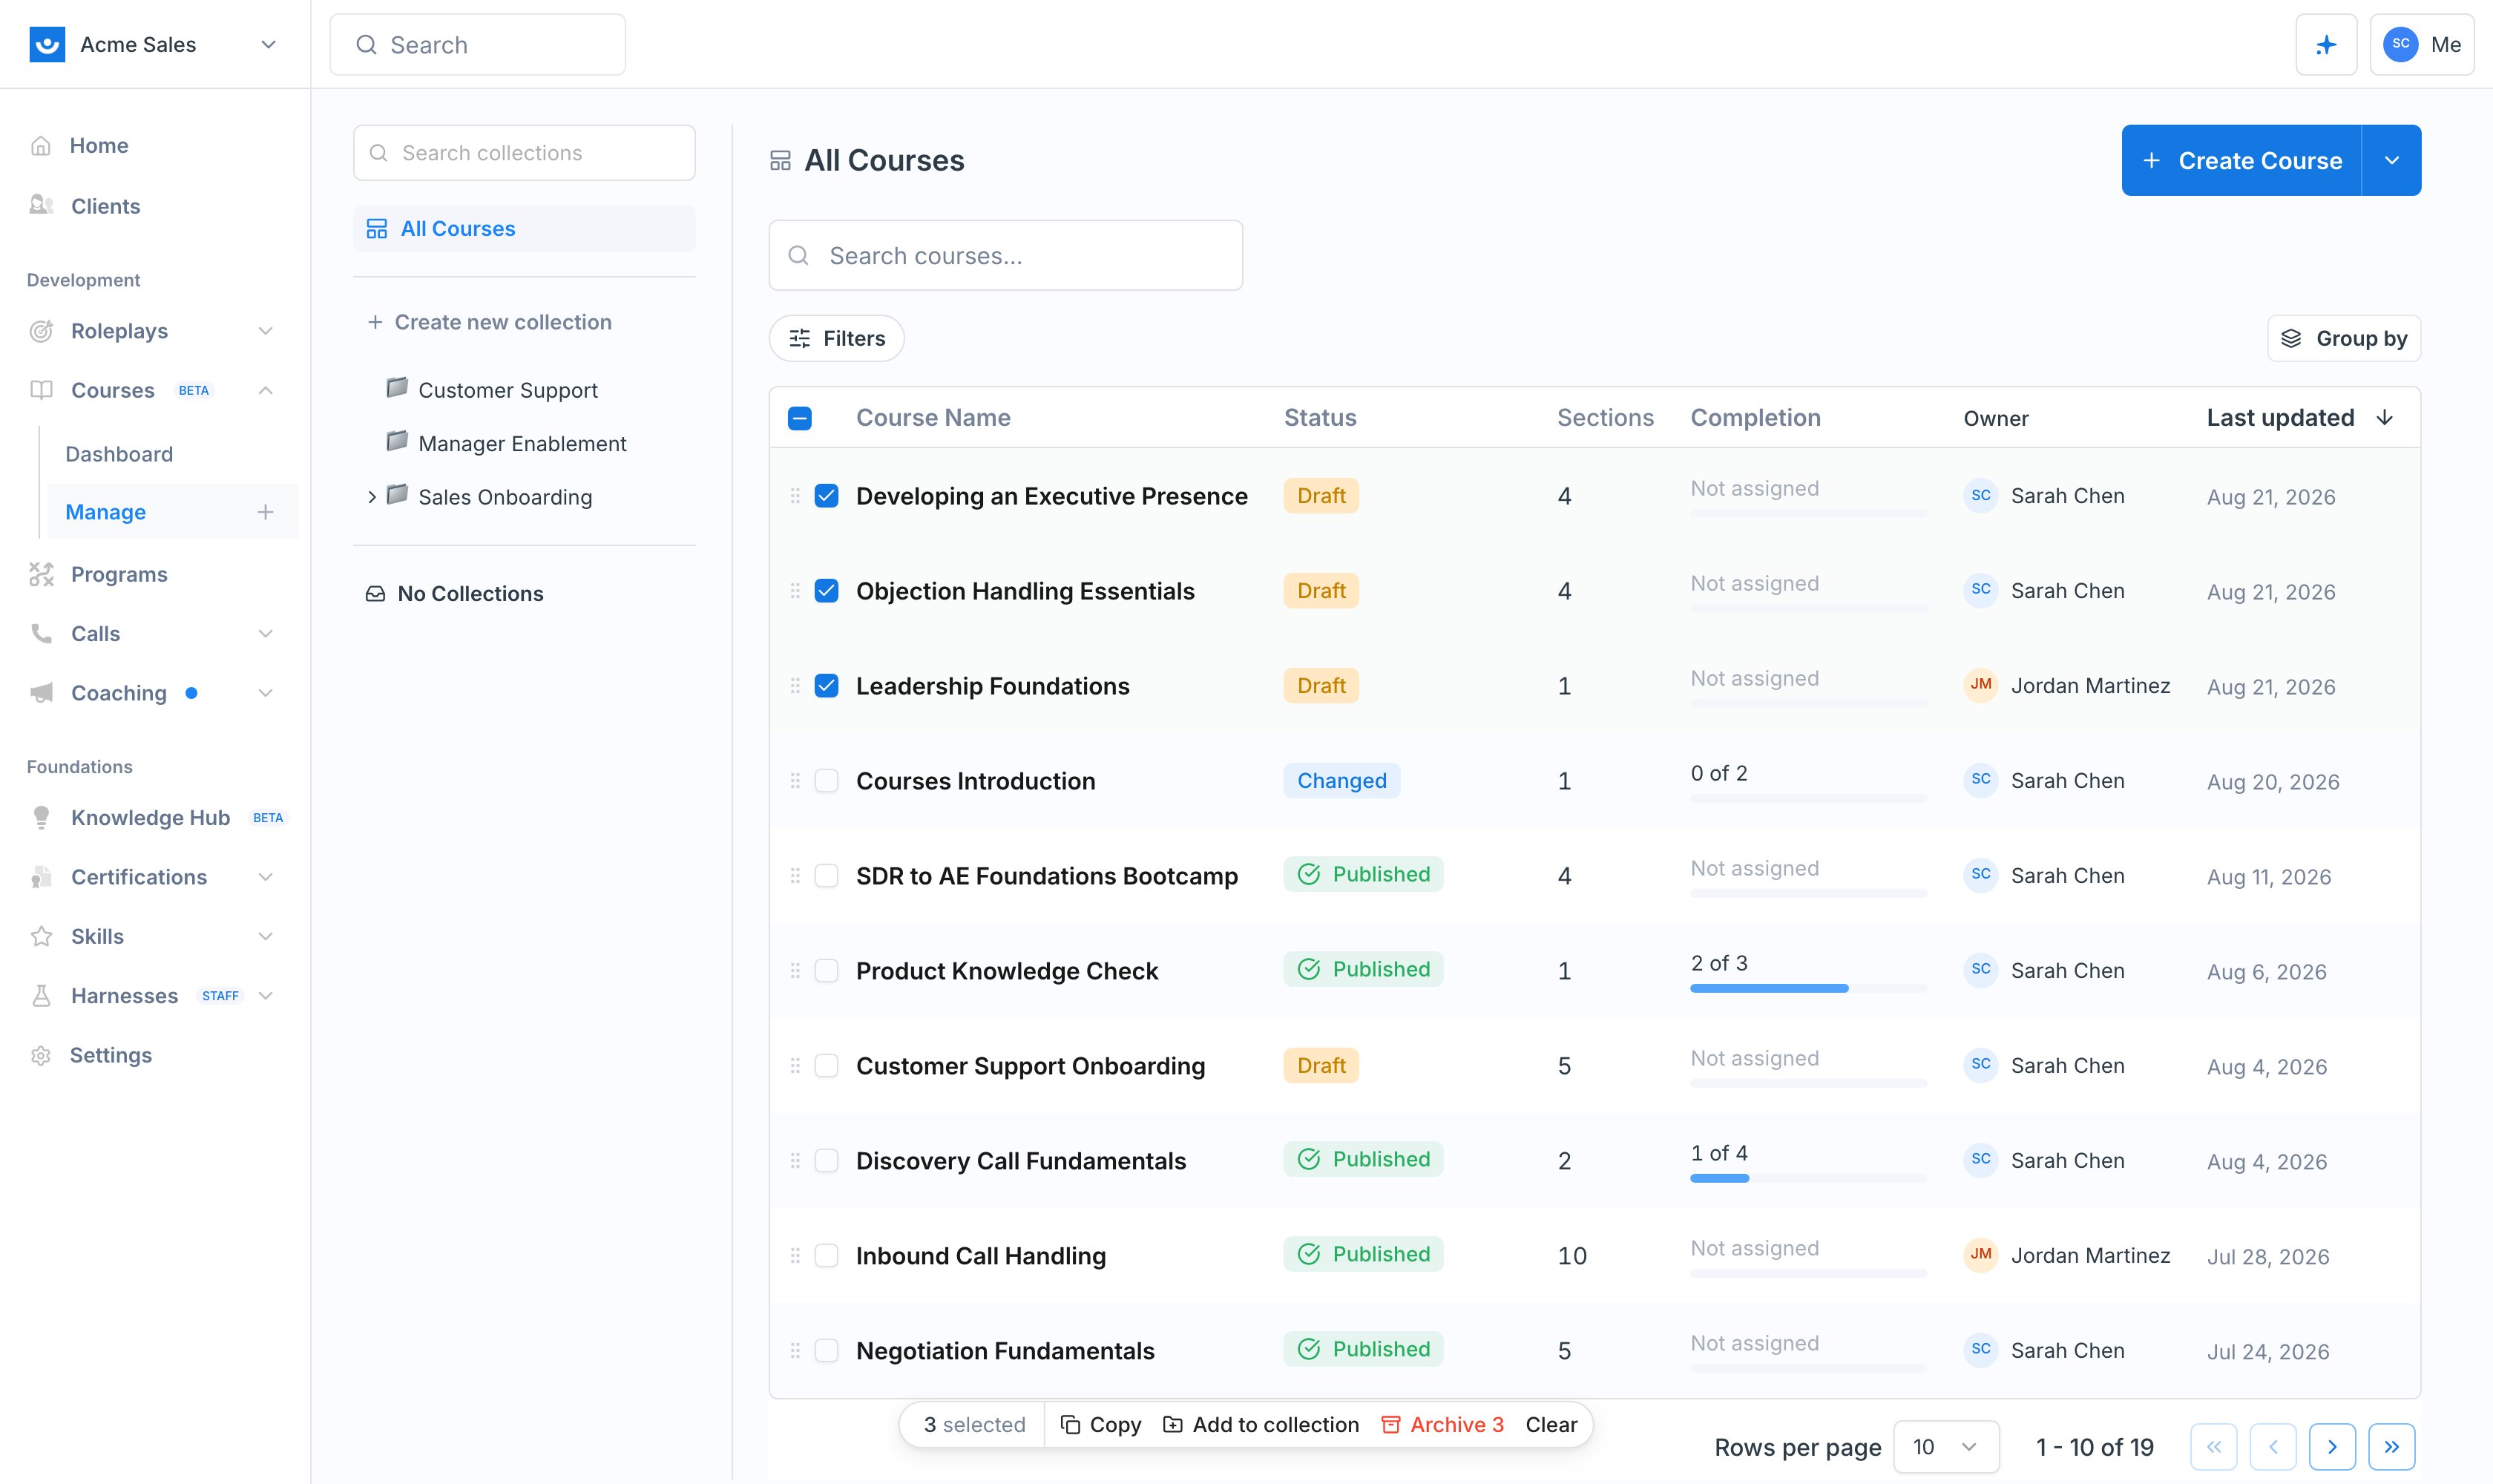 The action bar also has **Copy** and **Paste**, which is the quickest way to put the same courses into several collections: copy a selection, open another collection, and paste.
A course can live in as many collections as you like. Adding it to a collection does not move it out of anywhere else, and removing it from a collection never deletes the course.
## Nest Sub-collections
Collections can contain other collections, so you can keep a short top-level rail while still organizing detail underneath. Two ways to nest:
* **Create it nested.** Open the parent collection, then choose **New sub-collection** from the dropdown next to **Create Course**.
* **Move an existing one.** Drag a collection in the rail and drop it onto another collection.
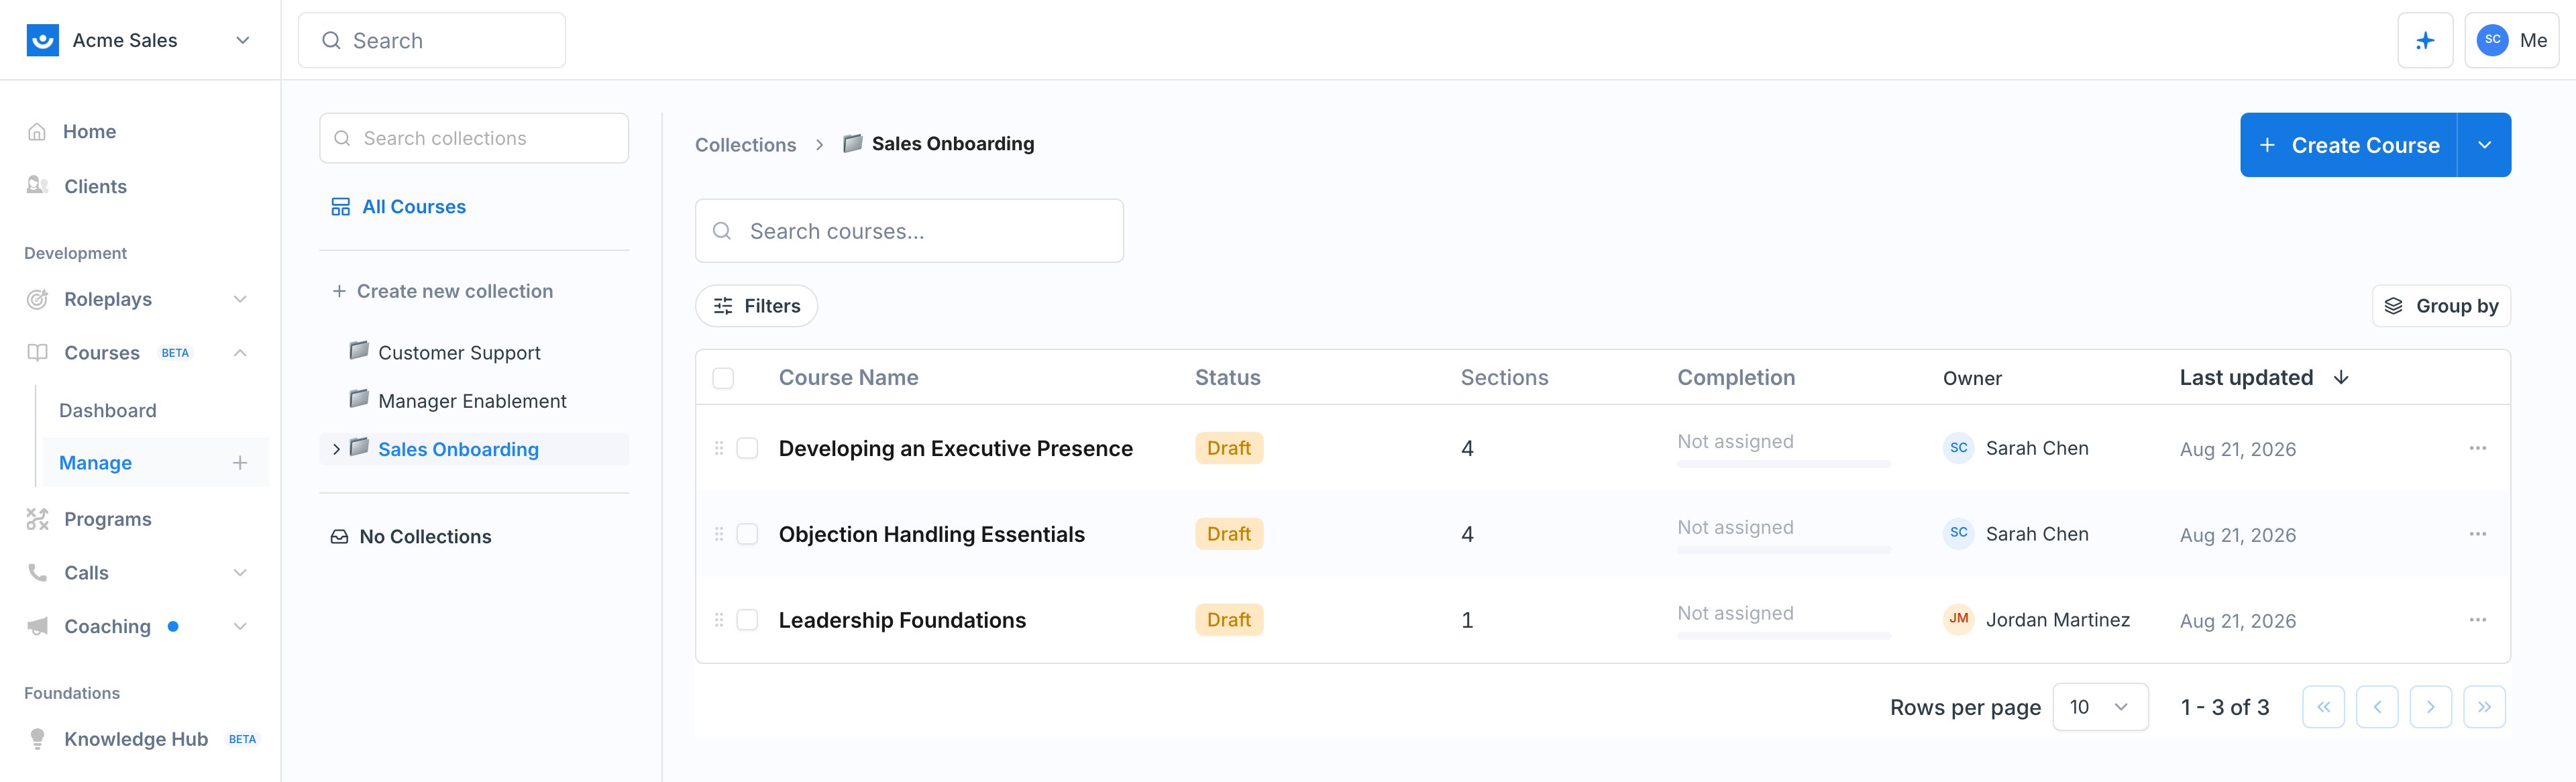
Expand a collection with the chevron beside its name to see its sub-collections. When you are inside one, a breadcrumb shows where you are.
The action bar also has **Copy** and **Paste**, which is the quickest way to put the same courses into several collections: copy a selection, open another collection, and paste.
A course can live in as many collections as you like. Adding it to a collection does not move it out of anywhere else, and removing it from a collection never deletes the course.
## Nest Sub-collections
Collections can contain other collections, so you can keep a short top-level rail while still organizing detail underneath. Two ways to nest:
* **Create it nested.** Open the parent collection, then choose **New sub-collection** from the dropdown next to **Create Course**.
* **Move an existing one.** Drag a collection in the rail and drop it onto another collection.
Expand a collection with the chevron beside its name to see its sub-collections. When you are inside one, a breadcrumb shows where you are.
 ## Find Courses Across Collections
The list has three tools that work together as the library grows:
* **Group by.** Switch the flat list into a grouped view with **Group by collection** or **Group by status**. Grouping by collection shows a count next to each collection and gathers everything that is not in one under **Unfiled**.
* **Filters.** Narrow the list by status (Draft, Published, Archived) or by collection.
* **No Collections.** The entry at the bottom of the rail jumps straight to courses that have not been filed anywhere, which is the fastest way to find what still needs organizing.
## Find Courses Across Collections
The list has three tools that work together as the library grows:
* **Group by.** Switch the flat list into a grouped view with **Group by collection** or **Group by status**. Grouping by collection shows a count next to each collection and gathers everything that is not in one under **Unfiled**.
* **Filters.** Narrow the list by status (Draft, Published, Archived) or by collection.
* **No Collections.** The entry at the bottom of the rail jumps straight to courses that have not been filed anywhere, which is the fastest way to find what still needs organizing.
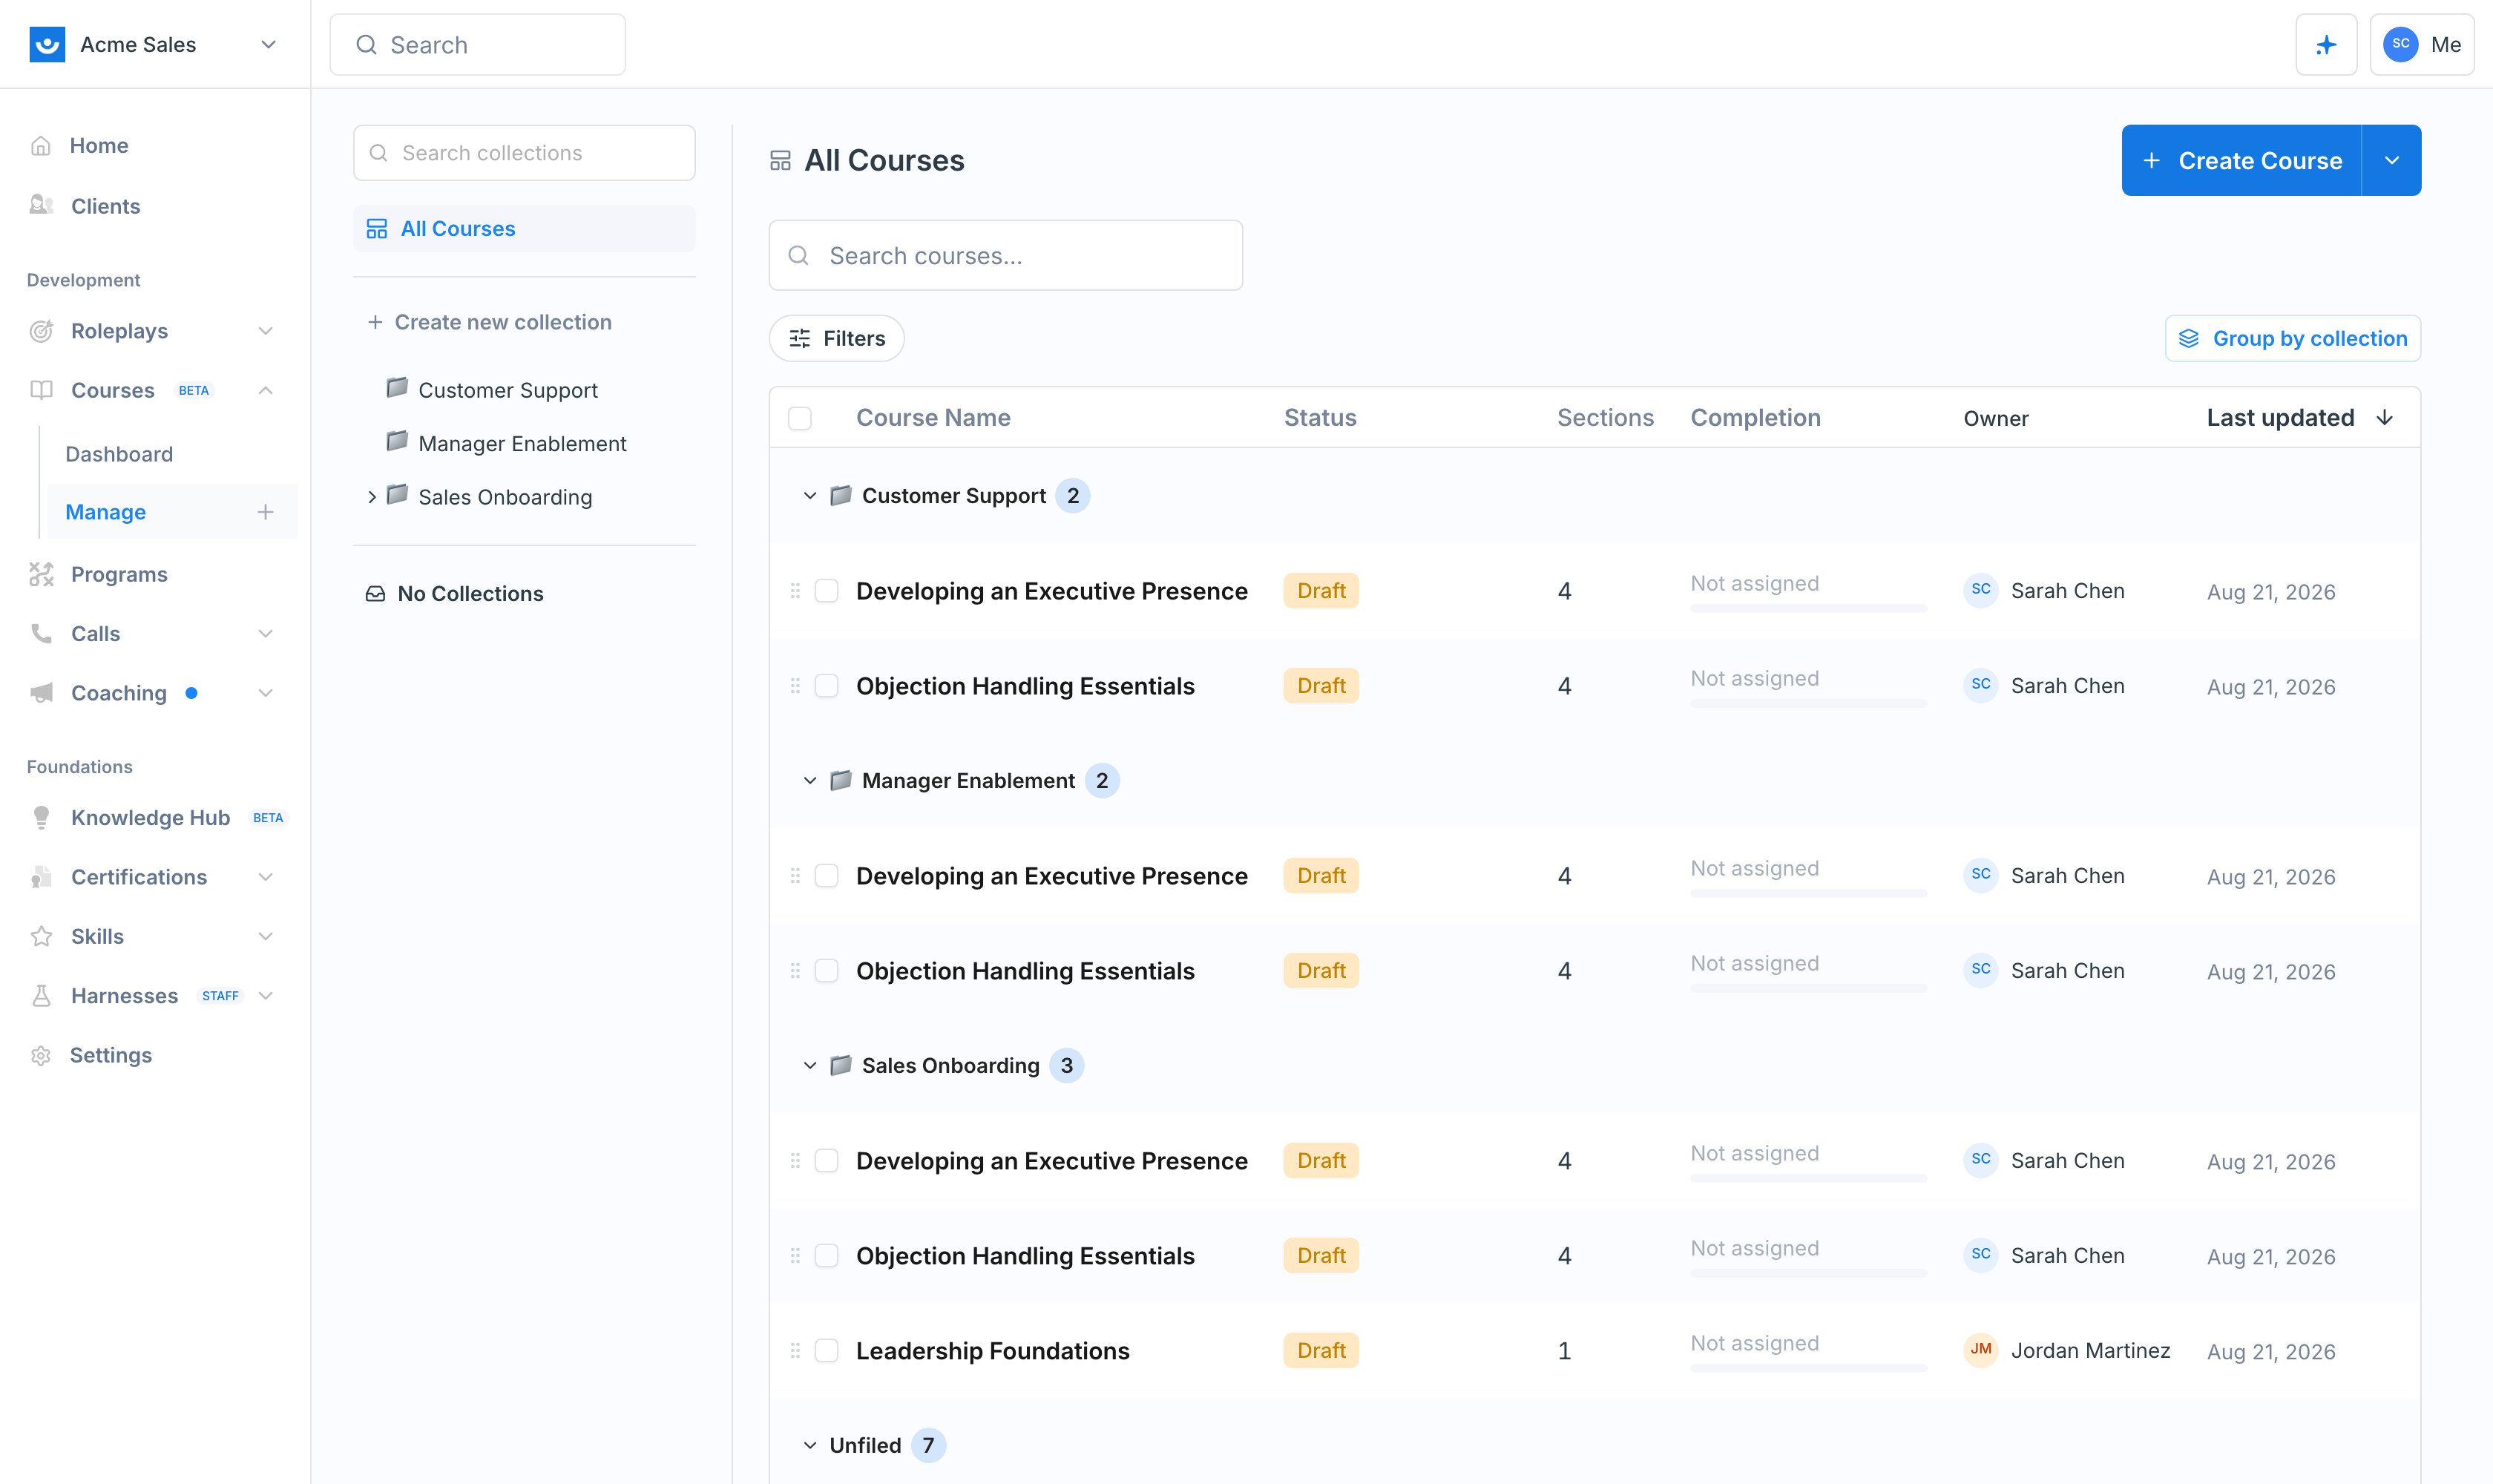 Because a course can belong to several collections, a grouped view will show it under each one it belongs to.
## Manage a Collection
Open a collection and use the dropdown next to **Create Course**:
Because a course can belong to several collections, a grouped view will show it under each one it belongs to.
## Manage a Collection
Open a collection and use the dropdown next to **Create Course**:
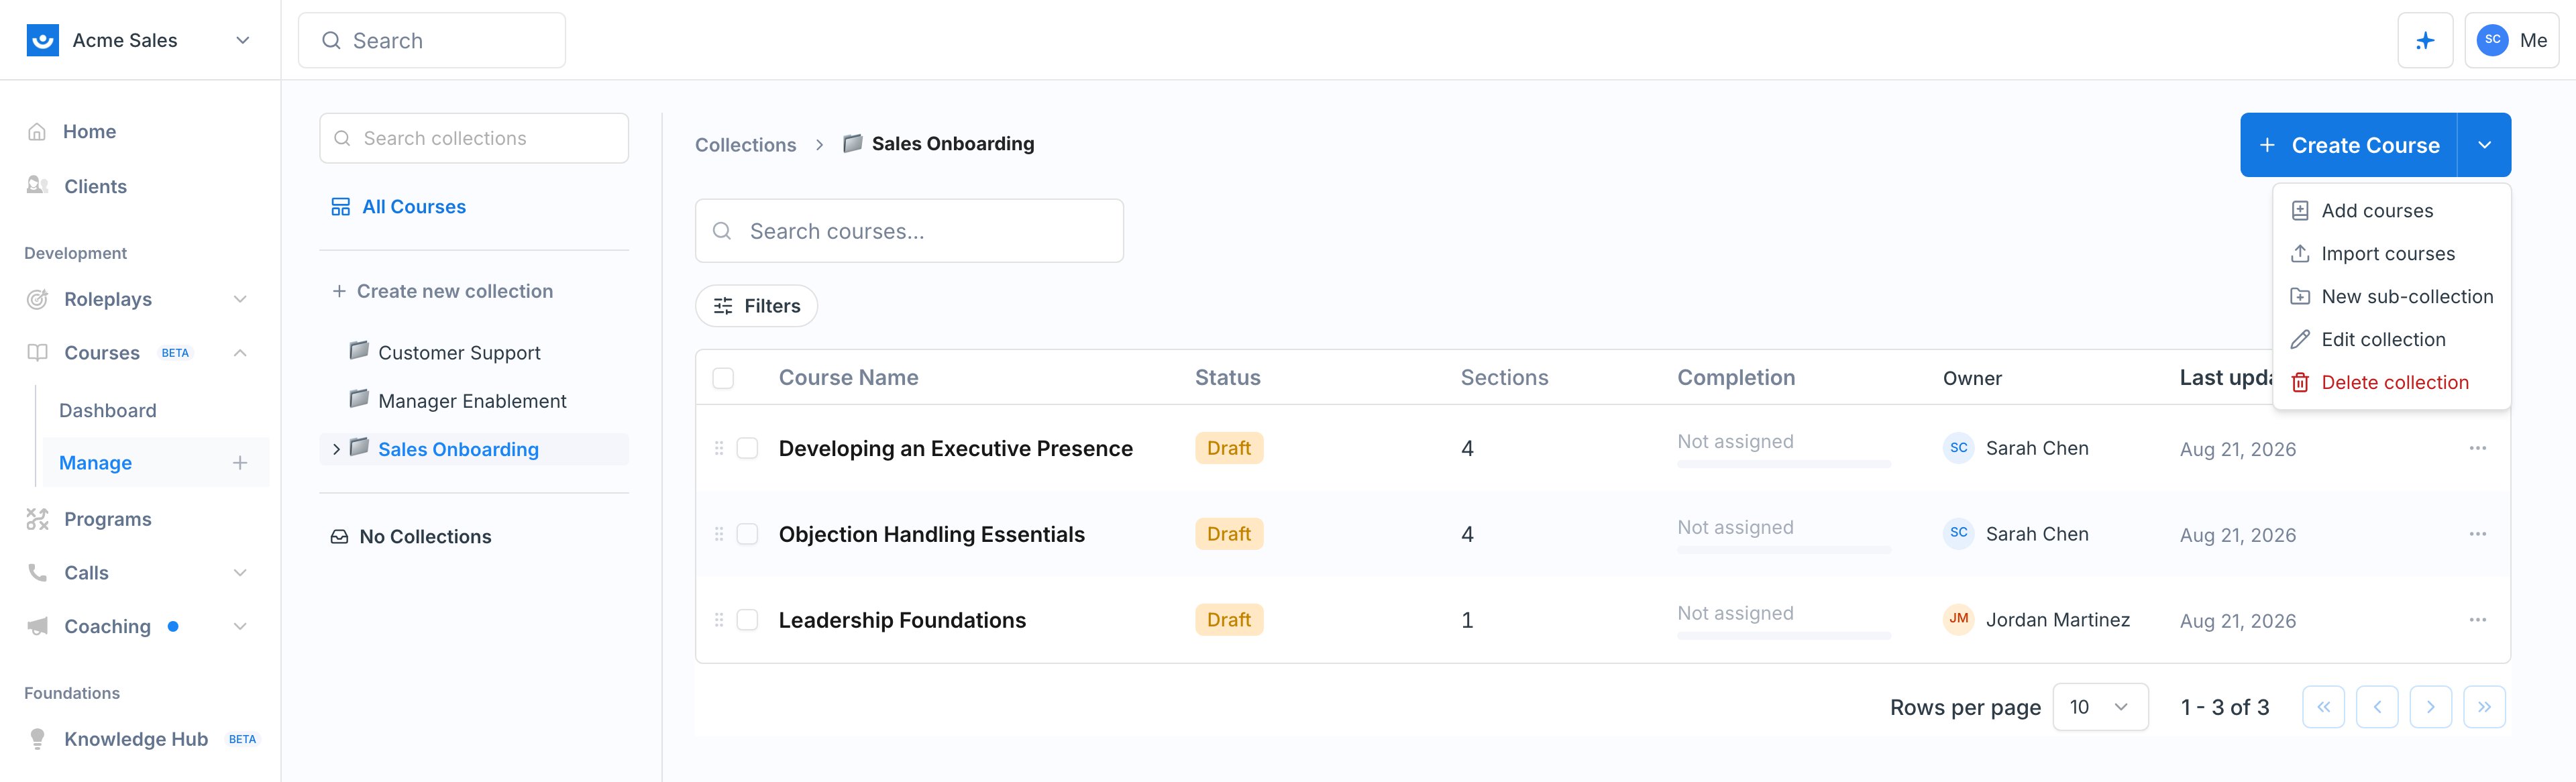 | Action | What it does |
| ------------------ | -------------------------------------------------------------------------------------------- |
| Add courses | Pick existing courses to file into this collection |
| Import courses | Start a SCORM import, landing the result here. See [Import a Course](/courses/import-course) |
| New sub-collection | Create a collection nested inside this one |
| Edit collection | Rename it or change its emoji |
| Delete collection | Remove the collection and its sub-collections |
Deleting a collection also deletes its sub-collections. The courses themselves are not deleted, they simply become unfiled and show up under **No Collections**.
## Tips
* **Mirror how your team asks for training.** Collections named after teams or roles ("New AE Onboarding", "Support") beat generic buckets, because people look for the audience before the topic.
* **Keep the top level short.** Push detail into sub-collections so the rail stays scannable.
* **File remixes with their original.** A course and its remixes belong in the same collection so it is obvious which versions exist. See [Remix a Course](/courses/remix-course).
* **Sweep No Collections periodically.** It is the backlog of courses nobody has organized yet.
## Next Steps
Copy a course into a new draft for a different audience.
Control who can actually see and take a course.
| Action | What it does |
| ------------------ | -------------------------------------------------------------------------------------------- |
| Add courses | Pick existing courses to file into this collection |
| Import courses | Start a SCORM import, landing the result here. See [Import a Course](/courses/import-course) |
| New sub-collection | Create a collection nested inside this one |
| Edit collection | Rename it or change its emoji |
| Delete collection | Remove the collection and its sub-collections |
Deleting a collection also deletes its sub-collections. The courses themselves are not deleted, they simply become unfiled and show up under **No Collections**.
## Tips
* **Mirror how your team asks for training.** Collections named after teams or roles ("New AE Onboarding", "Support") beat generic buckets, because people look for the audience before the topic.
* **Keep the top level short.** Push detail into sub-collections so the rail stays scannable.
* **File remixes with their original.** A course and its remixes belong in the same collection so it is obvious which versions exist. See [Remix a Course](/courses/remix-course).
* **Sweep No Collections periodically.** It is the backlog of courses nobody has organized yet.
## Next Steps
Copy a course into a new draft for a different audience.
Control who can actually see and take a course.