> ## Documentation Index
> Fetch the complete documentation index at: https://docs.exec.com/llms.txt
> Use this file to discover all available pages before exploring further.
# Build Sections and Pages
> Structure your course with sections and pages in the editor, reorder them, mark pages optional, and gate progress with sequential unlocking
The course editor is where you give your course its shape. Every course follows the same hierarchy: a **Course** contains ordered **Sections**, each Section contains **Pages**, and each Page holds the **Blocks** learners interact with. This page covers the structural work of sections and pages; see the [Courses Overview](/courses/overview) for the full content model and [Add Content Blocks](/courses/add-content-blocks) for what goes on each page.
 ## The Sections Rail
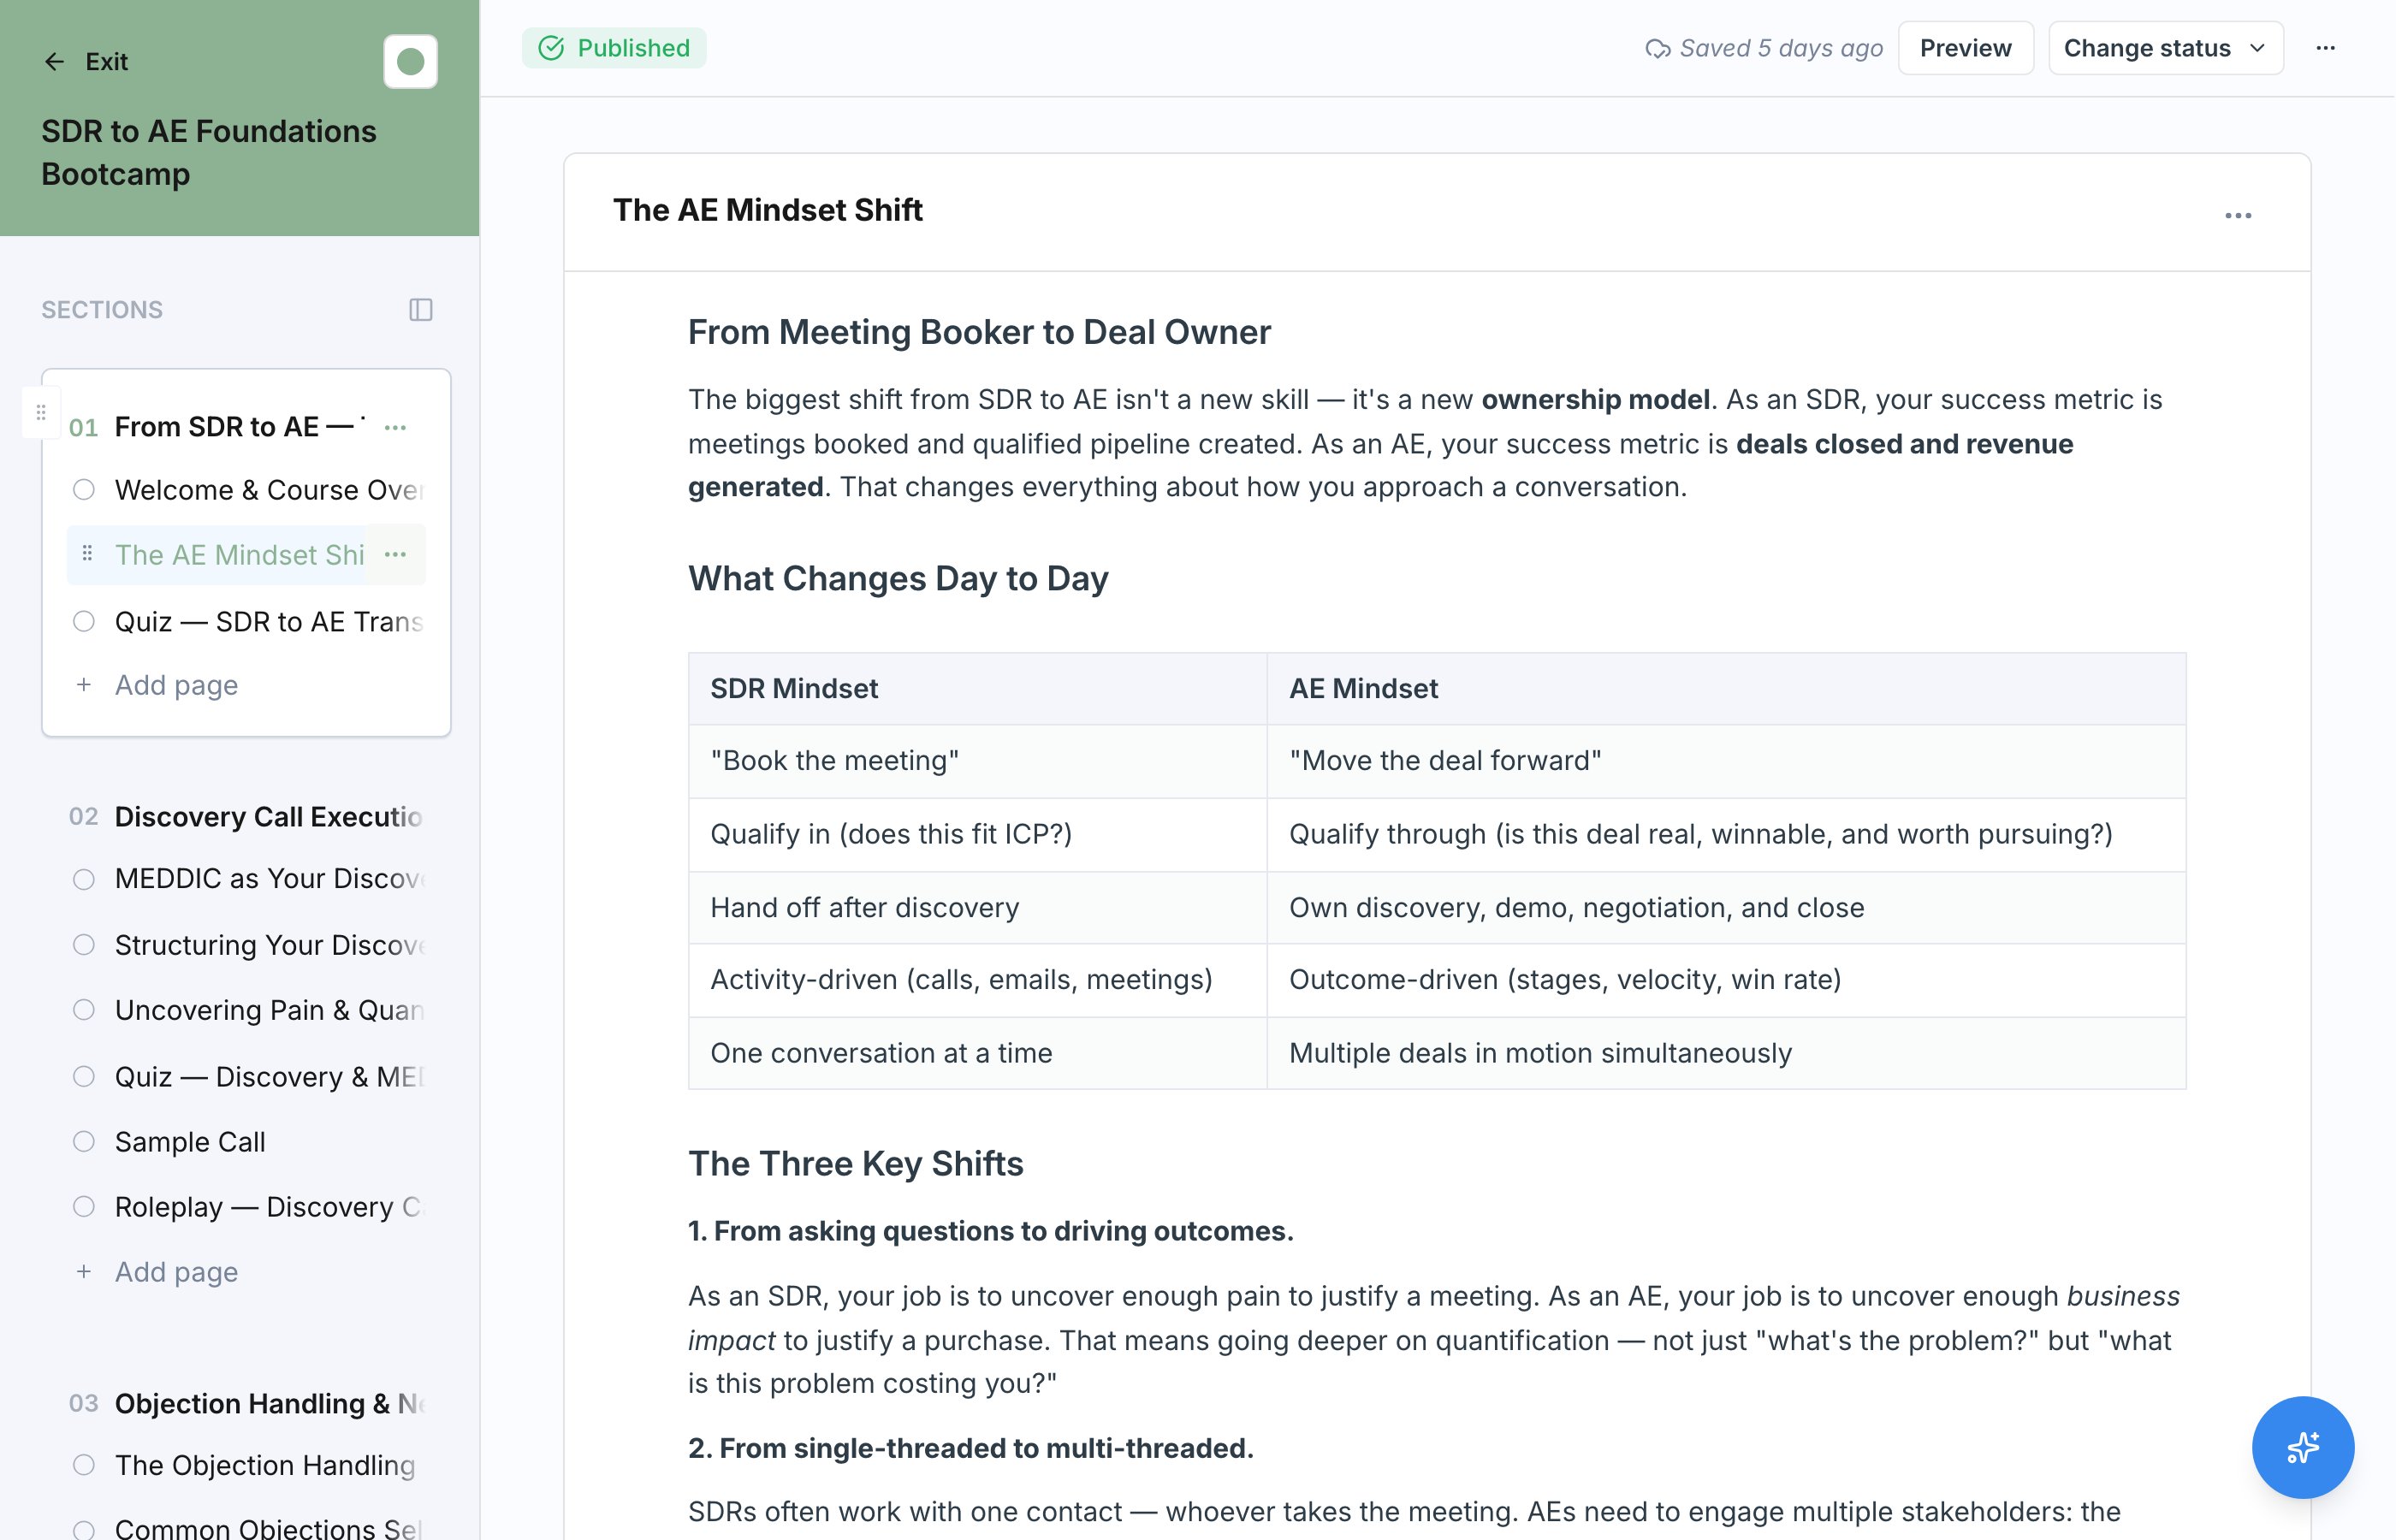
In the left rail of the editor you will find the **Sections**. It lists every section in your course, with each section's pages nested beneath it. This is your course outline: use it to move between pages while you work.
Click **Add Section** in the left rail. Sections are the top-level chapters of your course, so name them around a theme or milestone, like "Preparing for the Call" or "Handling Objections".
Add pages within the section to break it into digestible steps. Each page is a rich-text document where you write prose and insert content blocks.
Sections and pages are ordered, and learners move through them in the order shown in the rail. Drag and drop them until the flow reads the way you want a learner to experience it.
Writing a page works the way a modern document editor does: type prose directly, use markdown shortcuts for headings and lists, and open the slash menu when you want to drop in a block. See [Add Content Blocks](/courses/add-content-blocks).
Keep pages focused. A section with several short pages is easier to work through than one long page, and it gives learners a clearer sense of progress.
## Optional Pages
Pages can be marked **Optional**. Optional pages are available to learners but not required for completing the course, which makes them a good home for reference material, bonus depth, or supporting resources that not everyone needs.
## Gating: Sequential Unlock
Each section has two **Section Settings** toggles that control how learners move through it:
* **Gate this section** requires the previous section to be complete first, so learners work through your sections in order.
* **Sequential pages** requires participants to complete each page in order within the section.
When a page is locked, the player shows "This page is locked" with the message "Finish the earlier pages in this section to unlock it."
Use gating when the order matters, for example when a quiz should only appear after the learner has covered the material it tests. Turn these off when learners can safely jump around.
## Preview as a Learner
Use the preview view to see the course exactly as a learner will, without saving any progress. Preview is the fastest way to check pacing, confirm gating behaves the way you expect, and catch pages that feel too long or too thin before you publish.
## Course Theme and Publishing
Two more controls live in the editor header alongside the course title:
* **Course theme** sets the course's color, which carries through the header and the learner's player. Pick one of the brand presets or choose a custom color. Every new course starts on a random preset, so set this if you want the course on-brand.
* **Publish changes** pushes your draft live. Your edits stay in the draft version until you publish; see [Publish and Versioning](/courses/publish-and-versioning) for how drafts, versions, and enrolled learners interact.
The course name, description, cover image, certification, and enrollment settings are not in the editor. Reach them from the settings sheet on the course dashboard, which you can open any time before or after publishing. See [Create a Course](/courses/create-course).
## Next Steps
Fill your pages with text, articles, videos, slides, quizzes, files, and roleplays.
Publish your draft and understand how versions work.
## The Sections Rail
In the left rail of the editor you will find the **Sections**. It lists every section in your course, with each section's pages nested beneath it. This is your course outline: use it to move between pages while you work.
Click **Add Section** in the left rail. Sections are the top-level chapters of your course, so name them around a theme or milestone, like "Preparing for the Call" or "Handling Objections".
Add pages within the section to break it into digestible steps. Each page is a rich-text document where you write prose and insert content blocks.
Sections and pages are ordered, and learners move through them in the order shown in the rail. Drag and drop them until the flow reads the way you want a learner to experience it.
Writing a page works the way a modern document editor does: type prose directly, use markdown shortcuts for headings and lists, and open the slash menu when you want to drop in a block. See [Add Content Blocks](/courses/add-content-blocks).
Keep pages focused. A section with several short pages is easier to work through than one long page, and it gives learners a clearer sense of progress.
## Optional Pages
Pages can be marked **Optional**. Optional pages are available to learners but not required for completing the course, which makes them a good home for reference material, bonus depth, or supporting resources that not everyone needs.
## Gating: Sequential Unlock
Each section has two **Section Settings** toggles that control how learners move through it:
* **Gate this section** requires the previous section to be complete first, so learners work through your sections in order.
* **Sequential pages** requires participants to complete each page in order within the section.
When a page is locked, the player shows "This page is locked" with the message "Finish the earlier pages in this section to unlock it."
Use gating when the order matters, for example when a quiz should only appear after the learner has covered the material it tests. Turn these off when learners can safely jump around.
## Preview as a Learner
Use the preview view to see the course exactly as a learner will, without saving any progress. Preview is the fastest way to check pacing, confirm gating behaves the way you expect, and catch pages that feel too long or too thin before you publish.
## Course Theme and Publishing
Two more controls live in the editor header alongside the course title:
* **Course theme** sets the course's color, which carries through the header and the learner's player. Pick one of the brand presets or choose a custom color. Every new course starts on a random preset, so set this if you want the course on-brand.
* **Publish changes** pushes your draft live. Your edits stay in the draft version until you publish; see [Publish and Versioning](/courses/publish-and-versioning) for how drafts, versions, and enrolled learners interact.
The course name, description, cover image, certification, and enrollment settings are not in the editor. Reach them from the settings sheet on the course dashboard, which you can open any time before or after publishing. See [Create a Course](/courses/create-course).
## Next Steps
Fill your pages with text, articles, videos, slides, quizzes, files, and roleplays.
Publish your draft and understand how versions work.