> ## Documentation Index
> Fetch the complete documentation index at: https://docs.exec.com/llms.txt
> Use this file to discover all available pages before exploring further.
# A Guide to Groups
> Create groups, manage members and credits, and use groups to organize and tag your workspace
Groups let you organize the people in your workspace into segments you can manage together - a department, a cohort, an office, or any other way you want to slice your team. This guide covers what groups are for and how to manage them.
This is an admin task. Creating and managing groups is available to **workspace admins**. You can also appoint **group admins** to manage a single group. Credit features appear only when coaching is enabled.
***
## What groups are for
A group is a named collection of members. You can use groups to:
* **Organize your team** - segment members by department, cohort, region, or whatever structure fits.
* **Control coaching access** - give a group access to specific coaching services, or set a per-session credit limit.
* **Manage credits together** - give a group its own credit wallet and let a group admin distribute credits within it.
* **Assign work in bulk** - assign programs and roleplay scenarios to a whole group at once.
* **Tag and filter** - because a member can belong to many groups, groups double as **tags**. Use them to label members (for example, "New Hires" or "Pilot") and filter your Members list by group.
A member can be in as many groups as you like, so groups work just as well as lightweight tags as they do as formal teams.
***
## Create a group
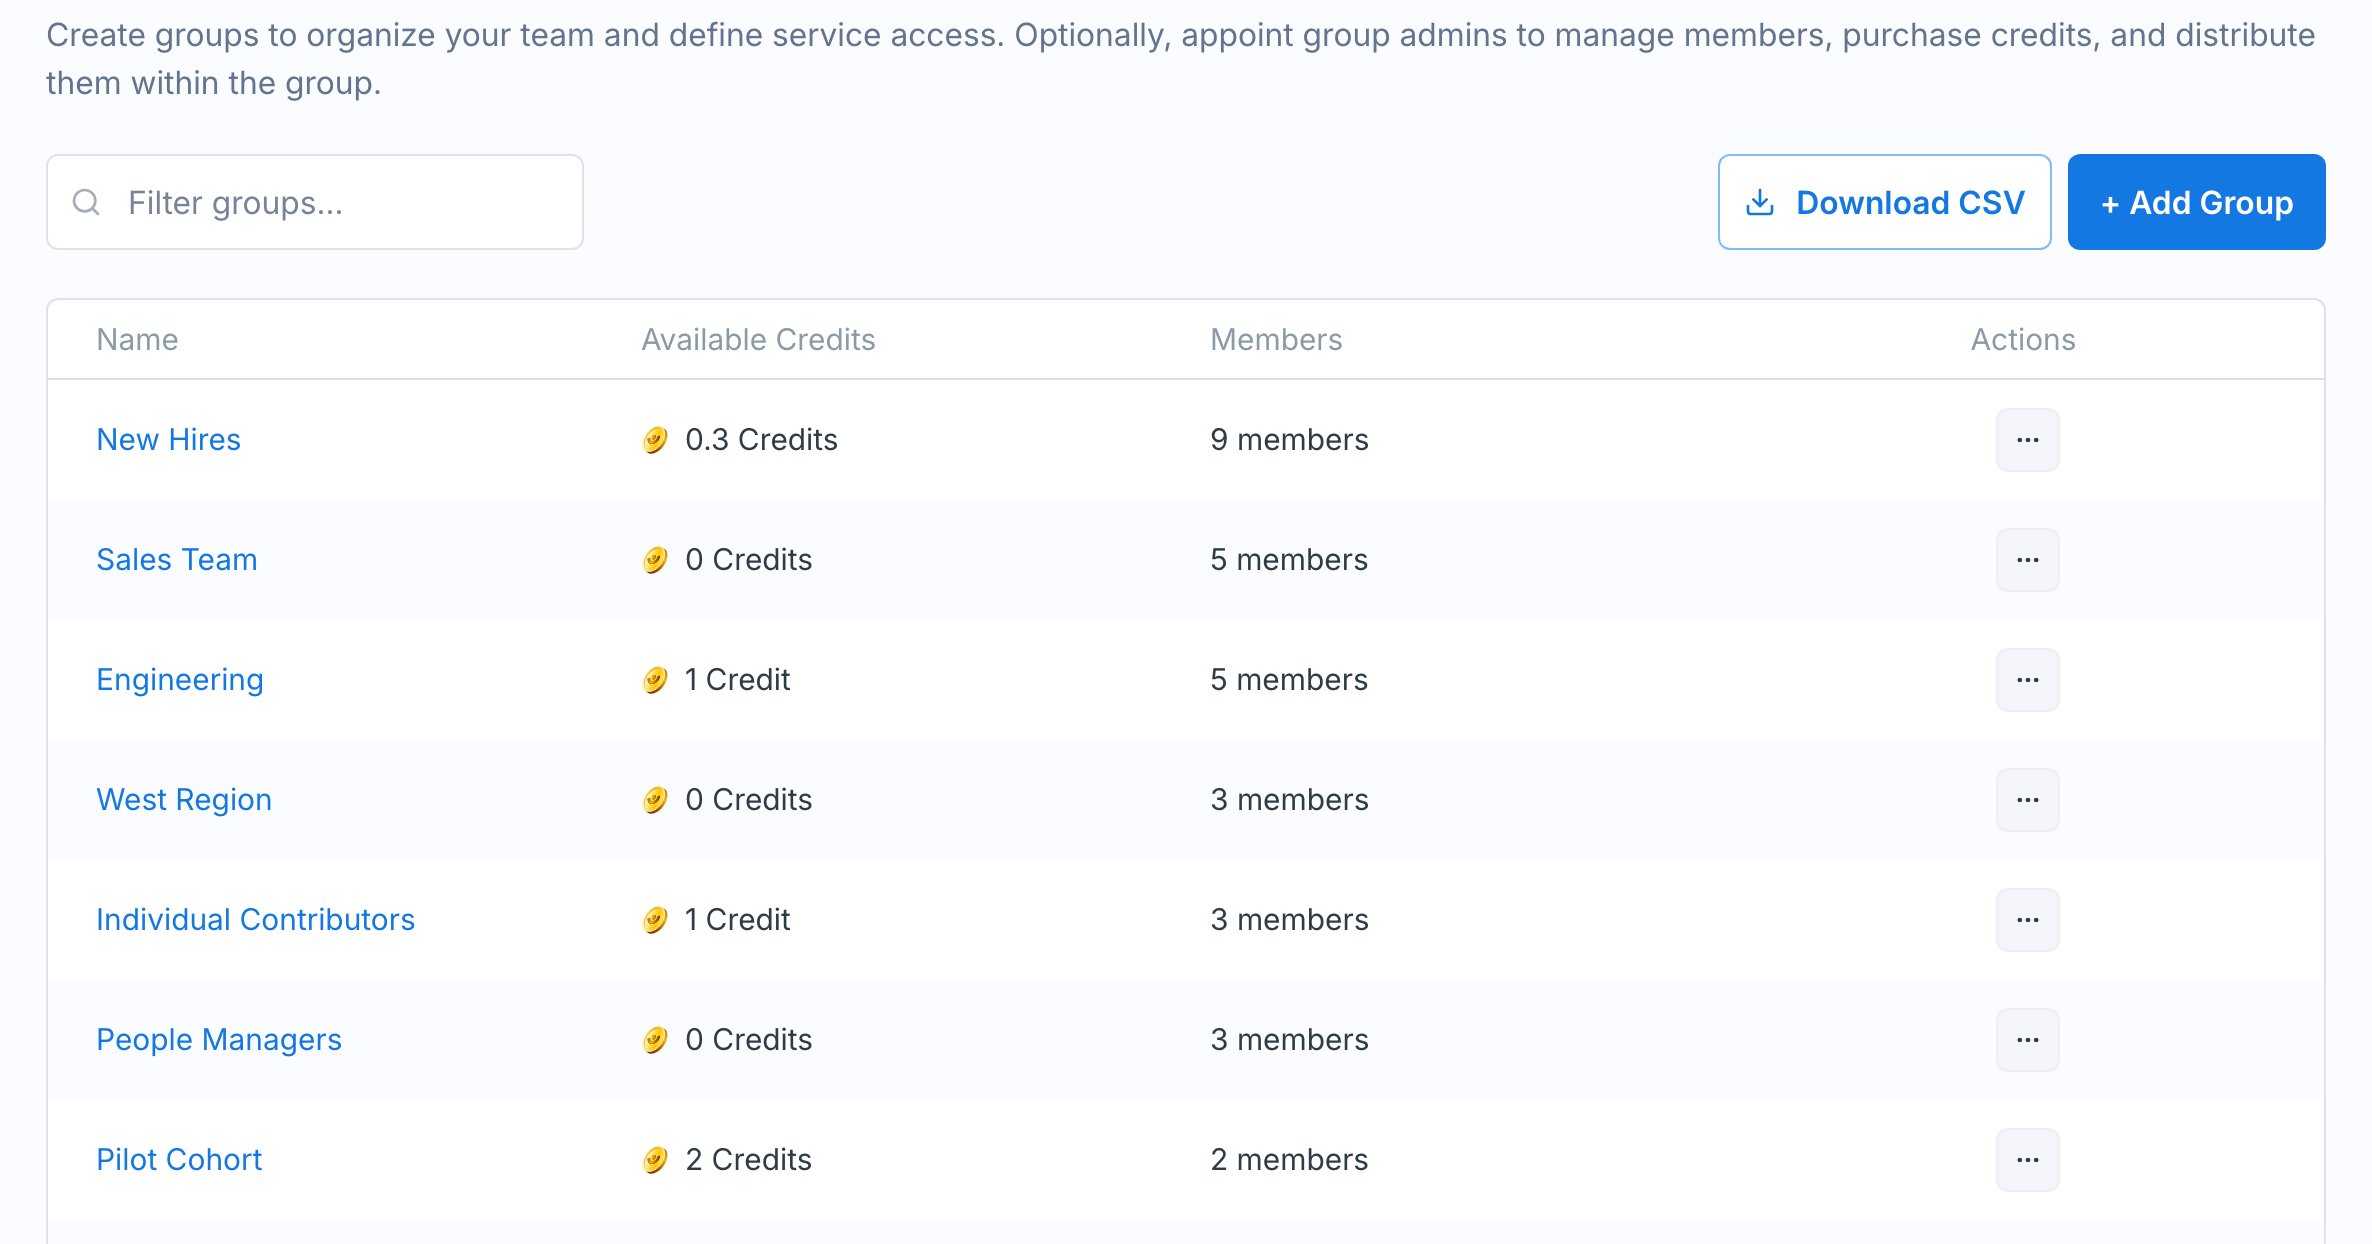
Go to **Workspace > Groups** in your admin settings, then click **+ Add Group**.
 In the **Add Group** dialog, give the group a **name** and optionally add members by email.
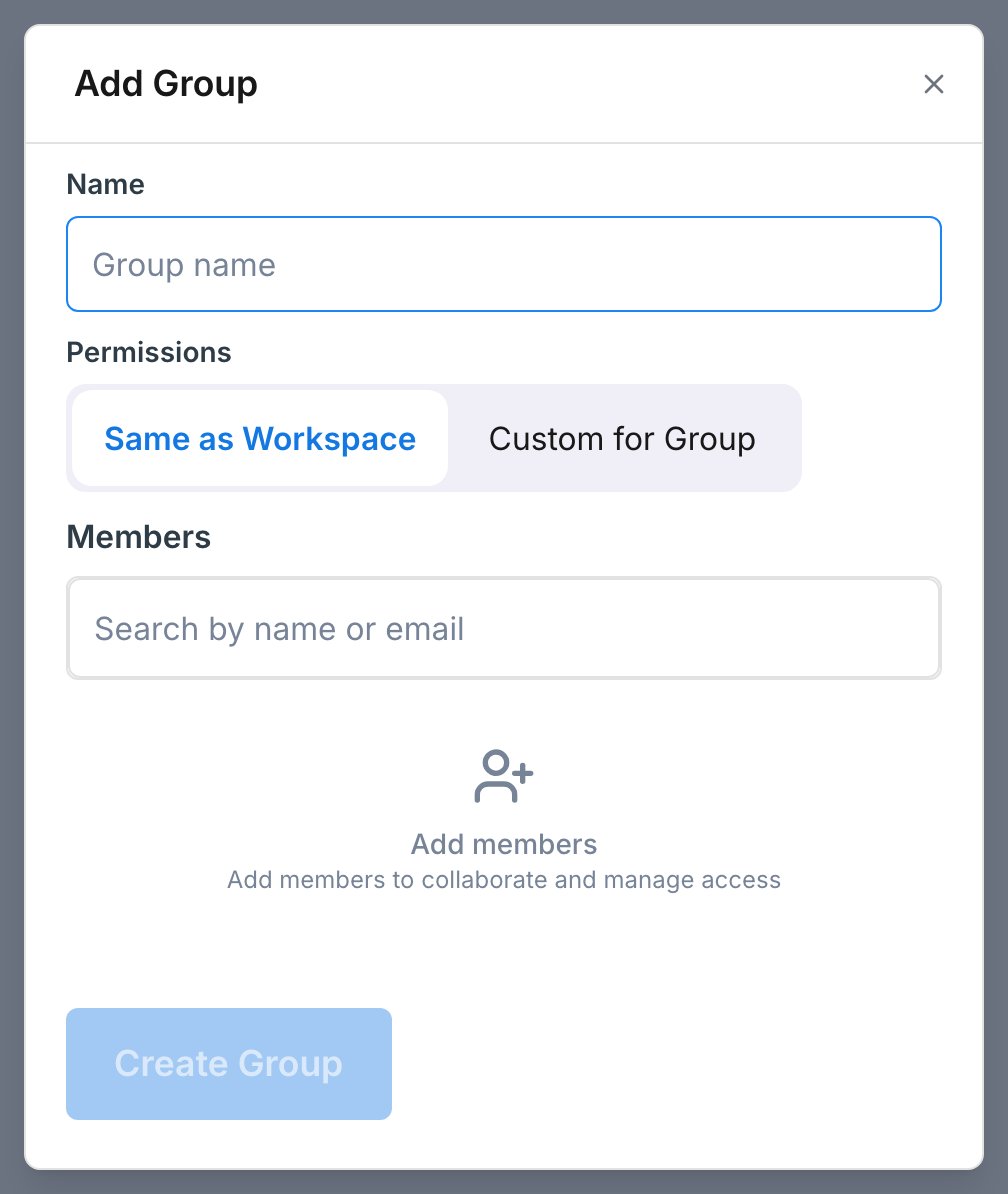 If coaching is enabled, choose **Same as Workspace** to inherit your workspace defaults, or **Custom for Group** to control which coaching services the group can access and set a per-session credit limit. Then click **Create Group**.
***
## Add and remove people
**Add members to the group.** On the group's page, find the **Group Members** section and click **+ Add Members**, then enter the emails of the workspace members to add.
**Remove a member.** In the **Group Members** table, open a member's actions menu and choose **Remove From Group**. This only removes them from the group, not from your workspace.
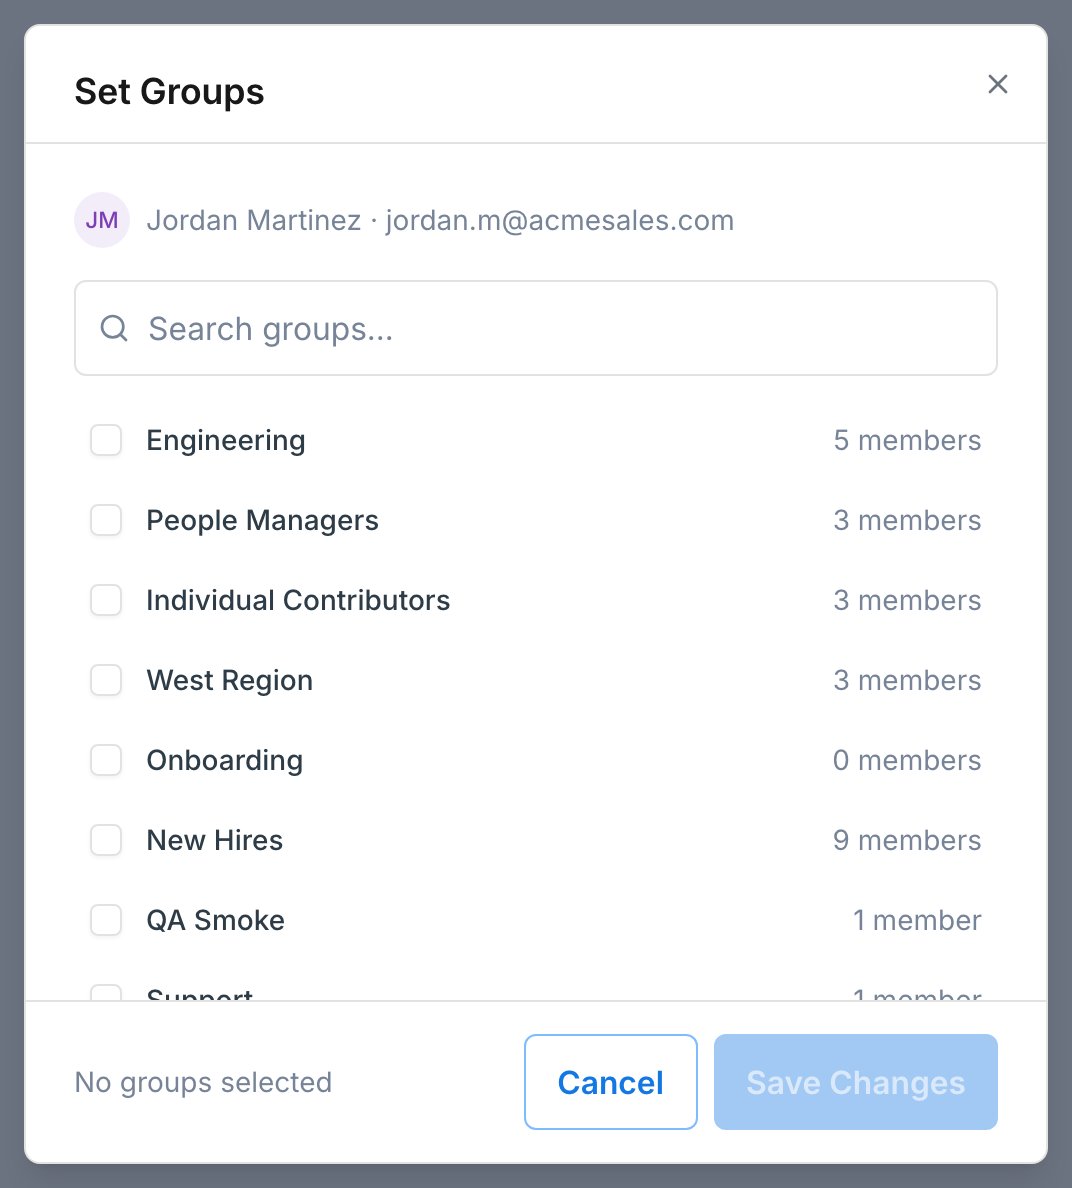
**Tag a member from the Members list.** You can also assign groups from the other direction: on your **Members** list, open a member's menu (or select several at once) and choose **Set Groups** to check the groups they belong to. This is the quickest way to use groups as tags.
If coaching is enabled, choose **Same as Workspace** to inherit your workspace defaults, or **Custom for Group** to control which coaching services the group can access and set a per-session credit limit. Then click **Create Group**.
***
## Add and remove people
**Add members to the group.** On the group's page, find the **Group Members** section and click **+ Add Members**, then enter the emails of the workspace members to add.
**Remove a member.** In the **Group Members** table, open a member's actions menu and choose **Remove From Group**. This only removes them from the group, not from your workspace.
**Tag a member from the Members list.** You can also assign groups from the other direction: on your **Members** list, open a member's menu (or select several at once) and choose **Set Groups** to check the groups they belong to. This is the quickest way to use groups as tags.
 ***
## Appoint a group admin
A **group admin** manages a single group without being a full workspace admin. They can add and remove members and distribute the group's credits, but they can't rename or delete the group or change its permissions.
To appoint one, open the **Group Members** table, open a member's actions menu, and choose **Make Group Admin** - their row then shows a **Group Admin** badge. Choose **Revoke Admin Rights** to remove it. Only workspace admins can appoint group admins.
***
## Manage group credits
Groups can hold their own pool of coaching credits, so a group admin can hand them out without touching the rest of the workspace's balance.
***
## Appoint a group admin
A **group admin** manages a single group without being a full workspace admin. They can add and remove members and distribute the group's credits, but they can't rename or delete the group or change its permissions.
To appoint one, open the **Group Members** table, open a member's actions menu, and choose **Make Group Admin** - their row then shows a **Group Admin** badge. Choose **Revoke Admin Rights** to remove it. Only workspace admins can appoint group admins.
***
## Manage group credits
Groups can hold their own pool of coaching credits, so a group admin can hand them out without touching the rest of the workspace's balance.
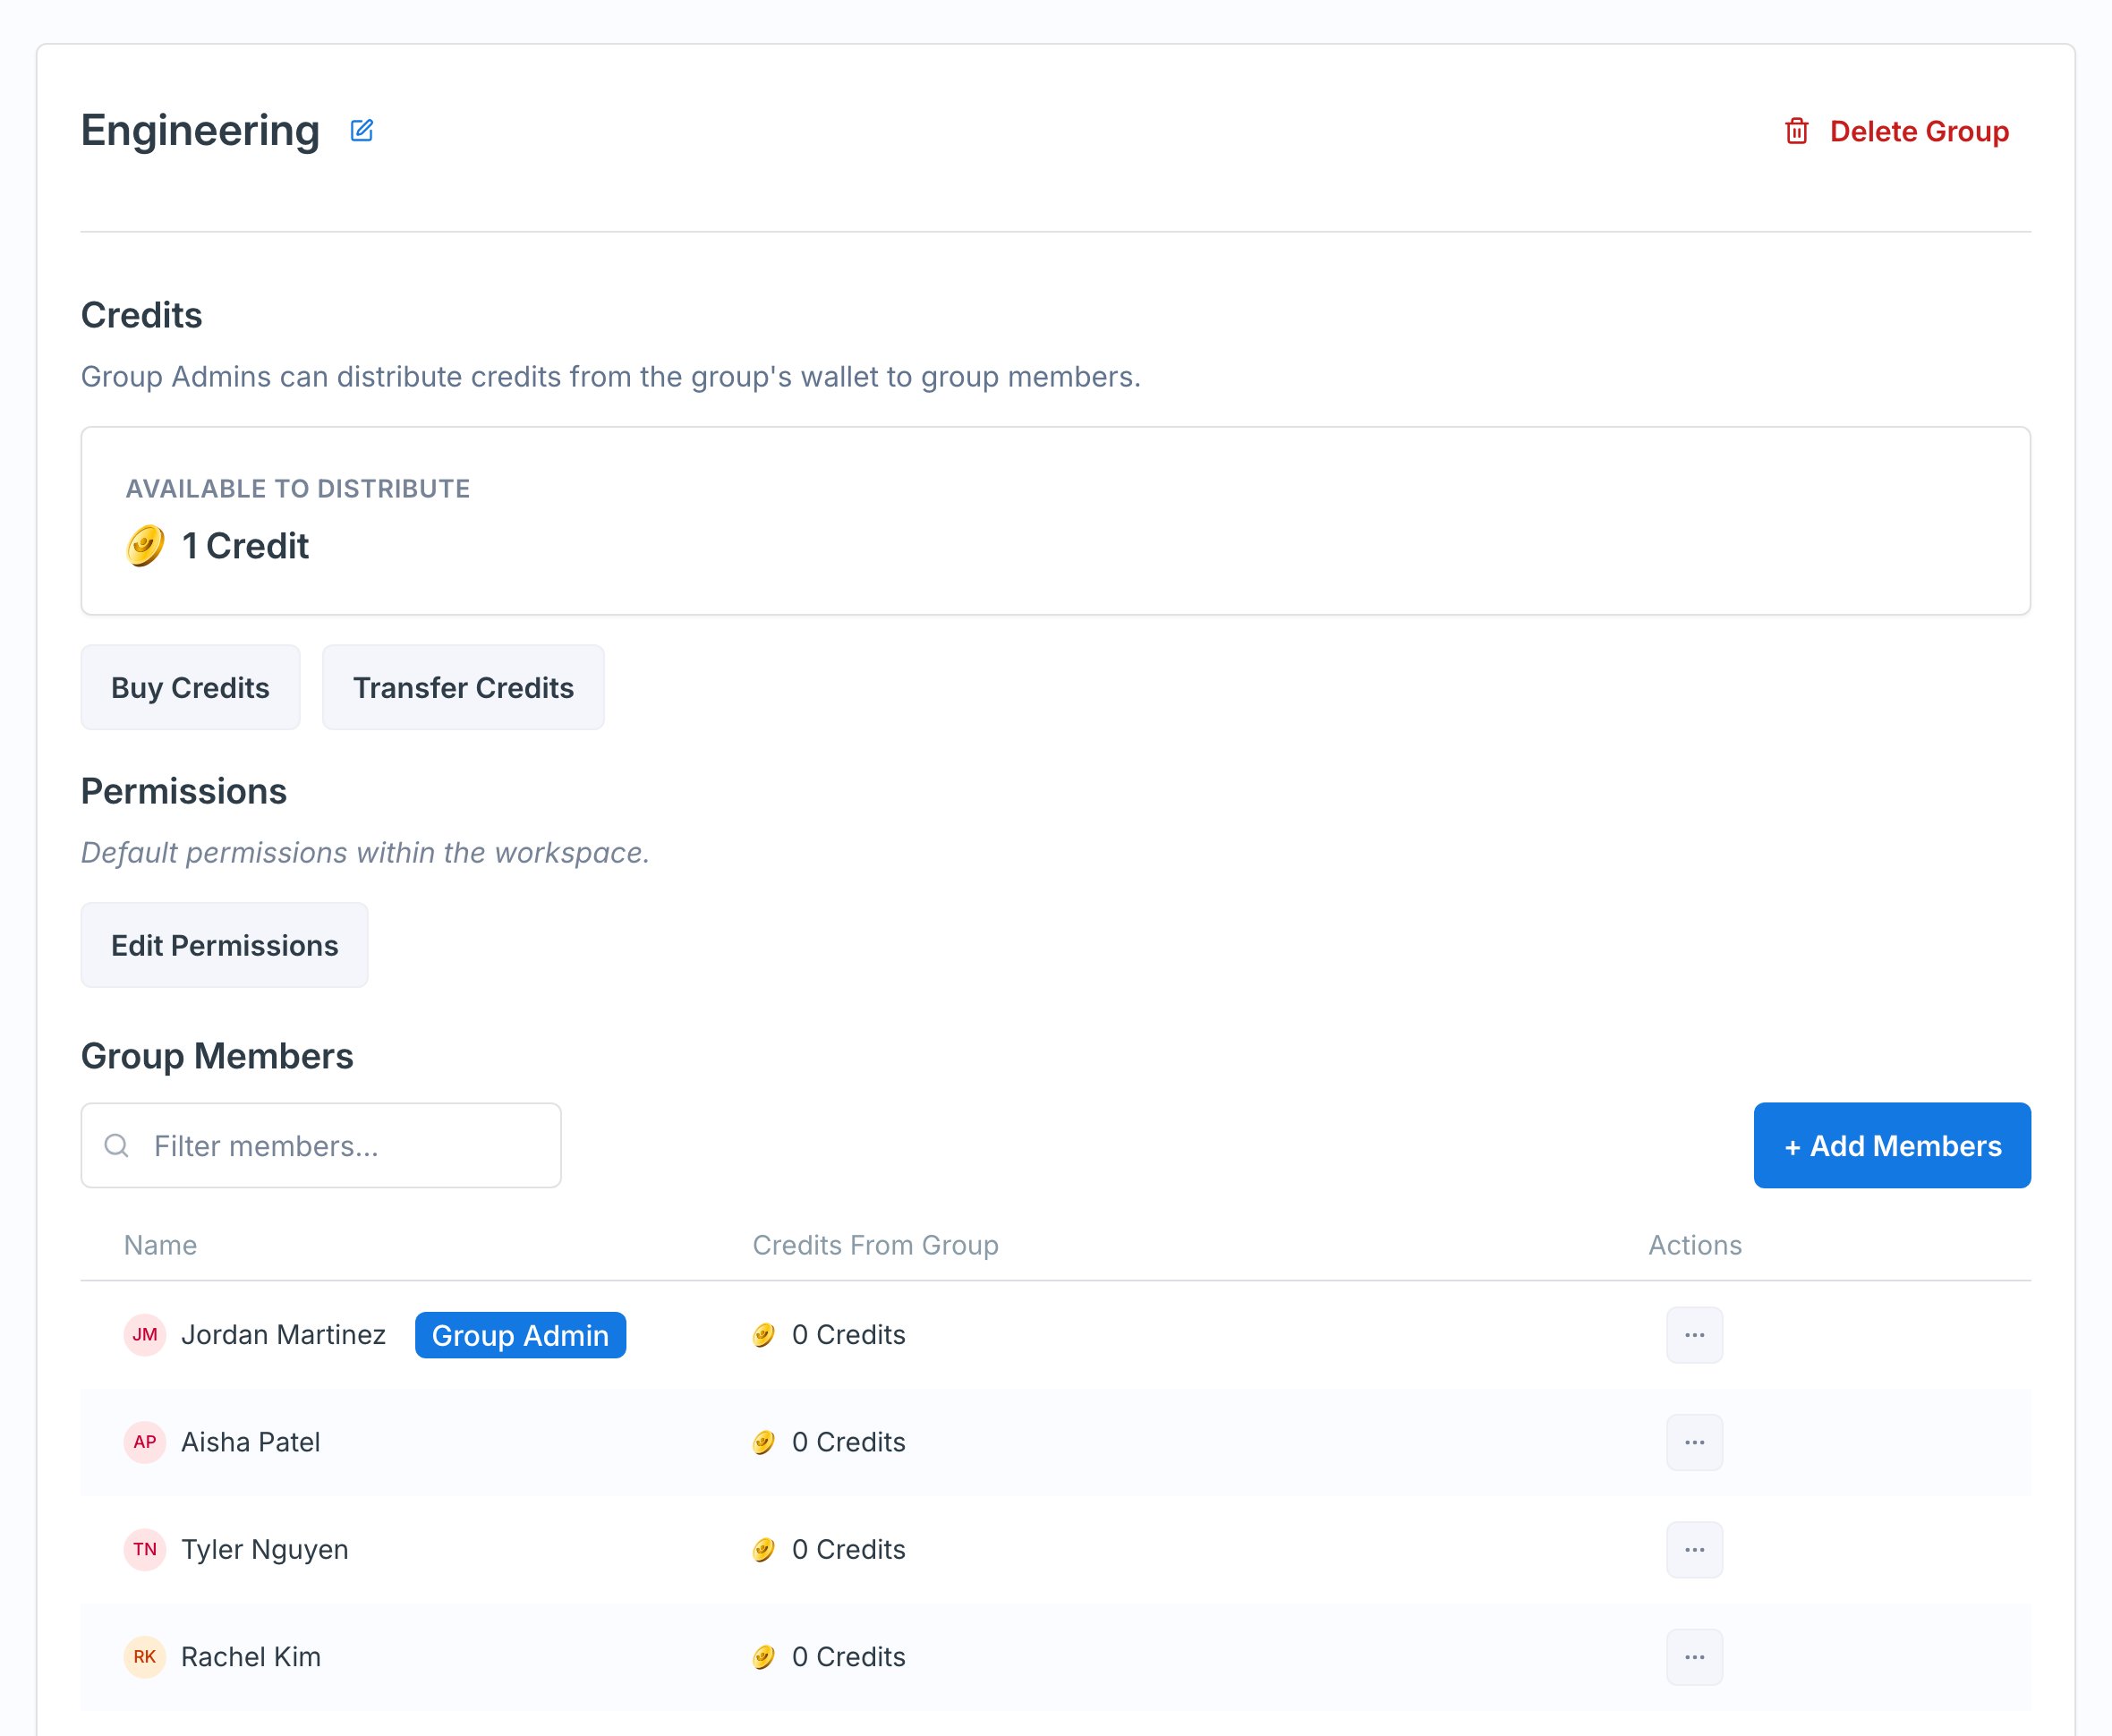 * **Fund the group.** From the **Groups** list or the group's page, use **Transfer Credits** to move credits from your workspace into the group's wallet. The group page shows this balance as **Available to Distribute**.
* **Distribute to members.** From the group's **Group Members** table, a workspace or group admin can transfer credits from the group wallet to individual members.
* **Leftover credits.** If you delete a group that still has credits, those credits move back to your workspace account.
For how credits work more broadly, see [Add or Remove Member Credits](/coaching/admin/member-credits).
***
## Edit or delete a group
On the group's page, workspace admins can **Edit** the group's name and permissions, or **Delete Group**. Deleting a group removes the grouping only - the people stay in your workspace - and any leftover group credits return to your workspace account.
***
## Getting help
Questions about structuring your groups or managing group credits? Email [hello@exec.com](mailto:hello@exec.com).
* **Fund the group.** From the **Groups** list or the group's page, use **Transfer Credits** to move credits from your workspace into the group's wallet. The group page shows this balance as **Available to Distribute**.
* **Distribute to members.** From the group's **Group Members** table, a workspace or group admin can transfer credits from the group wallet to individual members.
* **Leftover credits.** If you delete a group that still has credits, those credits move back to your workspace account.
For how credits work more broadly, see [Add or Remove Member Credits](/coaching/admin/member-credits).
***
## Edit or delete a group
On the group's page, workspace admins can **Edit** the group's name and permissions, or **Delete Group**. Deleting a group removes the grouping only - the people stay in your workspace - and any leftover group credits return to your workspace account.
***
## Getting help
Questions about structuring your groups or managing group credits? Email [hello@exec.com](mailto:hello@exec.com).